 XSF
XSFXSF Docs
Everything you need to get XSF into your game, set it up and build on top of it. New here? Read Install, then Your first game. The Scripting part is only for when you start writing your own code.
What XSF is #
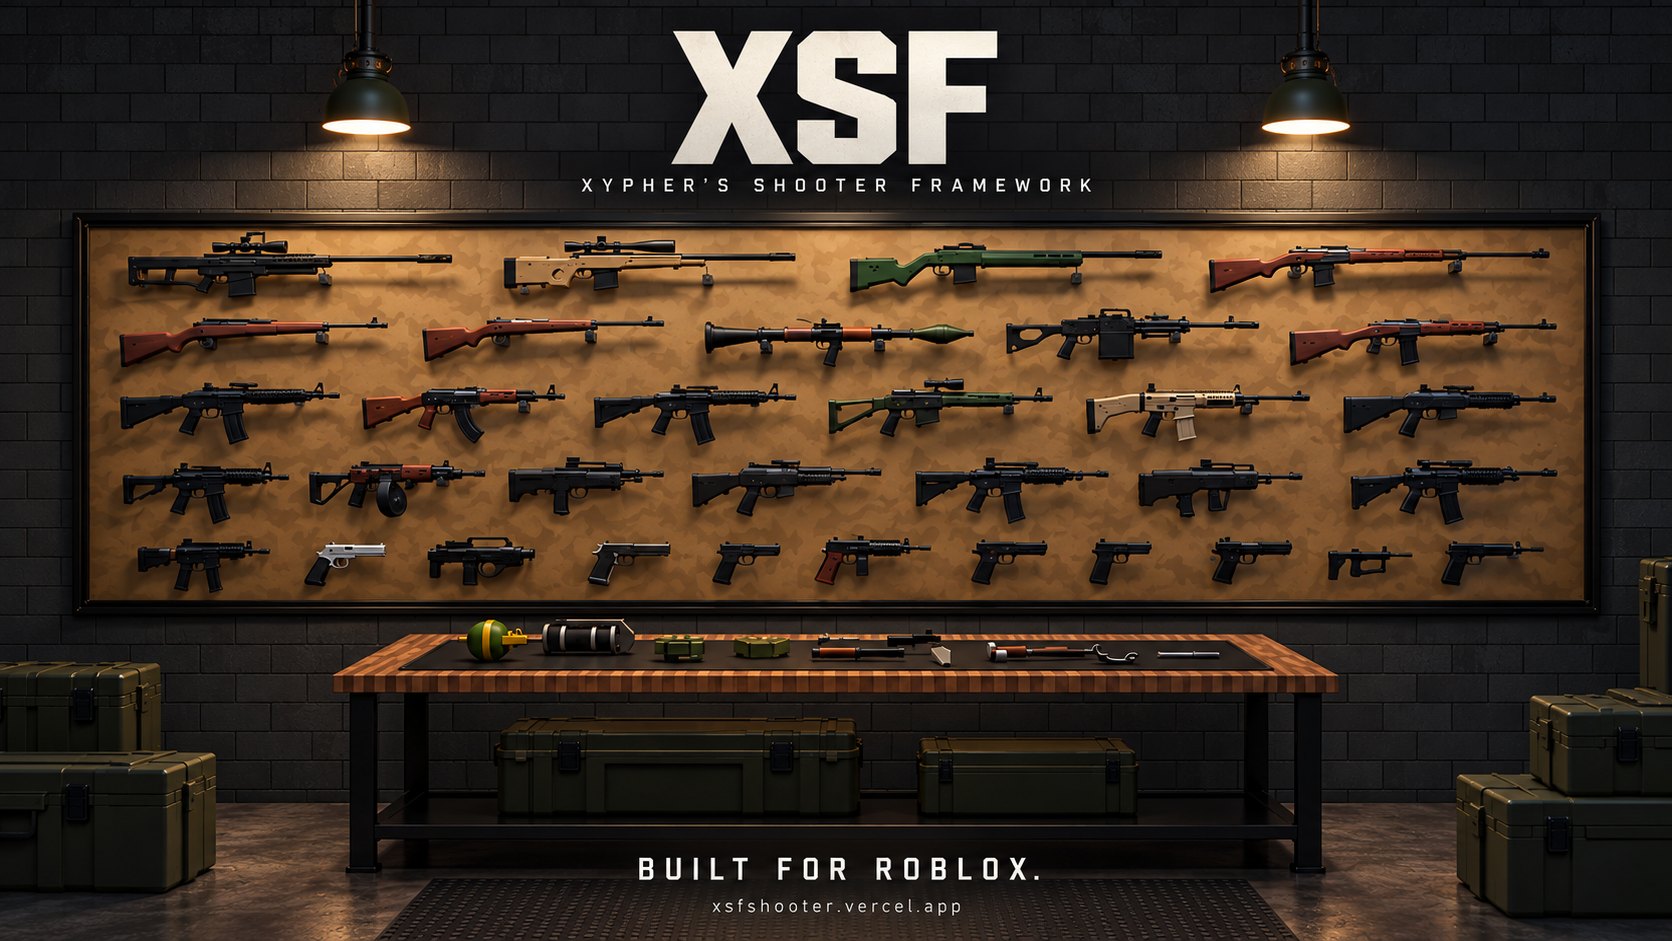
XSF is a first person shooter framework for Roblox. You drop it into your place and you get the whole gun side of a shooter in one go: weapons that feel heavy in your hands, real bullets that drop and go through walls, recoil you can learn, positional sound, leaning, crouching, prone, sliding, vaulting, a downed and revive system, explosives, pickups, attachments, skins and the menus that go with all of it. It works on PC, console, phones and tablets, with R6 and R15 characters.
What it doesn't do is make your game for you. There are no maps, rounds, teams, scoreboards or shops built in. That part is yours. XSF gives you the shooting and the feel, plus a server and client API so your own scripts can hand out guns, react to kills, sell skins or run a battle royale on top of it.
Two ways to set it up
You can mix both, and most people do:
- The website dashboard. No code. Pick a game style, a camera, a loadout and tweak sliders. Every game running XSF with your key reads it when a server starts.
- Studio. Open GameConfig and each weapon's Config and change the values directly. Everything is commented, so you rarely need to look anything up.
If the same setting is changed in both places, the Studio value wins in that game. That rule is explained properly in Presets and Studio.
What makes it feel different
- Bullets are real projectiles. They have a speed in meters per second, they drop over distance, they lose power going through walls and they can skip off concrete or metal at a shallow angle. Nothing is a hitscan ray.
- The server checks every shot. Your screen fires the bullet so it feels instant, then the server simulates the same bullet again and decides what it hit. An exploiter can't just tell the server "I hit that guy in the head".
- Lag is accounted for. The server rewinds other players to where they were when you pulled the trigger, so a hit on your screen is a hit on the server, within reason.
- Everything moves on springs. Recoil, sway, bob and inertia are spring simulations, not canned animations. They feel the same at 60 fps and at 240 fps.
- Hands that actually hold the gun. The realistic arms pose every finger against the real shape of each gun when it's drawn, so the hand wraps the grip and the finger sits on the trigger. Custom guns get this too.
How these docs are laid out
The left column is the table of contents, and the search box at the top of it filters by section titles and text. Roughly:
- Start here gets XSF into your place and running, and explains how the pieces fit together.
- Set up your game is everything you can change without writing code: the dashboard, GameConfig, keys, camera, movement and so on.
- Weapons covers every gun setting, attachments, skins, damage, explosives and how to add your own guns.
- Scripting is the API for your own Scripts and LocalScripts, plus copy and paste recipes for common game modes.
- Help is testing, performance, error messages and fixes for the problems people actually run into.
New in 2.1 #
2.1 is mostly what developers building on 2.0 asked for: empty hands, menus that never shoot, crouch and slide poses other players can see on R6, and a lot more hooks for your own scripts. Nothing in your game changes unless you turn it on, apart from the fixes. To update from 2.0, see Updating from 2.0 to 2.1.
Empty hands
Press Y, or the number key of the gun you're holding, to put it away. The gun leaves your hands for everyone, and the server won't accept shots until a weapon is out again. In first person you see your hands: relaxed when standing, swinging as you walk and pumping when you run, with every arms style. See Holster.
Crouch and slide on R6
Other players now see an R6 character kneel when it crouches and lean back with its legs out when it slides, and the server lowers its hitboxes to match. R15 already bent at the knees. See Movement and stances.
Menus and clicks
A click on your UI never fires the gun, and the click that closes a menu doesn't either. Hold Left Alt to free the cursor for a moment. Your own menus get SetMenuOpen, which frees the mouse and stops XSF reading input, and a GuiButton with Modal = true works like it does in any Roblox game. Clicking empty space inside the settings menu no longer closes it. See Menus and the mouse.
Quick throw
Two new keybinds, QuickLethal and QuickTactical, throw your first grenade of that kind without switching to it, cook it while held, and go back to your gun. They're unbound by default; bind them in GameConfig or let players set them. See Keys and key names.
New GameConfig options
Movement.SprintReload: keep sprinting through a reload. See Movement.Throwables: the arc, lift, gravity, bounce, friction, spin and roll of grenades, for every throwable or one at a time. See Throwables.Audio.CutFade,Audio.Voices,Audio.StealFade,Audio.ParentGroupandAudio.StepSets(your own footsteps per floor material). Per gun:Sounds.FadeandSounds.Tail, and lists of takes forFireSuppressedandFireThird. See Audio.Holster: empty hands, the number key rule and the hands. See Holster.Customization.Required(slots players can't leave empty) andCustomization.Access = "Off". See Customization.SettingsSave: save player settings on the XSF site, only in your game, or not at all.UseWebsite = falseruns the game on GameConfig alone. See Preset and the website.- New keybinds:
Holster,Pickup,QuickLethal,QuickTactical,FreeCursor. - The GameConfig that ships now has
GiveLoadout,Vault,Pickups,Ragdoll,Damage.ModifyandDebug.LogRejectswritten in, so you don't have to look them up.
More for your scripts
- Server:
GetInventory,GetAmmo,GetAttachments,SetCustomizeCheck, afromandweaponoption onDamage, and theEquipped,HolsteredandReloadedevents. See Server scripts. - Client:
IsDown,GetMovementState,OnMovement,AddSpeedModifier,SetMenuOpen,SetHUDVisible, the kit functions (GetKit,SetKitand friends),SetGunshotHandler,OnReady,GetAllSettings, and signals for input, menus, equip, holster, reloads, new arms and other players' shots. See Client scripts.
Fixes
- A second grenade could be thrown after
LoadCharacterwhile one was cooking. SetLoadoutleft the player with nothing equipped on the server, so shots were refused until they switched weapons.- The settings menu and loadout screen are easier to use with a controller: the D-pad stays inside the menu and moves through tabs and rows in order.
- Clicking empty space in the settings menu closed it and fired the gun. Pressing P could close the menu and open it again straight away.
- Players with nothing in their hands couldn't sprint.
- When every copy of a sound is busy, the oldest one now fades out instead of cutting off with a click.
- If your game removes the character without killing it, XSF's hotbar and scope overlay no longer stay on screen.
New in 2.0 #
2.0 is the biggest update XSF has had. If you're coming from 1.3, read Updating to 2.0 first so you don't lose your changes, then skim the parts below that matter for your game.
59 weapons, up from 20
Rifles, battle rifles, machine guns, SMGs, bolt action and semi auto snipers, pump, semi and full auto shotguns, pistols, a revolver, seven knives, three grenades, C4, a claymore and two launchers. Every one has its own sound, recoil, damage profile and inspect. The full list with every number is in Every weapon's stats.
Explosives
The RPG-7 fires a rocket that leaves the tube slowly and then lights its motor. The M320 lobs a 40mm grenade on a real arc with a range ladder. C4 sticks to whatever it hits and goes off on right click. The claymore sits facing where you put it and fires a fan of steel at the first enemy in front. Blast damage checks for cover, so a wall really saves you. See Explosives.
Pickups
Players can drop the gun in their hands and pick up someone else's, attachments, skin and ammo included. Dead players drop their gun. Your scripts can spawn guns and ammo boxes anywhere, which is most of a battle royale loot system already. See Pickups.
Zeroing, night vision and thermal
Snipers, DMRs and the M320 have range steps you change with ] and [. Two new sights, Night Vision and Thermal, change what you see through the scope. See Zeroing and special optics.
Vault and mantle
Run at a low wall and jump to vault it. Jump at a ledge you can reach and you climb up. The left hand plants on the edge and the camera dips with you. It works on any part in your map with no setup. See Vault and mantle.
108 skins and an unlock system
Skins from plain Matte Black up to Galaxy and Damascus, in five rarities. By default players only get the attachments and skins your game gives them, so you can sell them, put them in crates or tie them to levels with a few lines of code. See Skins and Unlocks.
Proper reloads
Bolt actions work the bolt by hand. The Kar98k and Mosin reload with stripper clips. The revolver swings its cylinder out, punches the cases and uses a speedloader. Pump shotguns load shell by shell. The M320 breaks open, the RPG takes a warhead in the front. See Reloads and feeds.
Every attachment fits every gun
Before 2.0 an attachment only looked right on the guns it was made for. Now XSF measures each attachment and seats it from its real shape, so an ACOG sits on the rail of a SCAR as well as it sits on an M4.
A self test and a test map
Press F6 in a Studio playtest and XSF equips, fires, aims, reloads and inspects every weapon in your game, then prints a pass or fail line for each. The download also has an optional test map with a house, a range, a vault course, penetration walls and an explosives yard. See Testing your game.
Fixes
- The echo after every shot is gone.
- Indoor sound is muffled properly.
- Bare arms no longer glow with layered clothing.
- A flashbang error is fixed.
- Skinned guns no longer show a second copy of themselves (fixed in the current 2.0.0 download, so re-download if you grabbed it on day one).
Install in 3 minutes #
The download is a single .rbxmx file. Inside it everything is already sorted into folders named after where they go, so installing is really just matching names. Do it once and you'll never think about it again.
1. Download
Sign in on your account page and download XSF-2.1.0.rbxmx. Your license is baked into the file, so there's no key to paste anywhere. Don't share the file: it's tied to your account, and every game that runs it shows up on your dashboard.
The very first time you download, the site offers a one minute setup of your game (four questions). It's optional. Skip it and XSF runs with its shipped defaults, and you can run the setup later from the dashboard. See Website dashboard.
2. Put it in Studio
Open your place in Studio and drag the file into the 3D view. You can also right click Workspace in the Explorer and pick Insert from File. A folder called XSF_Release appears in Workspace. Open it and you'll see this:
XSF_Release
├── ReplicatedStorage        (a folder)
│   └── XSF
├── ServerScriptService      (a folder)
│   └── XSF
├── StarterPlayerScripts     (a folder)
│   └── XSF_Boot
├── ServerStorage            (a folder, optional)
│   └── XSF_Tools
├── Workspace                (a folder, optional)
│   └── XSF_TestMap
├── _README
└── _ABOUT_THIS_MODEL
3. Match the names
Each folder inside XSF_Release is named after a service in your Explorer. Drag what's inside each folder to the service with the same name:
| Open this folder in XSF_Release | Drag what's inside it to | What it is |
|---|---|---|
| ReplicatedStorage | ReplicatedStorage | The XSF folder with GameConfig, Weapons, Assets, Client and Shared. Both players and the server read it. |
| ServerScriptService | ServerScriptService | A different XSF folder, with Main, Server and the server systems. It only ever runs on the server, so players can't see or steal it. |
| StarterPlayerScripts | StarterPlayer, then StarterPlayerScripts | XSF_Boot, the LocalScript that starts XSF for each player. StarterPlayerScripts lives inside StarterPlayer. Click the little arrow next to StarterPlayer to see it. |
| ServerStorage (optional) | ServerStorage | XSF_Tools, the ACS gun importer. Only bring it in if you want to convert ACS guns (see Importing ACS guns). It never runs in a live game. |
| Workspace (optional) | Workspace | XSF_TestMap, a small map for trying everything out: a house to clear, a range with targets out to 150 studs, a vault course, penetration walls and an explosives yard. Skip it if you already have a map. See Testing your game. |
Drag the XSF folder itself, not the folder around it. If you end up with ReplicatedStorage.ReplicatedStorage.XSF, you dragged one level too high. Move the inner XSF up and delete the empty folder.
4. Clean up and turn on HTTP
- Delete the now empty XSF_Release folder from Workspace. Leaving it there doesn't break anything, but it's clutter.
- Open Home > Game Settings > Security and turn on Allow HTTP Requests, then save. XSF uses HTTP to check its license, save player settings and read your dashboard. Without it XSF still runs, but settings fall back to DataStores and the dashboard is ignored.
- If you want player settings to save while testing in Studio without HTTP, also turn on Enable Studio Access to API Services on the same page.
5. Check it
Your Explorer should now have exactly these three things:
ReplicatedStorage
└── XSF                  (GameConfig, Weapons, Assets, Client, Shared ...)
ServerScriptService
└── XSF                  (Main, Server, Weapons, Damage ...)
StarterPlayer
└── StarterPlayerScripts
    └── XSF_Boot
Press Play. You should spawn holding the first weapon of the default loadout (the HK416), with the rest on the hotbar along the bottom of the screen. Press 1 to 5 to switch, B to see the whole backpack.
[XSF]. XSF tells you exactly what's wrong and how to fix it. Nine times out of ten it's a folder in the wrong place, and the message names which one. See Error messages and Troubleshooting, or ask in the XSF Discord.Things to remove first
- Other gun systems. ACS, FE Gun Kit, Carbon and so on all want the camera and the mouse. Two frameworks fighting over the camera is a mess. Remove the old one before testing XSF.
- Custom camera scripts that force first person or move the camera every frame. XSF runs its own camera. If you need the camera for a cutscene, use
SetCameraEnabled(false)from the client API. - Scripts that change WalkSpeed every frame. XSF sets WalkSpeed itself for sprinting, aiming, crouching and reloading. Change speeds in GameConfig instead.
What goes where #
Once installed, this is what you're looking at and which parts you're meant to touch.
| Where | What it is | Edit it? |
|---|---|---|
ReplicatedStorage.XSF.GameConfig | Your settings. Every option XSF has, with comments. | Yes, this is the main one. |
ReplicatedStorage.XSF.Weapons | One folder per weapon. Each has a Config (stats) and Anims (animations). | Yes, the Configs. Copy a folder to make a new gun. |
ReplicatedStorage.XSF.Assets.GunModels | The 3D gun models, one per weapon. | Add your own models here. |
ReplicatedStorage.XSF.Assets.AttModels | Attachment models: sights, muzzle devices, grips, lights. | Add your own attachments here. |
ReplicatedStorage.XSF.Assets.GrenadeModels | Grenade, C4 and claymore models. | Rarely. |
ReplicatedStorage.XSF.Assets.Projectiles | The rocket and 40mm round models. | Rarely. |
ReplicatedStorage.XSF.Assets.ArmModel | The first person arms. | No. |
ReplicatedStorage.XSF.Assets.Workbench | The workbench model for Customization.Access = "Workbench". | Copy it into your map. |
ReplicatedStorage.XSF.Client | Everything that runs on each player. API is the module your LocalScripts use. | No, except reading API. |
ReplicatedStorage.XSF.Shared | Code both sides use: ballistics, attachments, skins, the stock copy of every config. | No. |
ReplicatedStorage.XSF.Version | The version string, "2.1.0". | No. |
ServerScriptService.XSF | Server code. Server is the module your own Scripts use. | No, except reading Server. |
StarterPlayerScripts.XSF_Boot | Starts XSF for each player. | No. |
ServerStorage.XSF_Tools | The ACS importer. Optional. | No, just call it. |
Most of the code is protected and can't be read or edited. GameConfig, the weapon Configs and the two API modules are left readable on purpose, so you can set things up and script around XSF without ever needing the inside.
Folders XSF makes at runtime
While a game runs you'll see a few folders appear in Workspace. They're XSF's, so leave them alone and don't parent your own things into them:
| Folder | What's in it |
|---|---|
XSF_Thrown | Grenades, C4, claymores and rockets in flight or on the ground. |
XSF_Pickups | Dropped guns and ammo boxes. |
XSF_ThirdPerson | The guns other players hold, as everyone sees them. |
XSF_Local, XSF_Audio | Client side effects and sounds. These only exist on each player's own screen. |
Your first game #
Here's a full walk through from an empty baseplate to a small team deathmatch you can play with friends. It takes about fifteen minutes and touches most of what you'll use later. If you already know what you want, skip ahead, nothing here is required.
Step 1: install and press Play
Do the install, drop in XSF_TestMap if you don't have a map yet, and press Play. Walk around. Try the basics so you know what the defaults feel like:
- Left click fires, right click aims, R reloads, V switches fire mode.
- Shift sprints, C crouches, C while sprinting slides, Z goes prone, Q and E lean.
- Run at a low wall and press Space to vault it.
- N opens the loadout screen, where you fit attachments. P opens settings.
- Press 1 to 5 to switch weapons, and B to open the backpack with the rest.
It ships with the Bodycam camera and free aim on, which is a strong look. If you want a normal shooter feel, that's two lines in step 2.
Step 2: pick the feel
Open ReplicatedStorage.XSF.GameConfig. For a regular arcade style shooter, change these:
Camera = {
	Style = "Standard", -- was "Bodycam"
	-- leave the rest of Camera as it is
},
FreeAim = {
	Enabled = false, -- gun locked to the centre of the screen
},
Damage = {
	FriendlyFire = false,
	Hitmarkers = true, -- a small marker when your shots land
},
Don't retype whole tables. Find the line and change the value. Anything you don't touch keeps working as before. Press Play again to try it.
Step 3: choose the guns
Still in GameConfig, set Loadout to what each player spawns with. The first five go on the number keys.
Loadout = { "M4A1", "MP5", "G17", "KaBar", "M67" },The names are folder names from XSF.Weapons, spelled exactly the same. The full list is in Choosing the weapons.
Step 4: add teams
XSF uses normal Roblox Teams. Insert two Teams under the Teams service (Model tab, then Service, if you don't see it), name them Red and Blue, give them colours and turn AutoAssignable on for both. Add a SpawnLocation for each team with its TeamColor set to match and Neutral off.
That's all XSF needs. With Damage.FriendlyFire = false, players on the same team can't hurt each other, and with downed on, only teammates can revive.
Step 5: count kills
Add a Script to ServerScriptService. This gives each player a Kills and Deaths counter on the leaderboard and fills them from XSF's events:
local Players = game:GetService("Players")
local XSF = require(game.ServerScriptService.XSF.Server)

Players.PlayerAdded:Connect(function(player)
	local stats = Instance.new("Folder")
	stats.Name = "leaderstats"
	local kills = Instance.new("IntValue")
	kills.Name = "Kills"
	kills.Parent = stats
	local deaths = Instance.new("IntValue")
	deaths.Name = "Deaths"
	deaths.Parent = stats
	stats.Parent = player
end)

XSF.Killed:Connect(function(victim, attacker, weapon)
	local victimPlayer = Players:GetPlayerFromCharacter(victim.Parent)
	if victimPlayer then
		victimPlayer.leaderstats.Deaths.Value += 1
	end
	if attacker and attacker ~= victimPlayer then
		attacker.leaderstats.Kills.Value += 1
	end
end)
Killed fires for every death caused by XSF damage, including bleeding out after being downed, with the player who did it. You don't have to track who shot whom yourself.
Step 6: make it fair
A few choices that matter a lot for a deathmatch:
- Downed or not? Downed and revive is great for squads and terrible for quick respawn games. For TDM turn it off:
Downed = { Enabled = false }(keep the other lines). - Armour. Without armour everyone takes full damage. If you want body armour, set
XSF_Armoron characters, see How damage works. - Unlocks. By default players only own the FMJ ammo and each gun's own attachments. That's what you want if you plan to sell or unlock attachments later. If you want everyone to have everything from the start, set
Customization.Ownership = { Attachments = false, Skins = false }. See Unlocks.
Step 7: test with real players
In Studio, open the Test tab, set the player count to 2 or 3 and press Start. You get a server window and one window per player, which is the only proper way to test hits, revives and team rules on your own. When it plays well, publish it, turn on HTTP in the live game's settings if you haven't, and invite people.
Where to go next
- Fine tune everything from the dashboard without republishing.
- Change gun stats in Weapon settings.
- Build a shop, a leveling system or a main menu with the Recipes.
How XSF works #
You don't need any of this to use XSF. It helps when something behaves in a way you didn't expect, or when you start scripting.
Two halves
XSF has a client half and a server half, like every Roblox game.
- The client (in
ReplicatedStorage.XSF.Client, started byXSF_Boot) runs on each player. It handles input, the camera, the first person arms and gun, recoil, sounds, effects, the HUD and menus. It fires bullets on your screen the moment you click, so shooting never feels delayed. - The server (in
ServerScriptService.XSF) is the referee. It owns everyone's inventory and ammo, simulates every bullet again, decides what was hit, applies damage, runs downed and revive, explosions and pickups, and saves settings and unlocks.
The client asks, the server decides. If the client says "I fired", the server checks the player is alive, holding that gun, has ammo, isn't firing faster than the gun can, and that the shot started near where the player actually is. Shots that don't add up are thrown away and fire the Rejected event (see Server scripts).
What happens when you pull the trigger
- Your client spawns the bullet at the muzzle, plays the shot, kicks the camera and starts simulating the round with gravity and speed.
- It tells the server what it fired and where it was pointing.
- The server validates the shot, then rewinds every other player to where they were at the moment you fired (this is lag compensation, it keeps up to about a second of history).
- The server simulates the same bullet through that rewound world, through walls if it has the power, and finds what it hit.
- Damage is worked out from the body part, the gun, the ammo, distance, walls and armour, then applied. See How damage works.
- The shooter gets a hit confirm, the victim gets a hurt effect, and everyone else hears the shot with distance and walls taken into account.
Configs are merged, not replaced
XSF builds its final settings in layers, from the bottom up:
- Built in defaults (in
XSF.Shared.DefaultsandXSF.Shared.WeaponDefaults). - The website preset for this game, if there is one.
- Anything you changed in Studio, in GameConfig and the weapon Configs.
So a weapon Config only needs the lines that differ from the defaults, and GameConfig can lose any line without breaking. Delete Movement.ProneSpeed and XSF quietly uses 3.2. The full rules for how the website and Studio combine are in Presets and Studio.
Players don't have to be the only targets
Anything in Workspace with a Humanoid can be shot, takes damage by body part, ragdolls and fires the same events. XSF finds new ones automatically, so NPCs and dummies just work. See NPCs with guns.
Settings follow the player
A player's settings (sensitivity, FOV, keybinds, attachment choices and presets) are saved on the XSF site, so they carry across every server and every game that uses XSF. If HTTP is off they save to the game's own DataStore instead. A game can change where they are saved, or turn saving off, with SettingsSave in GameConfig (see Preset and the website).
Units
| Thing | Unit |
|---|---|
| Distances, ranges, radii | Studs |
Bullet speed (MuzzleVelocity) | Meters per second. XSF converts with Ballistics.StudsPerMeter, which is 1 / 0.28, so one stud is 28 cm. |
| Angles (recoil, FOV, free aim, lean) | Degrees |
| Times (aim time, fuse, cooldowns) | Seconds |
Weight (Handling.Mass) | Kilograms |
| Fire rate | Rounds per minute |
| Movement speeds | Studs per second, the same as Humanoid.WalkSpeed |
Website dashboard #
Open xsfshooter.vercel.app/dashboard (or the dashboard button on your account page) to set XSF up without touching code. Everything you do there is saved on your account. Every game that runs XSF with your key reads it the next time one of its servers starts.
The dashboard is the fastest way to try things. Change walk speed, press Play in Studio, feel it, change it again. No republishing, no editing Lua. When something feels right you can leave it on the website forever or copy it into GameConfig, whichever you prefer.
The quick setup
The first time you download XSF, the site asks four questions before the download starts. It takes about a minute and Skip setup is always there. You can run it again from the Setup tab whenever you like.
- Game style. Picks a starting point for movement, health, aiming and combat. Each card lists what it changes, so nothing happens behind your back.
- Camera and body. Standard or Bodycam camera, and realistic gloved arms or the classic blocky ACS arms. Picking a style also picks the camera it's built around, and you can change it here.
- Loadout. Tap weapons to add or remove them. The numbers show which ones go on the hotbar keys, the rest wait in the backpack. Select all and Clear do what they say.
- Platforms. Computer, console, phone and tablet, as many as you like. Console keeps aim assist and vibration on. Phone and tablet turn on low effects by default and use a 4 slot hotbar that fits small screens.
The review screen lists every setting your answers change, in plain words. Save and download saves it as your Default preset and starts the download. Save and fine tune saves it and opens the Settings tab. Running the setup again replaces Default with the new answers, so if you've hand tuned Default, copy it to a new preset first.
Here's exactly what each game style sets. Anything not listed stays at XSF's default.
| Style | What it is for | What it sets |
|---|---|---|
| Tactical | Slow, deliberate fights. Downed and revive, free aim, real recoil. | Movement.WalkSpeed = 12, Movement.SprintSpeed = 20, Downed.Enabled = true, FreeAim.Enabled = true, Damage.Hitmarkers = false, Malfunctions.Enabled = false |
| Bodycam | Looks like real body camera footage. Wide lens, grain, heavy free aim. | Camera.Style = "Bodycam", Camera.BodycamFov = 102, FreeAim.Enabled = true, FreeAim.Yaw = 11, Damage.Hitmarkers = false, Motion.Inertia = 1.15 |
| Milsim | As real as it gets. Gun jams, long bleed outs, friendly fire, no hitmarkers. | Movement.WalkSpeed = 11, Movement.SprintSpeed = 18, Malfunctions.Enabled = true, Damage.FriendlyFire = true, Damage.Hitmarkers = false, Downed.Enabled = true, Downed.BleedOutTime = 90, Controls.AutoReload = false, Customization.Access = "Workbench" |
| Arcade | Fast and fun. Quick movement, hitmarkers, no downed state, classic aiming. | Camera.Style = "Standard", Movement.WalkSpeed = 16, Movement.SprintSpeed = 26, Movement.Stamina = 15, Downed.Enabled = false, FreeAim.Enabled = false, Damage.Hitmarkers = true, Motion.Inertia = 0.6 |
| Battle royale | Big maps and long range. Downed and revive for squads, more stamina. | Movement.WalkSpeed = 14, Movement.SprintSpeed = 24, Movement.Stamina = 12, Downed.Enabled = true, Downed.BleedOutTime = 60, Damage.Hitmarkers = true, Customization.Access = "Anywhere" |
| Keep XSF defaults | Leave everything as XSF ships it. | Nothing |
The styles are starting points, not modes. Pick the closest one and change what you don't like. Battle royale with hitmarkers off is fine. Tactical with Standard camera is fine.
Settings
Every common GameConfig option, grouped and explained in plain words. Changes save by themselves (watch the save note in the corner), and anything you leave alone keeps XSF's default. Each setting has a reset button. The search box finds a setting by name or description. Settings that only matter for another setting (Bodycam field of view only matters with the Bodycam camera) only show up when they apply.
A small STUDIO tag on a setting means one of your games changed it in Studio, so that game keeps its own value for it. See Presets and Studio.
This is every setting on the website, the GameConfig option it writes, the default and the range the slider allows:
| Group | Setting on the website | GameConfig option | XSF default | Range |
|---|---|---|---|---|
| Camera | Camera style | Camera.Style | Bodycam | Standard, Bodycam |
| Camera | Bodycam field of view | Camera.BodycamFov | 100 | 80 to 120 ° |
| Camera | Field of view | Camera.FieldOfView | 80 | 60 to 110 ° |
| Camera | Camera bob | Camera.Bob | 1 | 0 to 2 x |
| Camera | Strafe tilt | Camera.Tilt | 1 | 0 to 2 x |
| Camera | Screen kick when firing | Camera.RecoilKick | 1 | 0 to 2 x |
| Camera | First person arms | Providers.Arms | Realistic gloves | Realistic gloves, Classic blocky |
| Movement | Walk speed | Movement.WalkSpeed | 12 | 6 to 30 studs/s |
| Movement | Sprint speed | Movement.SprintSpeed | 21 | 10 to 45 studs/s |
| Movement | Speed while aiming | Movement.AimSpeed | 7.5 | 3 to 20 studs/s |
| Movement | Sprint stamina | Movement.Stamina | 7 | 1 to 60 s |
| Movement | Stamina refill time | Movement.StaminaRegen | 4.5 | 0.5 to 30 s |
| Movement | Sliding | Movement.Slide.Enabled | On | On or Off |
| Movement | Slide speed | Movement.Slide.Speed | 30 | 15 to 60 studs/s |
| Movement | Shoot while sliding | Movement.Slide.CanShoot | On | On or Off |
| Aiming | Free aim | FreeAim.Enabled | On | On or Off |
| Aiming | Free aim width | FreeAim.Yaw | 9 | 1 to 25 ° |
| Aiming | Free aim height | FreeAim.Pitch | 5 | 1 to 20 ° |
| Aiming | Gun weight when turning | Motion.Inertia | 1 | 0 to 2 x |
| Aiming | Gun bob | Motion.Bob | 1 | 0 to 2 x |
| Aiming | Breathing sway | Motion.Breath | 1 | 0 to 2 x |
| Health and reviving | Downed state | Downed.Enabled | On | On or Off |
| Health and reviving | Bleed out time | Downed.BleedOutTime | 45 | 5 to 180 s |
| Health and reviving | Revive time | Downed.ReviveTime | 5 | 1 to 20 s |
| Health and reviving | Health after revive | Downed.ReviveHealth | 35 | 1 to 100 hp |
| Health and reviving | Only teammates can revive | Downed.TeamOnly | On | On or Off |
| Health and reviving | Downed players can shoot | Downed.AllowFiring | Off | On or Off |
| Health and reviving | Drag downed teammates | Downed.Drag | On | On or Off |
| Combat | Friendly fire | Damage.FriendlyFire | Off | On or Off |
| Combat | Hitmarkers | Damage.Hitmarkers | Off | On or Off |
| Combat | Gun jams | Malfunctions.Enabled | Off | On or Off |
| Combat | Auto reload | Controls.AutoReload | On | On or Off |
| Combat | Attachments menu | Customization.Enabled | On | On or Off |
| Combat | Where attachments can be changed | Customization.Access | Anywhere | Anywhere, Only at a workbench |
| Stances | Crouching | Stances.Crouch | On | On or Off |
| Stances | Going prone | Stances.Prone | On | On or Off |
| Stances | Leaning | Stances.Lean | On | On or Off |
| Hotbar and screens | Hotbar slots | Backpack.HotbarSize | 5 | 1 to 9 slots |
| Hotbar and screens | Hotbar on screen | Backpack.Hotbar | Always | Always, Only when switching |
| Hotbar and screens | Ammo and health readout | Providers.HUD | XSF minimal | XSF minimal, None |
| Hotbar and screens | Low effects by default | Performance.LowEffects | Off | On or Off |
| Sound | XSF footsteps | Audio.Footsteps | On | On or Off |
| Sound | Background sound | Audio.Ambience | On | On or Off |
| Controller and phone | Aim assist | AimAssist.Enabled | On | On or Off |
| Controller and phone | Aim assist strength | AimAssist.Slowdown | 0.55 | 0.2 to 1 x |
| Controller and phone | Controller vibration | Rumble.Enabled | On | On or Off |
Options that aren't on the website (keybinds, ballistics, slide timings, aim assist angle and a few more) are Studio only. Set them in GameConfig.
Weapons
The top card is the spawn loadout: tap a weapon to add or remove it, and use the arrows to change the order. The first ones in the list go on the hotbar keys. Under it, tap any weapon to change its stats. A stat you change gets a mark, and the reset button puts it back to how XSF ships the gun. Knives only have damage, and grenades have no stats here.
| Stat on the website | Weapon Config field | Range | Shown for |
|---|---|---|---|
| Head damage | Damage.Head | 1 to 1000 | Guns and knives |
| Body damage | Damage.Torso | 1 to 1000 | Guns and knives |
| Arm and leg damage | Damage.Limb | 1 to 1000 | Guns and knives |
| Fire rate | Fire.RPM | 20 to 1500 rounds/min | Guns only |
| Magazine size | Ammo.Magazine | 1 to 200 rounds | Guns only |
| Spare ammo | Ammo.Reserve | 0 to 1000 rounds | Guns only |
| Bullet speed | Fire.MuzzleVelocity | 100 to 2000 m/s | Guns only |
| Time to aim | Handling.AimTime | 0.05 to 1.5 s | Guns only |
| Recoil | Recoil (every kick and climb value, multiplied) | 0 to 3 x | Guns only |
Recoil is one multiplier for the whole recoil of the gun: 1 is normal, 0.5 halves every kick and climb, 2 doubles them. It only applies when that gun's Recoil table hasn't been changed in Studio. If you want to shape recoil (more climb, less sideways, a pattern), do it in the gun's Config, see Recoil and sway.
Presets
A preset is one full setup: settings, weapon stats and loadout together. You can have up to 20. Names can use letters, numbers, spaces, - and _, up to 32 characters. New preset starts empty or as a copy of the one you're editing, and every preset can be copied, renamed or deleted. The Editing preset picker at the top of Settings and Weapons decides which preset your changes go into. Check it before you start changing things. Editing the wrong preset is the most common reason "my change didn't do anything".
Good uses for presets:
- One preset per game, when you run several games on one account.
- One preset per mode in the same game, picked with
Preset = "Name"in a separate place (a TDM place and a hardcore place in the same universe). - A test preset you try in Studio before switching your live game over to it.
Games
Every game that has started XSF with your key shows up here, with when it was last seen and which XSF version it runs. For each game you can:
- Pick which preset it uses. Games you never pick for use Default.
- See how many settings it changes in Studio. Those keep the Studio value in that game.
- Revoke it, which stops XSF working in that game only, the next time a server starts. Restore undoes it. Use this if someone got hold of your file and is running it in a game that isn't yours.
If a game's GameConfig names a preset with Preset = "Name", the picker is locked and shows that name. If no preset has that name, the game shows a warning and uses Default.
When changes reach your game
- A server reads the dashboard once, when it starts, before any player spawns. A round never changes its rules halfway through.
- Servers that are already running keep what they started with. New servers get the new settings. To push a change to everyone, use Restart servers for updates on the game's page in the Roblox Creator Hub, or wait for old servers to empty out.
- In Studio, stop and press Play again.
- If the XSF site can't be reached when a server starts, the game runs on its Studio settings and keeps working. Players won't notice anything except that dashboard only changes are missing on that server.
Presets and Studio #
This is the one rule that matters when you use both the website and Studio. Read it once and you'll never be confused about where a value came from.
Which preset a game uses
- If GameConfig has
Preset = "Name", that preset. - Otherwise, the preset picked for the game on the Games tab.
- Otherwise, the preset called Default.
- If there's no Default either (you skipped the setup and never made one), the game simply uses GameConfig and nothing comes from the website.
return {
	-- this place always uses the "Zombies" preset from the dashboard
	Preset = "Zombies",
	-- ...the rest of GameConfig
}
If no preset has that name, Output says GameConfig asks for the website preset "Zombies", but your account has no preset with that name and the game uses Default. Make a preset with that exact name, or fix the spelling. Names are case sensitive.
Studio always wins, but only for what you changed
XSF carries a copy of its own GameConfig and every weapon Config exactly as this version ships them (in XSF.Shared.Stock, which you shouldn't edit). When a server starts, XSF compares your files with that copy, one value at a time:
- A value you changed in Studio is yours. It beats the dashboard, in that game only.
- A value you never touched follows the dashboard.
Example: your GameConfig sets Movement.WalkSpeed = 16, and your preset on the website sets walk speed 20 and sprint speed 30. That game walks at 16 (your Studio value) and sprints at 30 (from the website, because you never changed sprint speed in Studio). The dashboard shows a STUDIO tag on Walk speed, and the Games tab counts it.
Movement = {
	WalkSpeed = 16, -- changed in Studio: this game always walks at 16
	SprintSpeed = 21, -- still the shipped value: the website decides
},
Handing a value back to the website
Set it back to the value XSF ships with (the defaults are listed in Every GameConfig option). Deleting the line works too, because a missing line falls back to the default, which matches the shipped value for almost everything.
Weapon Configs work the same way, one value at a time. Change Damage.Head on the AK47 in Studio and the website can still set its fire rate.
A few things are a single value even though they look like lists:
Loadout. Change it in GameConfig and the website loadout is ignored in that game.- A weapon's
Recoiltable. Change any recoil value in Studio and the website's recoil multiplier no longer applies to that gun.
Scripts see the final values
Once applied, website values are part of the config like anything else. XSF.Config on the server and every client module read the final numbers, so your own scripts never need to know where a value came from.
A workflow that works
- Leave GameConfig as it ships.
- Do all your tuning on the website, testing with Play in Studio.
- Only edit GameConfig for things the website doesn't have (keybinds, ballistics, the hidden options) or things you want locked so nobody on the website can change them.
GameConfig #
Open ReplicatedStorage.XSF.GameConfig. Every option XSF has is already listed in it with its default value and a comment saying what it does, so you can change things without reading anything else.
- Change a value and press Play to try it. There's no restart or rebuild step.
- Delete a line and XSF uses its built in default for it. That's the same as the shipped value except for three:
Loadoutfalls back to just{ "HK416" },Camera.Styleto"Standard"andAudio.Ambiencetofalse. - Options marked (player) are only the starting value. Players can change those for themselves in the settings menu, and their own value wins for them.
- Anything you change here beats the website dashboard for that setting.
- GameConfig is read on both the server and every client, so never put secrets in it (API keys, webhook URLs). Players can read ReplicatedStorage.
Editing it without breaking it
GameConfig is a Lua table. The rules that trip people up:
- Every line inside a table ends with a comma. A comma after the last line is fine too. A missing comma is the number one typo.
- Text goes in double quotes:
"Bodycam", notBodycam. true,falseandnilare lowercase and have no quotes.- Brackets have to match. Every
{needs a}. - Names are case sensitive.
walkspeedis notWalkSpeed, and XSF won't see it.
If you do break it, XSF prints There is a typo in GameConfig on line N in Output and doesn't start. Look at that line and the one above it. Studio's script editor also underlines the problem in red.
-- right
Movement = {
	WalkSpeed = 14,
	SprintSpeed = 24,
},

-- wrong: missing comma after 14, and "Fast" isn't a number
Movement = {
	WalkSpeed = 14
	SprintSpeed = "Fast",
},
Changing values while the game runs
You can't. GameConfig is read when XSF starts. XSF.Config is there for reading, and changing it at runtime gives you a mix of old and new values on different machines. For things that change during a round (a player's guns, damage, attachments), use the server API instead.
Choosing the weapons #
Loadout is the list of weapons every player spawns with, in slot order. Use the folder names from XSF.Weapons, spelled exactly the same, capitals included.
Loadout = { "HK416", "USP", "M67" },It ships with thirteen: HK416, AK47, SCAR, AWM, M249, Deagle, M870, Knife, Karambit, M67, Flashbang, RPG7, C4. That's a showcase, not a real loadout. For a real game you'll usually want two to five.
All 59 weapons
The first column is the name you write in Loadout. Every number for every gun is in Every weapon's stats.
| Name | Weapon | Class | Notes |
|---|---|---|---|
HK416 | HK416 | Rifle | 5.56. Controllable, gets lively on full auto. |
M4A1 | M4A1 | Rifle | 5.56. Quick, flat and easy to keep on target. |
AK47 | AK-47 | Rifle | 7.62x39. Hits hard and climbs hard. |
AK12 | AK-12 | Rifle | 5.45. A modern AK that stays flatter. |
AKS74U | AKS-74U | Rifle | Short barrel AK. Fast handling, wild up close. |
HK33 | HK33 | Rifle | 5.56 roller delayed, a harder shove per shot. |
SCAR | SCAR-H | Rifle | 7.62 NATO. Big hits, slower rate. |
G36C | G36C | Rifle | Compact 5.56, very steady. |
AUG | Steyr AUG | Rifle | Bullpup 5.56. |
FAMAS | FAMAS | Rifle | Bullpup with a very high rate of fire. |
TAR21 | TAR-21 | Rifle | Bullpup 5.56, short and quick to aim. |
GALIL | Galil | Rifle | Israeli AK pattern rifle. |
FAL | FN FAL | Rifle | 7.62 NATO battle rifle. Heavy punch. |
M14 | M14 | Rifle | 7.62 DMR. Pairs well with zeroing. |
M249 | M249 | Rifle | Belt fed 5.56 machine gun. Big reserve, slow reload. |
PKM | PKM | Rifle | Belt fed 7.62. Heavy and brutal. |
MP5 | MP5 | SMG | 9mm. Light and quick, low kick. |
MP7 | MP7 | SMG | 4.6mm. Tiny and very fast. |
UMP45 | UMP-45 | SMG | .45 ACP. Slower, harder hitting SMG. |
Vector | Vector | SMG | .45 ACP. Very fast fire rate, stays flat. |
P90 | P90 | SMG | 5.7mm with a 50 round magazine. |
BIZON | PP-19 Bizon | SMG | Helical 64 round magazine. |
UZI | Uzi | SMG | 9mm classic. |
MAC10 | MAC-10 | SMG | Spits bullets, hard to control. |
THOMPSON | Thompson | SMG | .45 drum fed classic. |
MP40 | MP40 | SMG | 9mm, slow and steady. |
R700 | Remington 700 | Sniper | Bolt action. Heavy, slow to settle, hits very hard. |
AWM | AWM | Sniper | .338 Lapua. One chest hit drops most targets. |
KAR98 | Kar98k | Sniper | Bolt action, reloads with stripper clips. |
MOSIN | Mosin-Nagant | Sniper | Bolt action, reloads with stripper clips. |
SVD | SVD Dragunov | Sniper | Semi auto 7.62x54R. |
M82 | Barrett M82 | Sniper | .50 BMG anti material rifle. |
M870 | Remington 870 | Shotgun | 12 gauge pump. Eight pellets per shell, damage is per pellet. |
M1014 | M1014 | Shotgun | Semi auto 12 gauge. |
SPAS12 | SPAS-12 | Shotgun | Pump 12 gauge. |
DBS | Double barrel | Shotgun | Two shells, fast and loud. |
AA12 | AA-12 | Shotgun | Full auto 12 gauge. |
G17 | Glock 17 | Pistol | 9x19. Flat shooting and fast to recover. |
USP | USP | Pistol | .45. Snappy flip, quick recovery. |
M1911 | M1911 | Pistol | .45 classic. |
M92 | Beretta M9 | Pistol | 9mm, smooth. |
CZ75 | CZ 75 | Pistol | 9mm, fast follow ups. |
FIVESEVEN | Five-seveN | Pistol | 5.7mm with 20 rounds. |
Deagle | Desert Eagle | Pistol | .50 AE hand cannon. Huge hits, huge kick. |
R686 | S&W 686 | Pistol | .357 revolver with a swing out cylinder and speedloader. |
KaBar | Ka-Bar | Melee | The classic fighting knife. |
M9 | M9 Bayonet | Melee | Longer reach, a little slower. |
Karambit | Karambit | Melee | Short reach, very fast hooking cuts. |
Balisong | Butterfly knife | Melee | Light and quick. |
BOWIE | Bowie knife | Melee | Big blade, heavy cuts. |
KUKRI | Kukri | Melee | Forward weighted chopper. |
Knife | Combat knife | Melee | The original XSF knife. |
M67 | M67 frag | Grenade | Fragmentation grenade. |
M18 | M18 smoke | Grenade | Smoke grenade. |
Flashbang | M84 flashbang | Grenade | Stun grenade. |
C4 | C4 | Explosive | Thrown, sticks to what it hits, set off with right click. |
Claymore | Claymore | Explosive | Placed mine that fires a fan at the first enemy in front. |
RPG7 | RPG-7 | Launcher | Rocket with back blast. Reloads from the muzzle. |
M320 | M320 | Launcher | 40mm grenade launcher on a real arc. |
How slots work
- The first
Backpack.HotbarSizeweapons (5 by default) go on the number keys. The rest wait in the backpack (B). See Hotbar and backpack. - The player spawns holding the first one.
- Each grenade type takes one slot. The M67 ships with one in hand and one in reserve, so that slot holds two frags.
- A name that doesn't match a folder is skipped, and Output says
There is no weapon called "X" in XSF.Weapons. The rest of the loadout still works.
Different weapons for different players
Everyone gets the same Loadout. For classes, teams, a shop or a main menu, give weapons from a script instead with XSF.SetLoadout, which replaces everything the player carries:
local XSF = require(game.ServerScriptService.XSF.Server)

game.Players.PlayerAdded:Connect(function(player)
	player.CharacterAdded:Connect(function()
		task.wait() -- let XSF set up the character first
		if player.Team and player.Team.Name == "Snipers" then
			XSF.SetLoadout(player, { "R700", "USP", "M18" })
		else
			XSF.SetLoadout(player, { "HK416", "USP", "M67" })
		end
	end)
end)
If you give weapons from a script, you probably don't want XSF to also hand out Loadout on spawn. Add GiveLoadout = false to GameConfig. It isn't in the file by default, see Hidden options. The full API is in Server scripts, and there's a class picker in Recipes.
Removing weapons from your game
You don't have to. Weapons that aren't in anyone's loadout cost nothing at runtime. If you want a smaller place file anyway, delete the weapon's folder from XSF.Weapons and its model from XSF.Assets.GunModels. Leave the others alone.
Every GameConfig option #
This is the full list, taken straight from the GameConfig that ships with 2.0. The Default column is the value it ships with. Paths use dots for nesting, so Movement.Slide.Speed means the Speed line inside Slide inside Movement. Anything marked (player) is only the starting value, because players can change it for themselves in the settings menu.
Options that work but aren't written in the file are in More options. Keybinds have their own page, Keys and key names.
Providers
Which version of a system runs. The XSF... names are the built in ones. See Swapping parts out.
| Option | Default | What it does |
|---|---|---|
Providers.Inventory | "XSF" | "XSF" is XSF's own hotbar and backpack. "RobloxTools" turns each weapon into a normal Roblox Tool in the default backpack bar, for games built around Tools. |
Providers.Arms | "XSFRealistic" | "XSFRealistic" is gloved arms with posed fingers and sleeves that match the player's shirt. "ACSClassic" is the blocky ACS style arms. |
Providers.HUD | "XSFMinimal" | "XSFMinimal" is XSF's small readouts that only show when they matter. "None" turns off the XSF HUD completely so you can build your own with the client API. |
Preset and the website
| Option | Default | What it does |
|---|---|---|
Preset | nil | nil uses the preset picked for this game on the dashboard, or the one called Default. A name like "TDM" always uses that preset. See Presets and Studio. |
UseWebsite | true | false cuts the dashboard out completely. The game ignores every website setting and preset and runs only on GameConfig and the weapon Configs, and the "newer version" notice in Output is skipped too. The license check still runs, so Allow HTTP Requests has to stay on. Player settings are then saved in this game's own DataStore instead of on the XSF site (the same as SettingsSave = "Game"). Handy when you'd rather keep everything in Studio and never wonder which side a value came from. |
SettingsSave | "Shared" | Where each player's XSF settings are saved: sensitivity, FOV, keybinds, HUD options, and the attachments and presets they picked in the loadout screen. "Shared" saves them on the XSF site, so they follow the player into every game that uses XSF (a copy is also kept in this game's DataStore, used when the site can't be reached). "Game" saves them only in this game's DataStore (XSF_Settings_v1), so your game has its own settings and doesn't share them with other XSF games. "Off" saves nothing: every player starts from the defaults each time they join, and changes only last until they leave. With UseWebsite = false, "Shared" acts like "Game"; "Off" still means off. DataStores need Enable Studio Access to API Services to work in Studio. |
Loadout
| Option | Default | What it does |
|---|---|---|
Loadout | { "HK416", "AK47", "SCAR", "AWM", "M249", "Deagle", "M870", "Knife", "Karambit", "M67", "Flashbang", "RPG7", "C4" } | The weapons every player spawns with, in slot order. Names are folder names in XSF.Weapons, capitals included. See Choosing the weapons. |
Movement
All speeds are studs per second, the same unit as Humanoid.WalkSpeed. Roblox's own default walk speed is 16, so XSF ships a bit slower and heavier. See Movement and stances for how they combine.
| Option | Default | What it does |
|---|---|---|
Movement.WalkSpeed | 12 | Normal walking speed. |
Movement.SprintSpeed | 21 | Sprinting speed. Sprinting lowers the gun, so you can't fire mid sprint. |
Movement.AimSpeed | 7.5 | Speed while aiming down sights. |
Movement.ReloadSpeed | 10 | Speed while reloading. |
Movement.CrouchMultiplier | 0.55 | Crouched speed is whatever speed you'd have, times this. Crouch walking is 12 x 0.55 = 6.6. |
Movement.ProneSpeed | 3.2 | Crawling speed when prone. |
Movement.Stamina | 7 | Seconds of sprint from a full bar. |
Movement.StaminaRegen | 4.5 | Seconds to refill the bar from empty. |
Movement.SprintReload | false | true lets players keep sprinting through a reload. The legs run at sprint speed and stamina drains as normal, while the hands carry on with the reload instead of dropping to the sprint carry. Off, a reload slows you to ReloadSpeed. |
Movement.Slide.Enabled | true | Turns sliding on or off. With it off, crouch while sprinting just crouches. |
Movement.Slide.Speed | 30 | Speed at the start of the slide. |
Movement.Slide.EndSpeed | 7 | Speed it slows down to by the end. |
Movement.Slide.Duration | 0.8 | How long a slide lasts, in seconds. |
Movement.Slide.Cooldown | 0.7 | Seconds before you can slide again. |
Movement.Slide.CanShoot | true | Allow firing mid slide. Recoil is multiplied by Stances.Brace.Slide (1.25) while sliding. |
Camera
See Camera styles for what the two styles look like and when to use them.
| Option | Default | What it does |
|---|---|---|
Camera.Style | "Bodycam" | "Standard" or "Bodycam" (wide lens, vignette, grain, bleached colour). Delete the line and it falls back to Standard. |
Camera.BodycamFov | 100 | Field of view used by the Bodycam style. Players can't change this one. |
Camera.FieldOfView | 80 | (player) Field of view in the Standard style. |
Camera.Sensitivity | 1 | (player) Mouse sensitivity multiplier. 1 matches Roblox's own feel. |
Camera.AimSensitivity | 0.85 | (player) Extra multiplier while aiming. |
Camera.GamepadSpeed | 260 | (player) Controller look speed, degrees per second at full stick. |
Camera.GamepadCurve | 1.8 | Controller stick curve. Higher gives finer control near the centre and faster turns at the edge. 1 is linear. |
Camera.TouchSpeed | 0.28 | Mobile look speed, degrees per pixel dragged. |
Camera.EyeHeight | nil | Camera height above the HumanoidRootPart, in studs. nil works it out from the character, which is right for normal R6 and R15 rigs. Set it if you use unusual character sizes. |
Camera.Tilt | 1 | (player) The view leans into strafes. 0 is off, 1 normal, above 1 stronger. |
Camera.Bob | 1 | (player) The view bobs as you walk. |
Camera.RecoilKick | 1 | (player) The view kicks when you fire. This is only the camera, the gun still recoils. |
Camera.Landing | 1 | (player) The view dips when you land from a jump. |
Motion (gun sway)
How much the gun moves in your hands. All four are player settings, and the Comfort motion preset in the settings menu lowers them for people who get motion sick.
| Option | Default | What it does |
|---|---|---|
Motion.Inertia | 1 | The gun lags behind when you turn and settles after. Heavier guns lag more. |
Motion.Lead | 1 | The muzzle swings ahead into the direction you're turning, like you're leading with your arms. |
Motion.Bob | 1 | The gun bobs as you walk and run. |
Motion.Breath | 1 | Slow breathing sway while standing still. |
FreeAim (gun movement)
Bodycam style aiming: small mouse movements swing the gun first, and the body only turns once the gun nears the edge of a box. Only you can change this, players can't. The full explanation is in Gun movement.
| Option | Default | What it does |
|---|---|---|
FreeAim.Enabled | true | On or off. Off locks the gun to the centre of the screen like a normal shooter. |
FreeAim.Yaw | 9 | How far the gun can swing left or right before the body turns, in degrees. |
FreeAim.Pitch | 5 | How far it can swing up or down, in degrees. |
FreeAim.Return | 0.4 | How fast the body squares up behind the gun when you hold still. 0 is never. |
Customization (loadout screen and unlocks)
The loadout screen (N, Y on controller, the KIT button on mobile), where players fit attachments, pick ammo and put skins on each gun or knife. Every change is checked on the server and saved with the player's settings, with three presets per gun. See Loadout screen and Unlocks.
| Option | Default | What it does |
|---|---|---|
Customization.Enabled | true | Turns the loadout screen on or off. Off hides it (the Customize key does nothing and the KIT button on phones is gone) and the server refuses every change, including SetKit from the client API, so each gun keeps the attachments in its Config. Server scripts can still change attachments with XSF.SetAttachments. |
Customization.Slots | { Sight = true, Barrel = true, UnderBarrel = true, Other = true, Ammo = true, Skin = true } | Which slots players may change. Set a slot to false to lock it to whatever the gun comes with. |
Customization.Allowed | nil | Per gun lists of what players may pick, attachments and skins together, like { AK47 = { "Acog", "Woodland" } }. A listed gun only offers those. Guns you leave out aren't limited. |
Customization.Blocked | nil | A list of attachment or skin names nobody can pick on any gun, like { "PM II", "Gold Plated" }. |
Customization.Ownership | { Attachments = true, Skins = true } | true means players only get what you give them with XSF.GrantAttachment and XSF.GrantSkin. Set Attachments = false to let everyone use every attachment, and the same for Skins. Ownership = false turns both off. A gun's own default attachments are always free. |
Customization.Starter | { "FMJ" } | Items that are free for everyone. A plain name frees it on every gun ("Reflex"). "AK47:Acog" frees one item on one gun. Skins work here too. |
Customization.SaveOwnership | false | true: XSF remembers unlocks in its own DataStore. false: you save XSF.GetOwned(player) yourself and load it with XSF.SetOwned. |
Customization.Access | "Anywhere" | "Anywhere" opens the loadout screen any time with the Customize key. "Workbench" only opens it at a workbench while holding the gun. Place benches by copying ReplicatedStorage.XSF.Assets.Workbench into your map, as many as you like. "Off" is the same as Enabled = false. |
Customization.Required | nil | A list of slots players can't leave empty, like { "Sight" } or { "Sight", "Skin" }. The loadout screen drops the None choice for those slots, and the server refuses a kit that leaves one empty with "Pick something for the Sight slot." It only counts on guns that have at least one choice for that slot the player can use, so a pistol with no sights is never stuck. It only checks changes players make; a gun's own default kit and XSF.SetAttachments from your scripts aren't checked. Slot names: Sight, Barrel, UnderBarrel, Other, Skin (a required Skin removes the Factory choice). Ammo is never empty, since no pick means the normal rounds, so listing it does nothing. nil or an empty list means every slot can be empty. |
Animations
| Option | Default | What it does |
|---|---|---|
Animations | "XSF" | "XSF" uses XSF's own draw, reload, jam clearing and inspect on magazine guns, fitted to the arms and worked out from each gun's own magazine. "Imported" keeps the clips that came with each gun (handy for imported ACS guns with hand made reloads). Bolt actions, revolvers, shotguns and launchers always use their own reloads. |
Malfunctions (jams)
| Option | Default | What it does |
|---|---|---|
Malfunctions.Enabled | false | Turns jams on. A jammed gun shows JAMMED and won't fire until the player reloads. See Jams, sound and effects. |
Malfunctions.Chance | 0.003 | Chance per shot before heat. 0.003 is about one jam every 300 rounds. Long bursts and suppressors raise it a little. |
Throwables
How grenades, smokes, flashbangs and C4 fly and land. These are the defaults for every throwable. Any weapon can set the same names inside its own Grenade table, which wins over these (see Grenades).
| Option | Default | What it does |
|---|---|---|
Throwables.Arc | 0.12 | How far above the crosshair a normal throw leaves. 0 throws flat along the crosshair, 0.3 is a high arc. |
Throwables.LobArc | 0.25 | The same for an underarm lob (holding aim while you let go). |
Throwables.Lift | 0.12 | Extra upward speed on top of the aim, as a share of the throw speed. |
Throwables.Gravity | 1 | Gravity on the grenade, as a share of workspace.Gravity. 0.5 floats twice as long, 1.5 drops fast. C4 always uses normal gravity so it sticks where you expect. |
Throwables.Bounce | 0.18 | Elasticity. 0 lands dead, 0.6 bounces around a room. |
Throwables.Friction | 1.2 | Grip on the ground, 0 to 2. Low values slide on smooth floors. |
Throwables.Density | 3 | How heavy it is. Heavier grenades shove loose props harder. |
Throwables.Spin | 12 | How much it tumbles on the way out. 0 flies without spinning. |
Throwables.RollDrag | 0 | Share of its speed a grenade loses every second while it's on the ground. 0 rolls freely (down a slope it keeps going), 3 stops within a second or so. |
-- floatier, higher throws that stop rolling quickly
Throwables = { Arc = 0.2, Gravity = 0.7, RollDrag = 3 },
Performance
| Option | Default | What it does |
|---|---|---|
Performance.LowEffects | false | The starting value of the player's Low effects setting. Low effects cuts particles, drops brass and muzzle smoke and keeps fewer bullet holes. Turn it on for games aimed at phones. Players can still turn it off. See Performance. |
Stances
| Option | Default | What it does |
|---|---|---|
Stances.Crouch | true | Allow crouching. |
Stances.Prone | true | Allow going prone. |
Stances.Lean | true | Allow leaning left and right. |
Stances.LeanAngle | 22 | How far the view tilts when leaning, in degrees. |
Stances.LeanOffset | 1.1 | How far the head moves sideways when leaning, in studs. This is what lets you peek around a corner. |
Stances.Brace | { Crouch = 0.8, Prone = 0.62, Bipod = 0.42, Slide = 1.25 } | Recoil multiplier per stance. Lower is steadier. Bipod applies when prone with a bipod fitted, Slide while sliding. Standing is always 1. |
Downed
When a player would die they go down first and a teammate can revive them. See Downed and revive.
| Option | Default | What it does |
|---|---|---|
Downed.Enabled | true | Players go down before dying and can be revived. Off means they die straight away. |
Downed.BleedOutTime | 45 | Seconds before a downed player dies on their own. |
Downed.ReviveTime | 5 | Seconds a teammate holds the revive prompt. |
Downed.ReviveHealth | 35 | Health after being revived. |
Downed.DownedHealth | 40 | Extra damage a downed player can take before dying. Shooting a downed player finishes them. |
Downed.TeamOnly | true | Only teammates can revive. Ignored in games without teams. |
Downed.CrawlSpeed | 2.5 | Crawling speed while downed. |
Downed.AllowFiring | false | Let downed players shoot. |
Downed.NPCs | false | NPCs go down too, instead of dying straight away. |
Downed.Drag | true | Teammates can drag a downed player to cover (H on keyboard, D-pad up on controller). |
Downed.DragSpeed | 6 | Walking speed while dragging someone. |
Backpack (hotbar)
The hotbar along the bottom of the screen and the backpack panel. See Hotbar and backpack.
| Option | Default | What it does |
|---|---|---|
Backpack.Hotbar | "Always" | "Always" keeps the hotbar on screen, slightly faded until you switch. "Fade" only shows it for a moment when you switch weapons or hold Check gear. |
Backpack.HotbarSize | 5 | How many slots the hotbar has, from 1 to 9. Number keys 1 to this pick them. Everything else waits in the backpack. |
Damage
| Option | Default | What it does |
|---|---|---|
Damage.FriendlyFire | false | Teammates can hurt each other, with bullets and explosions. Players with no team, or on a neutral team, can always be hurt. |
Damage.Hitmarkers | false | Show a small marker when your shots land. This is also the default for the player's own Hitmarkers setting. |
Audio
| Option | Default | What it does |
|---|---|---|
Audio.Footsteps | true | XSF's own footstep sounds, which change with the floor material. |
Audio.StepVolume | 1 | Footstep volume multiplier. |
Audio.RobloxSteps | false | Also keep Roblox's default running sound. You'll hear both, so leave this off unless you turned XSF footsteps off. |
Audio.Ambience | true | Quiet wind and distant traffic outdoors, room tone indoors. Turn it off if your game plays its own ambience. |
Audio.CutFade | nil | Seconds a gunshot takes to fade out once it reaches its Cut point. nil works it out from the sound's length (0.05 to 0.18 seconds). Raise it to 0.3 or so if shots sound clipped, lower it for a tighter, drier crack. A gun can set its own with Sounds.Fade in its Config. |
Audio.Voices | nil | How many copies of the same sound can play over each other. nil is 8. Very fast guns in a big firefight can run out and cut older shots short, so try 12 to 16 there. Each voice is a Sound kept around, so don't go wild. When every copy is busy, the oldest one is reused and fades out over Audio.StealFade instead of stopping dead. |
Audio.StealFade | 0.08 | Seconds a sound fades out when its copy is reused because all Audio.Voices copies are busy. Without it, long recordings with the echo baked in (shots with a 2 second tail) get cut off with an audible click during long bursts. Raise it to 0.15 or so for very long, wet recordings. 0 stops the old sound straight away like 2.0 did. |
Audio.ParentGroup | nil | A SoundGroup, or the name of one in SoundService, that XSF's three sound groups (XSF_World, XSF_Own, XSF_Body) are put under. Your master volume slider, compressor or limiter on that group then covers XSF too. nil leaves them in SoundService. A name that doesn't exist after 10 seconds prints a warning and changes nothing. |
Audio.StepSets | nil | Your own footstep sounds per floor material, keyed by Enum.Material name (Grass, Concrete, Metal, WoodPlanks and so on). Default covers every material you don't list. Each entry is { Ids = { ... }, Volume = 1, Pitch = 1 } or just a list of ids. A random id is picked every step. Volume and pitch are optional; leave them out to keep XSF's own (quieter on soft ground, higher on metal). Ids can be numbers or "rbxassetid://123". Materials with no entry and no Default keep XSF's sounds. |
Audio = {
	-- XSF goes through your master group, so your volume slider covers it
	ParentGroup = "Master",
	StepSets = {
		Grass    = { Ids = { 1111111111, 2222222222 }, Volume = 0.7 },
		Metal    = { Ids = { 3333333333 }, Volume = 1.1, Pitch = 1.05 },
		Default  = { 4444444444, 5555555555 }, -- every other floor (your own sound ids)
	},
},
Holster
Empty hands. The Holster key (Y by default), or the number key of the gun in your hands, puts the gun away and takes the same gun back out. Other players see the gun leave your hands too, and nothing is equipped on the server, so shots are refused until a weapon is out again. XSF won't hand a gun back by itself while you're holstered, even when your inventory changes. A new life starts armed as normal.
| Option | Default | What it does |
|---|---|---|
Holster.Enabled | true | false turns the Holster key off. Your scripts can still holster with XSF.Unequip() (client). |
Holster.Reselect | true | Pressing the number key of the gun you're holding puts it away too, and pressing it again takes it back out. false leaves only the Holster key. |
Holster.Hands | true | Shows first person hands while nothing is held: relaxed in the lower corners standing still, swinging in step when walking, and bent arms pumping with loose fists when running. They also lift when jumping, reach forward in a slide and hide when prone or downed. Works with every arms style (XSFRealistic, ACSClassic, XSFSimple and your own Providers.Arms module, as long as it has the usual update function). false shows nothing with empty hands. |
A grenade being cooked or thrown can't be put away halfway. Games using Providers.Inventory = "RobloxTools" holster the normal Roblox way, by clicking the tool again, and the gun now leaves the character for other players there too.
AimAssist
Controller only. It never moves the aim for the player, it only slows looking down while an enemy is under the barrel. Mouse and touch are never affected.
| Option | Default | What it does |
|---|---|---|
AimAssist.Enabled | true | Turns the slowdown on or off. |
AimAssist.Slowdown | 0.55 | Look speed multiplier over a target. Lower is stickier. |
AimAssist.Angle | 2.5 | How close to the barrel a target has to be, in degrees. |
AimAssist.Range | 300 | Furthest a target can be, in studs. |
Rumble
| Option | Default | What it does |
|---|---|---|
Rumble.Enabled | true | Controller vibration when firing. |
Rumble.Strength | 1 | Scales the vibration. |
Controls
| Option | Default | What it does |
|---|---|---|
Controls.AimToggle | false | (player) Aim is a toggle instead of hold. |
Controls.SprintToggle | false | (player) Sprint is a toggle instead of hold. Sprint always toggles on controller. |
Controls.LeanToggle | false | (player) Lean is a toggle instead of hold. |
Controls.CrouchToggle | true | Crouch is a toggle. Set false for hold to crouch. |
Controls.CrouchHoldProne | true | (player) Controller and touch: tap crouch to crouch, hold it to go prone. |
Controls.AutoReload | true | Guns start reloading by themselves a moment after the last round is fired, as long as there are spare rounds. Off means the player has to press reload. |
Ballistics
World scale for bullets. Leave these alone unless your map is built at an unusual scale. See Bullets and walls.
| Option | Default | What it does |
|---|---|---|
Ballistics.StudsPerMeter | 1 / 0.28 | How many studs make a meter. 1 / 0.28 means one stud is 28 cm, which fits standard Roblox characters. Bullet speed and drop are worked out in meters and converted with this. |
Ballistics.Gravity | 9.81 | Bullet gravity in m/s². Separate from workspace.Gravity, so a low gravity map doesn't make bullets float. |
Ballistics.MaxLife | 3 | Seconds a bullet is simulated before it's removed. At 880 m/s that's about 2.6 km, far more than any map. |
Debug
| Option | Default | What it does |
|---|---|---|
Debug.Overlay | false | Shows a performance readout on screen for everyone, in live games too. In Studio you can toggle it with F3 instead. |
Debug.LogRejects | false | true prints a line in Output every time the server throws away a shot that didn't add up. |
Keys and key names #
Default keys live in Keybinds in GameConfig. Every action takes a list, and you can mix keyboard keys, mouse buttons and controller buttons in the same list. Players can rebind every action in the settings menu, and their binds are saved with their settings, so your defaults only matter for new players.
| Action | Default | What it does |
|---|---|---|
Fire | MouseButton1, ButtonR2 | Shoot. Hold for automatic fire. On grenades, hold to get ready (and cook a frag) and release to throw. On knives, slash. |
Aim | MouseButton2, ButtonL2 | Aim down sights. Hold or toggle, the player picks in settings. With a grenade, hold as you release to lob it underhand. With C4 out, sets off your charges. |
Reload | R, ButtonX | Reload. With rounds still in the magazine it's a quicker reload that keeps the old magazine and one in the chamber. Also clears a jam. |
Sprint | LeftShift, ButtonL3 | Sprint. Always a toggle on controller. |
Crouch | C, ButtonB | Crouch. While sprinting it slides. On controller and touch, holding it goes prone. |
Prone | Z | Go prone. Press again to get up. |
LeanLeft / LeanRight | Q / E | Lean around corners. Hold or toggle, the player picks. |
FireMode | V, DPadUp | Switch between the gun's fire modes (auto, burst, semi). |
CheckMag | T, DPadLeft | Look at the magazine. The HUD says roughly how full it is (FULL, NEARLY FULL, ABOUT HALF, ALMOST EMPTY) instead of an exact count. |
CheckGear | G, DPadLeft | Show the full HUD for a moment: health, stance, attachments, spare magazines. |
Inspect | I, DPadDown | Turn the gun over to look at it. Knives do their own tricks. |
NextWeapon / PrevWeapon | ButtonR1 / ButtonL1 | Cycle weapons. The mouse wheel also does this and isn't in Keybinds. |
Light / Laser | L / K | Turn the weapon light or laser on and off. Everyone sees them. |
GearToggle | ButtonR3 | Controller: cycles light and laser. |
ZeroUp / ZeroDown | RightBracket / LeftBracket | Change the sight zero (or the M320 range ladder) on guns that have zero steps. |
Settings | P, DPadRight | Open the settings menu. |
Customize | N, ButtonY | Open the loadout screen. |
Backpack | B, ButtonSelect | Open the backpack panel. See Hotbar and backpack. |
Pickup | F, ButtonY | Pick up a gun or take ammo from a box on the ground. Rebindable like everything else, and the prompt on the ground shows whatever key the player picked. Only one keyboard key and one controller button are used, the first of each in the list. |
Drop | X | Drop the gun in your hands. On a controller, holding D-pad down (Inspect) also drops it, or give Drop a button of its own. See Pickups. |
Holster | Y | Put the gun away (empty hands), and press again to take it back out. See Holster. |
QuickLethal | not bound | Throws the first frag, C4 or claymore the player carries without switching to it first, then goes back to what was in hand (or back to empty hands). Hold to cook a frag, let go to throw. Bind it yourself, for example { "G", "ButtonL1" }, or let players bind it in the settings menu. |
QuickTactical | not bound | The same for a flashbang or smoke. A weapon's Config can move it between the two with Grenade.Quick = "Lethal" or "Tactical". |
FreeCursor | LeftAlt | Hold to free the mouse cursor. Clicks then go to your UI and never shoot. See Menus and the mouse. |
Slot1 to Slot9 | One to Nine | Jump straight to a hotbar slot. Slots above Backpack.HotbarSize do nothing. |
Two keys are fixed because they belong to prompts that pop up in the world: revive (hold F, D-pad down) and drag (H, D-pad up). Roblox draws those prompts, so players see the key on screen.
Writing key names
- Keyboard keys use the Roblox
Enum.KeyCodename without theEnum.KeyCode.part:"F","LeftShift","LeftControl","LeftAlt","Space","Tab","CapsLock","One","Two". - Mouse buttons are
"MouseButton1"(left),"MouseButton2"(right) and"MouseButton3"(middle). - Controller buttons are
"ButtonA","ButtonB","ButtonX","ButtonY","ButtonL1","ButtonR1","ButtonL2","ButtonR2","ButtonL3","ButtonR3","DPadUp","DPadDown","DPadLeft","DPadRight","ButtonSelect","ButtonStart". These are Xbox names, and PlayStation controllers map to them automatically (Cross is ButtonA, Circle is ButtonB, and so on). - A misspelled name doesn't break anything. XSF skips it and Output says
"X" is not a Roblox key name, with which action lost its key. - Two actions can share a key.
CheckMagandCheckGearboth use D-pad left on controller by default. - Avoid keys Roblox already uses: Escape (menu), the slash key (chat) and F9 (developer console).
Keybinds = {
	Crouch = { "LeftControl", "ButtonB" }, -- crouch on Ctrl instead of C
	Prone  = { "X" },
	Drop   = { "G", "DPadDown" },          -- G, or D-pad down on a controller
	-- actions you leave out keep their default keys
},
You only need to list the actions you change. Everything else keeps its default.
Camera styles #
XSF has two camera looks, picked with Camera.Style. Both are first person, and both use the same arms, recoil and sway. What changes is the lens and the picture.
| Standard | Bodycam | |
|---|---|---|
| Field of view | Camera.FieldOfView (80), and players can change it | Camera.BodycamFov (100), fixed for everyone |
| Picture | Clean, Roblox's normal colours | Wide lens, vignette at the edges, film grain and bleached colour, like real body camera footage |
| Works well with | Arcade, competitive, anything where players need to read the map clearly | Tactical, horror, realism, short clips people share |
| Shipped default? | No (it's the fallback if you delete the line) | Yes |
Bodycam looks best with free aim on, because the gun moving inside the frame is half of what sells the look. Standard with free aim off feels like a normal modern shooter.
-- clean competitive look
Camera = { Style = "Standard", FieldOfView = 85 },
FreeAim = { Enabled = false },

-- heavy bodycam look
Camera = { Style = "Bodycam", BodycamFov = 104 },
FreeAim = { Enabled = true, Yaw = 11, Pitch = 6 },
Only change the lines you care about. These snippets show the important values, keep the rest of each table as it ships.
Camera effects
Four effects run on top of either style. Each is a multiplier: 0 turns it off, 1 is normal, 2 doubles it. They're all player settings too, so players can turn them down for themselves.
Camera.Tiltleans the view a little into strafes.Camera.Bobbobs the view as you walk.Camera.RecoilKickkicks the view up when you fire. The gun's own recoil still happens with this at 0, so the gun still climbs.Camera.Landingdips the view when you land from a jump or a fall.
Players also get a Lens and grain switch and a Stress effects slider (blur, tunnel vision and ringing when hurt or flashed) in the settings menu. See Player settings.
Looking around
- Mouse speed is Roblox's own feel times
Camera.Sensitivity, and timesCamera.AimSensitivitywhile aiming. - Controller speed is
Camera.GamepadSpeeddegrees per second at full stick, shaped byCamera.GamepadCurveso small stick movements stay precise. - Touch speed is
Camera.TouchSpeeddegrees per pixel dragged on the right side of the screen.
Taking the camera away for a moment
Cutscenes, spectating and menus need the camera. Call SetCameraEnabled(false) from the client API: XSF puts the gun away and hands the camera back to Roblox. SetCameraEnabled(true) takes it back. Don't fight XSF by setting CameraType every frame.
Movement and stances #
XSF takes over WalkSpeed, sprinting, crouch, prone, lean, slide and vault. You set the numbers in Movement and Stances, and XSF picks the right speed every frame.
Which speed applies
XSF works out a base speed first, then the stance changes it:
- Base speed. Sprinting uses
Movement.SprintSpeed(21). If not sprinting, aiming usesMovement.AimSpeed(7.5). If not aiming, reloading usesMovement.ReloadSpeed(10). Otherwise it'sMovement.WalkSpeed(12). - Stance. Crouching multiplies the base speed by
Movement.CrouchMultiplier(0.55). Prone replaces it withMovement.ProneSpeed(3.2). A slide starts atSlide.Speed(30) and eases down toSlide.EndSpeed(7). Downed players crawl atDowned.CrawlSpeed(2.5). - Dragging a downed teammate caps the speed at
Downed.DragSpeed(6).
Don't set Humanoid.WalkSpeed from your own scripts, XSF will overwrite it on the next frame. For a slow zone, a speed boost or a tactical sprint, add a speed modifier from a LocalScript with AddSpeedModifier. It gets the final speed after all of the steps above and returns your own. See Movement state and speed.
Sprint and stamina
- Sprinting only works while moving forward on the ground and not reloading. The gun drops to a low carry and can't fire while you sprint. With
Movement.SprintReload = trueplayers can keep running through a reload: the legs sprint, the hands keep reloading. - A full bar lasts
Movement.Staminaseconds (7). - The bar starts refilling about 0.8 seconds after you stop sprinting and takes
Movement.StaminaRegenseconds (4.5) to fill from empty. - Run it to zero and you're winded: you can't sprint again until the bar is back to 30%. You'll hear the breathing.
- Players pick hold or toggle sprint in settings. On controller it's always a toggle (click L3).
For an arcade game, raise both: Stamina = 15 and StaminaRegen = 3. To effectively remove stamina, set Stamina = 9999.
Crouch and prone
- Crouch is a toggle by default (
Controls.CrouchToggle). Prone has its own key (Z) on keyboard. On controller and touch, tap crouch to crouch and hold it to go prone. - You can't stand up under something low. XSF checks for headroom first: about 2.6 studs to stand from a crouch, 3.2 from prone. From prone with no room to stand, you go to a crouch instead.
- Jumping while crouched stands you up first, if there's room.
- Other players see you crouch, slide and go prone. On R15 the hips lower and the knees bend. R6 has no knees, so since 2.1 an R6 crouch is shown as a kneel (body down about a stud, one leg forward and one back) and a slide as the body low and leaning back with both legs out in front. The server lowers an R6 player's head, torso and arm hitboxes to match, so shots land where the body is seen. NPCs with
XSF_StanceandXSF_Slidingattributes get the same poses. - Crouching makes recoil steadier (x0.8), prone more so (x0.62), and prone with a bipod fitted the most (x0.42). These are the
Stances.Bracenumbers. - Turn any stance off with
Stances.Crouch,Stances.ProneorStances.Lean.
Leaning
Q and E lean the view Stances.LeanAngle degrees (22) and move the head Stances.LeanOffset studs (1.1) to the side. That offset is what lets you peek a corner without stepping out. Other players see you lean. Players choose hold or toggle. Lean isn't bound on controller by default, add a button in Keybinds if you want it there.
Sliding
Press crouch while sprinting. You drop low and slide at Slide.Speed, slowing to Slide.EndSpeed over Slide.Duration seconds, then you can't slide again for Slide.Cooldown seconds. You can shoot during a slide if Slide.CanShoot is on, with recoil times 1.25. Turn sliding off with Movement.Slide.Enabled = false.
Jumping and landing
Jumping uses Roblox's normal jump. XSF adds the landing dip (Camera.Landing) and a vault or climb when you jump at an obstacle you can get over, see Vault and mantle. To change jump height, change StarterPlayer.CharacterJumpPower or CharacterJumpHeight as usual.
Gun movement (FreeAim) #
With FreeAim on, which is how XSF ships, the gun isn't locked to the middle of the screen. Small mouse or stick movements swing the gun inside a box first, and the body only turns once the gun gets near the edge of that box. It's what gives bodycam shooters their heavy, body worn feel. Players can't turn it off, only you can, in GameConfig.
How it moves
- It has weight. The gun doesn't follow the mouse one to one. It swings toward where you point on a spring, so a quick flick eases out and settles instead of jumping.
- The edge is soft. Near the centre the gun takes almost all of the movement. The closer it gets to the edge, the more the body takes over, so there's never a moment where the gun stops dead and the view suddenly starts turning.
- Coming back leads with the gun. Moving back toward the centre, the gun moves first and the body waits, the way you'd re-aim with your arms.
- The body squares up. When you hold still, the body slowly turns in behind the gun until it's centred again.
Returnsets how fast. 0 turns this off. - Aiming centres it. Aiming down sights brings the gun smoothly back to the middle, and it stays there while you aim.
- Bullets go where the barrel points, not to the middle of the screen. With FreeAim on, the crosshair setting shows the centre of the view, so learn to read the gun.
| Option | Default | What it does |
|---|---|---|
FreeAim.Enabled | true | On or off. Off locks the gun to the centre like a normal shooter. |
FreeAim.Yaw | 9 | How far the gun can swing left or right, in degrees. Bigger feels looser and heavier. |
FreeAim.Pitch | 5 | How far it can swing up or down, in degrees. |
FreeAim.Return | 0.4 | How fast the body squares up behind the gun when you hold still. 0 is never, around 1 is quick. |
Suggested setups
-- tactical, slow and heavy
FreeAim = { Enabled = true, Yaw = 12, Pitch = 7, Return = 0.25 },

-- light touch, close to a normal shooter
FreeAim = { Enabled = true, Yaw = 4, Pitch = 2.5, Return = 1 },

-- off: gun locked to the centre
FreeAim = { Enabled = false },
Should I turn it off?
Turn it off for anything competitive or fast. Hip fire with free aim takes practice, and new players blame the game when they miss. Keep it for tactical, milsim, horror and anything that wants to look like footage. Free aim also doesn't matter much on mobile, where most people aim down sights anyway.
Downed and revive #
With Downed.Enabled on (the default), a hit that would kill a player puts them on the ground instead. A teammate can pick them up before they bleed out. It changes how fights play a lot: trading a kill no longer ends the fight, and pushing to finish someone is a real decision.
What the downed player can do
- Crawl at
Downed.CrawlSpeed(2.5 studs per second). - Shoot, only if
Downed.AllowFiringis on. - Give up: hold crouch (or G) for about two seconds to bleed out on the spot, so they can respawn instead of waiting.
- Their HUD shows YOU ARE DOWN.
Bleeding out and finishing
- A downed player dies after
Downed.BleedOutTimeseconds (45) if nobody helps. - They can take
Downed.DownedHealthmore damage (40) before dying, so shooting a downed player finishes them fast. - The kill goes to whoever downed them, even if they bleed out later.
XSF.Killedfires with that attacker.
Reviving
- Walk up to them and a Revive prompt appears (within 7 studs). Hold F, or D-pad down on controller, for
Downed.ReviveTimeseconds (5). - They get up with
Downed.ReviveHealth(35). - With
Downed.TeamOnlyon, only players on the same Team see the prompt. In a game without teams anyone can revive.
Dragging
With Downed.Drag on, a Drag prompt sits under the revive one. Press H (D-pad up) to start pulling the downed player behind you at Downed.DragSpeed (6), and press it again to let go. Use it to get someone out of a doorway before reviving them.
NPCs
NPCs die straight away by default. Set Downed.NPCs = true and they go down like players. Your own scripts can revive them with XSF.Revive.
From scripts
local XSF = require(game.ServerScriptService.XSF.Server)

XSF.PlayerDowned:Connect(function(humanoid, info)
	print(humanoid.Parent.Name, "went down")
end)

XSF.Revived:Connect(function(humanoid, byPlayer)
	if byPlayer then
		print(byPlayer.Name, "revived", humanoid.Parent.Name)
		-- reward the medic here
	end
end)

XSF.BledOut:Connect(function(humanoid)
	print(humanoid.Parent.Name, "bled out")
end)

-- a medkit that revives instantly
local function useMedkit(target)
	if XSF.IsDowned(target) then
		XSF.Revive(target)
	end
end
Downed characters also carry the XSF_Downed attribute on their Humanoid, so any script (even a LocalScript) can check it with humanoid:GetAttribute("XSF_Downed").
Turning it off
Downed = { Enabled = false } makes every lethal hit kill straight away. That's the right call for deathmatch, gun game and anything with quick respawns.
Common changes #
The quick answers. Everything here is in GameConfig unless it says otherwise.
| I want to... | Change this |
|---|---|
| make everyone faster | Movement.WalkSpeed and Movement.SprintSpeed. Try 16 and 26 for arcade. |
| turn off sliding, prone or leaning | Movement.Slide.Enabled = false, Stances.Prone = false, Stances.Lean = false |
| get a clean normal camera (it ships as Bodycam) | Camera.Style = "Standard" |
| lock the gun to the centre of the screen | FreeAim.Enabled = false |
| stop guns reloading by themselves | Controls.AutoReload = false |
| let teammates hurt each other | Damage.FriendlyFire = true |
| show hitmarkers | Damage.Hitmarkers = true |
| kill players straight away instead of downing them | Downed.Enabled = false |
| give everyone every attachment and skin | Customization.Ownership = { Attachments = false, Skins = false } |
| stop players changing attachments at all | Customization.Enabled = false |
| let players change sights but not ammo | Customization.Slots = { Sight = true, Barrel = true, UnderBarrel = true, Other = true, Ammo = false, Skin = true } |
| only allow attachment changes at a bench | Customization.Access = "Workbench", then copy XSF.Assets.Workbench into your map |
| make guns jam now and then | Malfunctions.Enabled = true |
| go easy on weak phones by default | Performance.LowEffects = true |
| use each gun's own reload animations | Animations = "Imported" |
| use the normal Roblox backpack | Providers.Inventory = "RobloxTools" |
| hide XSF's HUD and make my own | Providers.HUD = "None", then use the client API |
| change a default key | the action in Keybinds, for example Crouch = { "LeftControl", "ButtonB" } |
| give guns from a menu instead of on spawn | add GiveLoadout = false, then call XSF.SetLoadout |
| stop dead players dropping guns | add Pickups = { DropOnDeath = false } |
| turn off vaulting | add Vault = { Enabled = false } |
| put everyone in the same sleeve colour | add Arms = { SleeveColor = Color3.fromRGB(60, 70, 50) } |
| make one gun hit harder | Damage in that gun's Config, or the gun's stats on the dashboard |
| make every gun kick less | the Recoil slider per gun on the dashboard, or Stances.Brace for stance based steadiness |
| give everyone body armour | set XSF_Armor on characters from a script, see How damage works |
Controls #
The default controls, as players see them. Everything in Keybinds can be changed by you in GameConfig and by players in the settings menu.
| Action | Keyboard and mouse | Controller |
|---|---|---|
| Fire / Aim | Left / right mouse | R2 / L2 |
| Reload | R | X |
| Sprint | Left Shift | L3 (click to toggle) |
| Crouch / Slide | C (while sprinting to slide) | tap B, or B while sprinting to slide |
| Prone | Z | hold B |
| Lean left / right | Q / E | not bound |
| Jump and vault | Space | A |
| Next / previous weapon | mouse wheel | R1 / L1 |
| Hotbar slots | 1 to 5 (up to 9 with Backpack.HotbarSize) | |
| Backpack | B | Select |
| Fire mode | V | D-pad up |
| Check magazine | T | D-pad left |
| Check gear (full HUD) | G | D-pad left |
| Inspect weapon | I | D-pad down |
| Light / laser | L / K | R3 cycles both |
| Sight zero up / down | ] / [ | |
| Drop gun | X | |
| Holster (empty hands) | Y, or the number key of the gun in hand | |
| Quick throw lethal / tactical | not bound, players can bind them | |
| Free the mouse cursor (hold) | Left Alt | |
| Pick up gun / take ammo | F | Y |
| Loadout screen | N | Y |
| Settings menu | P | D-pad right |
| Revive a teammate (hold) | F | D-pad down |
| Drag a downed teammate | H | D-pad up |
| Give up while downed (hold 2 s) | G or crouch | crouch |
| Set off C4 | right mouse (or left with no charge in hand) | L2 |
Revive, drag and pick up are prompts that show up in the world next to the person or object, so their keys are fixed and not in Keybinds.
Players can rebind everything in the settings menu, clear a bind with the X next to it, and set aim, sprint and lean to hold or toggle. On controller and touch, tapping crouch crouches and holding it goes prone.
Mobile and console #
XSF switches its controls to whatever the player touched last: keyboard and mouse, controller or touch. Someone on a laptop with a controller plugged in can swap between them mid fight.
Phones and tablets
- The left thumbstick moves, dragging on the right side of the screen looks.
- There are on screen buttons for fire, aim, reload, jump, crouch, sprint, swap weapon, gear (light and laser), lean left and right, fire mode and the loadout screen (KIT). The hotbar stays on screen so players can tap a slot.
- Players can hide buttons they don't use in the MOBILE tab of the settings menu. Most people turn off lean and fire mode.
- Tap crouch to crouch, hold it to go prone.
- Low effects is a good default for phone games:
Performance.LowEffects = true. Players can turn it off on better phones. - The dashboard's phone and tablet platform choice also sets a 4 slot hotbar, which fits small screens better.
Controller (Xbox, PlayStation, PC)
- Look speed and curve come from
Camera.GamepadSpeedandCamera.GamepadCurve, and players can change look speed in the menu. - Aim assist slows looking down a little over an enemy. It never pulls the aim. See AimAssist.
- Guns rumble when they fire (
Rumble). - Sprint is always a toggle on L3.
- Lean isn't bound by default because there aren't enough buttons. Add one in
Keybindsif your game needs it.
Testing other devices in Studio
Use Studio's device emulator (Test tab, Device) to try phone layouts, and plug in a controller to test it directly. XSF switches as soon as you touch the stick.
Player settings #
Players open the settings menu with P or D-pad right. Settings save on the XSF site, so a player keeps the same sensitivity, binds and attachment choices in every game that uses XSF. If a game has HTTP requests off, settings save to that game instead. A game can change where they are saved, or turn saving off, with SettingsSave in GameConfig (see Preset and the website).
What's in the menu
| Tab | Settings |
|---|---|
| GAME | HUD (Minimal, Full or Off), centre dot, see your legs, toggle aim, toggle sprint and the other gameplay toggles |
| CAMERA | Motion preset (Full or Comfort), field of view (Standard camera), mouse sensitivity, aim sensitivity, controller look speed, camera tilt, camera bob, recoil view kick, landing dip |
| WEAPON | Weapon inertia, muzzle lead, weapon bob, breathing sway |
| EFFECTS | Stress effects, lens and grain, low effects (faster on weak devices), volume |
| CONTROLS | Every keybind. Click one and press the new key, or clear it with the X |
| MOBILE | Which on screen buttons show up: fire, aim, reload, jump, crouch, sprint, swap weapon, gear, lean left, lean right and the rest |
RESET ALL SETTINGS at the bottom puts everything back to your game's defaults.
The Comfort preset
Comfort is for players who get motion sick. It cuts camera tilt to 0.15, camera bob to 0.1, recoil view kick to 0.45, landing dip to 0.25, gun bob to 0.5, breathing to 0.4, inertia and lead to 0.7 and stress effects to 0.35. Switching back to Full restores your game's defaults.
Which of your settings players can override
Everything marked (player) in Every GameConfig option: field of view, sensitivities, controller speed, the four camera effects, the four motion values, the toggle settings and crouch hold for prone. Plus low effects and hitmarkers. Your GameConfig value is what a new player starts with.
Things players can never change: camera style, Bodycam FOV, free aim, movement speeds, damage, downed rules and anything about weapons.
Reading and changing settings from code
Your LocalScripts can read and change a player's settings with GetSetting and SetSetting from the client API, for example to build your own settings screen. Changes save like normal.
| Key | Type |
|---|---|
FieldOfView, Sensitivity, AimSensitivity, GamepadSpeed | number |
CameraTilt, CameraBob, CameraRecoilKick, CameraLanding | number, 0 to 2 |
MotionInertia, MotionLead, MotionBob, MotionBreath | number, 0 to 2 |
MotionPreset | "Full" or "Comfort" |
AimToggle, SprintToggle, LeanToggle, CrouchHoldProne | boolean |
StressEffects | number, 0 to 1 |
LensEffects, LowEffects, ShowLegs, Hitmarkers | boolean |
Crosshair | boolean, the centre dot |
HudMode | "Minimal", "Full" or "Off" |
MasterVolume | number, 0 to 1 |
Touch_FIRE, Touch_AIM, Touch_RELOAD and the other Touch_ keys | boolean, whether that mobile button shows |
local XSF = require(game.ReplicatedStorage:WaitForChild("XSF").Client.API)

-- a "streamer mode" button in your own menu
local function streamerMode()
	XSF.SetSetting("LensEffects", false)
	XSF.SetSetting("StressEffects", 0.3)
	XSF.SetSetting("Crosshair", true)
end

XSF.SettingChanged:Connect(function(key, value)
	if key == "*" then
		print("all settings loaded")
	else
		print(key, "is now", value)
	end
end)
Weapon settings #
Each weapon folder in XSF.Weapons has a Config ModuleScript with that weapon's stats. You only write what's different from the defaults. Anything you leave out comes from XSF.Shared.WeaponDefaults, so a working gun Config can be five lines long.
-- HK416, 5.56. Controllable, but it gets lively on full auto.
return {
	Class = "Rifle",
	Fire = { RPM = 800, Modes = { "Auto", "Semi" }, MuzzleVelocity = 880, TracerEvery = 3 },
	Ammo = { Magazine = 30, Reserve = 90, Chamber = true },
	Damage = { Head = 150, Torso = 60, Limb = 38 },
	Handling = { Mass = 3.6, AimTime = 0.3, AimFov = 60 },
	SlideTravel = CFrame.new(0, 0, -0.4),
	Attachments = { Sight = "EOTech", UnderBarrel = "Vertical Grip", Other = "AN PEQ" },
}
Units: distances in studs, angles in degrees, bullet speed in meters per second, time in seconds, mass in kilograms.
Damage, fire rate, magazine size, spare ammo, bullet speed, aim time and overall recoil can also be changed per preset on the dashboard. Everything else is Studio only. A value you edit in a Config beats the website for that one value.
Top level
| Setting | Default | What it does |
|---|---|---|
Class | "Rifle" | The kind of weapon: "Pistol", "SMG", "Rifle", "DMR", "Shotgun", "Sniper", "Launcher", "Melee" or "Grenade". It picks the default gunshot sound and how far bullets go through walls (see Bullets and walls). Pistols also mount lights and lasers under the barrel instead of on the side. |
Kind | "Gun" | "Melee" for knives and "Grenade" for anything thrown or placed. Leave it out for guns and launchers. |
Model | the folder name | The name of the model in XSF.Assets.GunModels. Only needed when it doesn't match the folder name. |
Feed | magazine | How it reloads, when it isn't a normal magazine: "Stripper" (Kar98k, Mosin), "Revolver" (686), "Breech" (M320), "Muzzle" (RPG-7). See Reloads and feeds. |
ShellInsert | false | true loads one shell at a time, like the pump shotguns. The HUD then counts spare shells instead of magazines. |
SlideTravel | CFrame.new(0, 0, -0.4) | How far the slide, bolt or charging handle moves back when the gun cycles. Pistols use small values like -0.05. |
SlideLock | true | The slide or bolt stays back when the gun runs empty, like a real pistol. false for guns that don't do that (revolvers, some SMGs). |
ShellColor, ShellSize | brass | Colour and size of the ejected case. Shotguns use red shells. |
Attachments | {} | What the gun comes with, by slot: { Sight = "Acog", Barrel = "Suppressor" }. These are always free, even with unlocks on. See Attachments. |
Sounds | class sounds | The gun's own sounds. See Sounds below. |
Fire
| Setting | Default | What it does |
|---|---|---|
Fire.RPM | 700 | Rounds per minute. 600 is 10 shots a second. The server enforces this, so a modified client can't fire faster. |
Fire.Modes | { "Semi" } | Fire modes the player can switch between with V: "Auto", "Semi", "Burst", "Pump", "Bolt". The first one is where it starts. Pump and Bolt make the player cycle the action between shots. |
Fire.Burst | 3 | Rounds per trigger pull in Burst mode. |
Fire.MuzzleVelocity | 850 | Bullet speed in meters per second. Faster bullets drop less and arrive sooner. Pistols are around 250 to 470, rifles 700 to 970. |
Fire.Dispersion | 0.04 | Random spread in degrees for every shot, even when aiming. Snipers use about 0.008. |
Fire.Pellets | 1 | Projectiles per shot. Shotguns use 8. Damage is per pellet. |
Fire.PelletSpread | 0 | Extra spread in degrees for each pellet, added on top of Dispersion. The 870 uses 3.2. |
Fire.TracerEvery | 3 | Every Nth round is a visible tracer. 1 makes every round a tracer, 0 turns tracers off (snipers, pistols and shotguns ship with 0). |
Fire.Zero | 100 | The range in studs the sights are zeroed to. Bullets cross the line of sight at this distance. |
Fire.ZeroSteps | nil | A list of zero ranges the player can step through with ] and [, like { 100, 200, 300, 400 }. See Zeroing. |
Fire.Penetration | from Class | Overrides how much wall the bullet can go through. See Bullets and walls. |
Ammo
| Setting | Default | What it does |
|---|---|---|
Ammo.Magazine | 30 | Rounds in a full magazine (or tube, belt, cylinder). |
Ammo.Reserve | 90 | Spare rounds the player spawns with, on top of the full magazine. |
Ammo.Chamber | true | Reloading before the magazine is empty keeps one round in the chamber, so a 30 round gun holds 31. Closed bolt rifles and pistols use this. Bolt actions, revolvers and open bolt guns don't. |
Damage
| Setting | Default | What it does |
|---|---|---|
Damage.Head | 120 | Damage for a head hit. |
Damage.Torso | 45 | Damage for a hit to the upper or lower torso (or Torso on R6) and the root part. |
Damage.Limb | 30 | Damage for arms, hands, legs and feet. |
Damage.FalloffStart | 150 | Distance in studs where damage starts to drop. |
Damage.FalloffEnd | 600 | Distance where it reaches its lowest. |
Damage.MinMultiplier | 0.6 | What damage drops to at FalloffEnd and beyond. 0.6 means 60% of the base. |
Characters have 100 health by default (Roblox's normal MaxHealth), so a Torso value of 34 is a three shot kill and 50 is a two shot kill. Shotgun values are per pellet, so the 870's 28 torso with 8 pellets is 224 if every pellet lands. The whole damage chain is in How damage works.
Handling
| Setting | Default | What it does |
|---|---|---|
Handling.Mass | 3.5 | Weight in kilograms. Heavier guns swing slower, lag more when you turn and settle slower after recoil. |
Handling.AimTime | 0.28 | Seconds to raise the sights. Magnified sights and grips change this (see Attachments). |
Handling.AimFov | 60 | Field of view while aiming with iron sights or a red dot. Lower zooms in more. Magnified sights replace this with their own. |
Handling.EyeRelief | 0.85 | How far your eye sits behind the sight when aiming, in studs. Lower brings the sight closer to your face. |
Handling.Scoped | false | true makes the gun's own sight work like a scope (scope view and zoom) with no sight attachment. The AUG, SVD and M82 use this for their built in optics. |
Handling.ScopeFill | 0.8 | For scopes, how much of the screen the scope picture fills when aimed. |
Handling.HipConvergence | 60 | At the hip, the barrel is angled so bullets cross the centre of the view this many studs away. |
Handling.HipOffset | CFrame.new(0.12, -0.22, -0.55) | Where the gun sits on screen when not aiming. X is right, Y is up, negative Z is forward. |
Handling.HipPivot, Handling.AimPivot | near the grip | The point the gun turns around for sway and recoil, at the hip and when aiming. Move it back toward the stock for long guns. |
Handling.ReloadSpeed | 1 | Speed multiplier for reload animations. 0.75 is a quarter slower (the revolver), 1.2 is 20% faster. |
Handling.Inspect | generic | The gun's own inspect (I), as keyframes. See below. |
Handling.Bolt | nil | Bolt actions: where the hand grabs the bolt and how it turns and pulls. See Reloads and feeds. |
Handling.LeftHandShift | nil | Moves where the support hand grabs the gun, in studs along the gun. Vector3.new(0, 0, 0.3) moves it 0.3 back toward you, a negative Z moves it forward. Use it when the hand covers the muzzle or grabs a part it shouldn't. |
Handling.LeftHand | found automatically | false takes the support hand off the gun completely. A CFrame places it exactly, in the gun's Handle space. |
Recoil and Sway
These two tables have the most numbers and the most effect on feel, so they have their own page: Recoil and sway.
Inspect keyframes
The inspect animation is a short list of poses the gun moves through. Each keyframe has a rotation (Rot, degrees of pitch, yaw and roll), a move (Pos, studs) and how long to take getting there and holding (Hold, seconds). The last keyframe should always be all zeros, so the gun ends back where it started.
Handling = { Mass = 2.7, AimTime = 0.22, AimFov = 62,
	-- the Vector is short: the support hand holds the front of the frame, behind the muzzle
	LeftHandShift = Vector3.new(0, 0, 0.42),
	-- inspect keyframes: turn (degrees pitch, yaw, roll), move (studs) and hold (seconds)
	Inspect = {
		{ Rot = Vector3.new(-8, 52, 12), Pos = Vector3.new(-0.26, 0.18, -0.42), Hold = 0.9 },
		{ Rot = Vector3.new(8, 36, -6), Pos = Vector3.new(-0.22, 0.26, -0.45), Hold = 0.5 },
		{ Rot = Vector3.new(14, -26, -40), Pos = Vector3.new(-0.12, 0.22, -0.36), Hold = 0.95 },
		{ Rot = Vector3.new(0, 0, 0), Pos = Vector3.new(0, 0, 0), Hold = 0.4 },
	},
},
A good inspect is three or four keyframes: turn the gun to show its side, tilt it the other way, roll it to show the top or the ejection port, then return. Copy one from a gun of similar size and adjust. Longer guns need more negative Z in Pos so they don't clip into the camera.
Sounds
Every gun gets a gunshot from its class, plus generic handling sounds (mag out, mag in, slide, bolt, click when empty). Override any of them in Sounds.
| Key | What it is |
|---|---|
Fire | The shot. One sound id, or a list of takes like { 111, 222, 333 }. XSF picks a random take every shot, so a burst never repeats the same recording. Everyone hears it, not just the shooter. |
FireSuppressed | Replaces Fire while a suppressor is fitted. One id or a list of takes, picked at random like Fire. |
FireThird | What other players hear, if you want it different from what the shooter hears. One id or a list of takes. |
Tail | The echo XSF adds on top of the shot: outdoors for the shooter, and for anyone hearing the shot from more than 40 studs away. false turns it off for this gun, which you want when your recording already has its own echo baked in (otherwise you hear it twice). A number scales it, like 0.5 for half. Leave it out to keep XSF's. Rooms still add their own reverb either way. |
Pitch, Volume | Multiply the shot (1 is unchanged). |
Cut | Stops each take after this many seconds, for samples with a long tail. |
Fade | Seconds the shot fades out over once it reaches Cut, instead of the automatic 0.05 to 0.18. Beats Audio.CutFade in GameConfig for this gun. |
Draw, MagOut, MagIn, AimUp, AimDown, Click, SlidePull, SlideRelease, BoltOpen, BoltClose, ClipIn, CylinderOut, CylinderIn, Eject | Handling sounds. Each is a table: { Id = 123, Volume = 0.6, Pitch = 1, Cut = 0.9 }. Only Id is required. |
Sounds = {
	Fire = { 9118163044, 9118163100 }, -- two takes, picked at random
	FireSuppressed = 9118164000,
	Pitch = 0.9, Volume = 1.1, Cut = 0.45,
	Tail = false, -- these takes already have their own echo
	MagIn = { Id = 873135562, Volume = 0.8, Pitch = 0.9 },
},
Every gun added in 2.0 already has its own shot. Use sounds you own or free sounds from the Creator Store, otherwise Roblox may block them in your game.
Knife and grenade settings
Knives use Melee (see Knives), grenades and placed explosives use Grenade (see Grenades and Explosives), and launchers use Projectile (see Explosives).
Every weapon's stats #
Every number below is read straight from the Configs that ship with 2.1.0. Use it to balance your game, or to pick guns for a loadout without opening 59 files.
- Body shots to kill assumes 100 health, no armour, FMJ, close range (before falloff) and, for shotguns, every pellet landing.
- Falloff: "150 to 500 (x0.6)" means full damage up to 150 studs, dropping in a straight line to 60% at 500 studs, and 60% beyond that.
- Kg (mass) and aim time decide how heavy the gun feels and how fast it gets on target.
- Ships with is the attachments the gun comes with, which are always free.
Rifles and machine guns
| Name | RPM | Modes | m/s | Mag / spare | Head / body / limb | Body shots to kill | Falloff | Kg | Aim time | Ships with |
|---|---|---|---|---|---|---|---|---|---|---|
FAL | 650 | Auto, Semi | 840 | 20 / 80 | 185 / 72 / 46 | 2 | 150 to 500 (x0.6) | 4.3 | 0.3 s | nothing. Zero steps: 100, 200, 300, 400, 500, 600 |
M14 | 700 | Semi, Auto | 850 | 20 / 80 | 185 / 72 / 46 | 2 | 150 to 500 (x0.6) | 4.5 | 0.3 s | nothing. Zero steps: 100, 200, 300, 400, 500, 600 |
SCAR | 600 | Auto, Semi | 714 | 20 / 80 | 185 / 72 / 46 | 2 | 150 to 500 (x0.6) | 3.9 | 0.33 s | nothing |
AK47 | 600 | Auto, Semi | 715 | 30 / 90 | 170 / 68 / 42 | 2 | 150 to 600 (x0.6) | 3.9 | 0.32 s | nothing |
PKM | 650 | Auto | 825 | 100 / 200 | 165 / 64 / 42 | 2 | 150 to 500 (x0.6) | 7.5 | 0.45 s | nothing |
HK33 | 750 | Auto, Semi | 870 | 25 / 75 | 150 / 60 / 33 | 2 | 150 to 600 (x0.6) | 3.9 | 0.32 s | Acog |
HK416 | 800 | Auto, Semi | 880 | 30 / 90 | 150 / 60 / 38 | 2 | 150 to 600 (x0.6) | 3.6 | 0.3 s | EOTech, Vertical Grip, AN PEQ |
M4A1 | 850 | Auto, Semi | 880 | 30 / 120 | 145 / 58 / 36 | 2 | 150 to 600 (x0.6) | 3.3 | 0.28 s | EOTech, AN PEQ |
AUG | 700 | Auto, Semi | 970 | 30 / 90 | 145 / 54 / 36 | 2 | 150 to 600 (x0.6) | 3.6 | 0.3 s | nothing |
FAMAS | 1000 | Auto, Burst, Semi | 960 | 25 / 100 | 140 / 52 / 35 | 2 | 150 to 600 (x0.6) | 3.6 | 0.3 s | nothing |
G36C | 750 | Auto, Semi | 850 | 30 / 120 | 140 / 52 / 35 | 2 | 150 to 600 (x0.6) | 2.8 | 0.3 s | nothing |
GALIL | 650 | Auto, Semi | 950 | 35 / 140 | 140 / 52 / 35 | 2 | 150 to 600 (x0.6) | 4 | 0.3 s | nothing |
TAR21 | 850 | Auto, Semi | 910 | 30 / 120 | 140 / 52 / 35 | 2 | 150 to 600 (x0.6) | 3.3 | 0.3 s | Reflex |
AK12 | 650 | Auto, Burst, Semi | 880 | 30 / 120 | 138 / 50 / 34 | 2 | 150 to 600 (x0.6) | 3.3 | 0.3 s | nothing |
AKS74U | 700 | Auto, Semi | 735 | 30 / 120 | 138 / 50 / 34 | 2 | 150 to 600 (x0.6) | 2.7 | 0.3 s | nothing |
M249 | 800 | Auto | 915 | 100 / 200 | 130 / 50 / 34 | 2 | 120 to 400 (x0.6) | 7.5 | 0.45 s | Bipod |
SMGs
| Name | RPM | Modes | m/s | Mag / spare | Head / body / limb | Body shots to kill | Falloff | Kg | Aim time | Ships with |
|---|---|---|---|---|---|---|---|---|---|---|
MAC10 | 1090 | Auto | 280 | 30 / 120 | 118 / 40 / 28 | 3 | 45 to 170 (x0.6) | 2.8 | 0.2 s | nothing |
THOMPSON | 700 | Auto, Semi | 285 | 30 / 120 | 118 / 40 / 28 | 3 | 45 to 170 (x0.6) | 4.9 | 0.26 s | nothing |
UMP45 | 600 | Auto, Semi | 285 | 25 / 100 | 118 / 40 / 28 | 3 | 45 to 170 (x0.6) | 2.5 | 0.23 s | nothing |
Vector | 1100 | Auto, Semi | 290 | 25 / 100 | 110 / 38 / 26 | 3 | 50 to 180 (x0.6) | 2.7 | 0.22 s | nothing |
MP40 | 550 | Auto | 400 | 32 / 128 | 100 / 34 / 24 | 3 | 50 to 180 (x0.6) | 4 | 0.24 s | nothing |
MP5 | 800 | Auto, Semi | 400 | 30 / 120 | 100 / 34 / 24 | 3 | 60 to 200 (x0.6) | 2.6 | 0.24 s | Suppressor, Flashlight |
UZI | 600 | Auto, Semi | 400 | 32 / 128 | 100 / 34 / 24 | 3 | 50 to 180 (x0.6) | 3.5 | 0.22 s | nothing |
MP7 | 950 | Auto, Semi | 735 | 40 / 160 | 96 / 33 / 23 | 4 | 70 to 230 (x0.6) | 1.9 | 0.2 s | nothing |
P90 | 900 | Auto, Semi | 715 | 50 / 150 | 92 / 31 / 22 | 4 | 65 to 220 (x0.6) | 2.6 | 0.22 s | nothing |
BIZON | 680 | Auto, Semi | 320 | 64 / 192 | 92 / 30 / 21 | 4 | 45 to 160 (x0.6) | 2.7 | 0.22 s | nothing |
Snipers
| Name | RPM | Modes | m/s | Mag / spare | Head / body / limb | Body shots to kill | Falloff | Kg | Aim time | Ships with |
|---|---|---|---|---|---|---|---|---|---|---|
M82 | 120 | Semi | 853 | 10 / 30 | 500 / 190 / 120 | 1 | 1000 to 2500 (x0.9) | 13 | 0.6 s | Bipod. Zero steps: 100, 200, 300, 400, 600, 800, 1000, 1500 |
AWM | 40 | Bolt | 936 | 5 / 25 | 400 / 150 / 100 | 1 | 800 to 2000 (x0.85) | 6.5 | 0.5 s | PM II, Bipod. Zero steps: 100, 200, 300, 400, 600, 800, 1000 |
KAR98 | 45 | Bolt | 760 | 5 / 30 | 300 / 115 / 75 | 1 | 500 to 1200 (x0.8) | 4.1 | 0.42 s | nothing. Zero steps: 100, 200, 300, 400, 600, 800 |
MOSIN | 45 | Bolt | 865 | 5 / 30 | 300 / 112 / 74 | 1 | 500 to 1200 (x0.8) | 4.2 | 0.42 s | nothing. Zero steps: 100, 200, 300, 400, 600, 800 |
R700 | 45 | Bolt | 850 | 10 / 30 | 300 / 110 / 80 | 1 | 600 to 1500 (x0.8) | 4.4 | 0.42 s | PM II, Bipod. Zero steps: 100, 200, 300, 400, 600, 800 |
SVD | 280 | Semi | 830 | 10 / 40 | 290 / 105 / 70 | 1 | 600 to 1500 (x0.8) | 4.3 | 0.42 s | nothing. Zero steps: 100, 200, 300, 400, 600, 800, 1000 |
Shotguns
| Name | RPM | Modes | m/s | Mag / spare | Head / body / limb | Body shots to kill | Falloff | Kg | Aim time | Ships with |
|---|---|---|---|---|---|---|---|---|---|---|
DBS | 400 | Semi | 400 | 2 / 24 | 66 / 31 / 18 x8 pellets | 1 | 18 to 70 (x0.2) | 3.4 | 0.3 s | nothing |
M870 | 70 | Pump | 400 | 7 / 21 | 60 / 28 / 16 x8 pellets | 1 | 25 to 90 (x0.25) | 3.6 | 0.3 s | nothing |
AA12 | 300 | Auto | 400 | 8 / 32 | 54 / 25 / 15 x8 pellets | 1 | 22 to 80 (x0.25) | 5.2 | 0.3 s | nothing |
SPAS12 | 75 | Pump | 400 | 8 / 24 | 54 / 25 / 15 x8 pellets | 1 | 22 to 80 (x0.25) | 4.4 | 0.3 s | nothing |
M1014 | 220 | Semi | 400 | 7 / 28 | 52 / 24 / 14 x8 pellets | 1 | 22 to 80 (x0.25) | 3.8 | 0.3 s | nothing |
Pistols
| Name | RPM | Modes | m/s | Mag / spare | Head / body / limb | Body shots to kill | Falloff | Kg | Aim time | Ships with |
|---|---|---|---|---|---|---|---|---|---|---|
Deagle | 200 | Semi | 470 | 7 / 35 | 190 / 70 / 45 | 2 | 50 to 200 (x0.6) | 2.0 | 0.24 s | nothing |
R686 | 150 | Semi | 440 | 6 / 36 | 180 / 64 / 40 | 2 | 45 to 170 (x0.6) | 1.2 | 0.22 s | nothing |
M1911 | 380 | Semi | 253 | 7 / 42 | 140 / 46 / 30 | 3 | 40 to 150 (x0.6) | 1.1 | 0.2 s | nothing |
CZ75 | 460 | Semi | 370 | 16 / 64 | 100 / 34 / 24 | 3 | 50 to 180 (x0.6) | 1 | 0.2 s | nothing |
FIVESEVEN | 480 | Semi | 650 | 20 / 80 | 96 / 34 / 24 | 3 | 60 to 200 (x0.6) | 1 | 0.2 s | nothing |
M92 | 450 | Semi | 381 | 15 / 60 | 100 / 34 / 24 | 3 | 50 to 180 (x0.6) | 1 | 0.2 s | nothing |
USP | 450 | Semi | 270 | 12 / 60 | 90 / 32 / 22 | 4 | 40 to 150 (x0.6) | 0.9 | 0.18 s | nothing |
G17 | 480 | Semi | 375 | 17 / 68 | 80 / 28 / 19 | 4 | 35 to 140 (x0.6) | 0.75 | 0.16 s | nothing |
Knives
| Name | Head / body / limb | Range | Time between slashes | Hits after | Notes |
|---|---|---|---|---|---|
KUKRI | 100 / 58 / 40 | 6.2 studs | 0.85 s | 0.24 s | Chops harder than any other knife, and swings slowest. |
BOWIE | 85 / 50 / 35 | 6 studs | 0.72 s | 0.2 s | Long blade, heavy cuts. |
M9 | 78 / 47 / 33 | 5.8 studs | 0.7 s | 0.18 s | Longer reach, a little slower. |
KaBar | 75 / 45 / 32 | 5.5 studs | 0.65 s | 0.18 s | The classic fighting knife. |
Knife | 75 / 45 / 32 | 5.5 studs | 0.65 s | 0.18 s | The original XSF knife. |
Karambit | 70 / 40 / 30 | 5 studs | 0.5 s | 0.18 s | Short reach, very fast hooking cuts. |
Balisong | 65 / 38 / 28 | 5 studs | 0.45 s | 0.18 s | The fastest knife. |
Every knife does four times damage from behind, so any knife is a one hit kill in the back. See Knives.
Grenades and explosives
| Name | Type | Damage | Radius | Fuse | Carried | Notes |
|---|---|---|---|---|---|---|
M67 | Frag | 180 | 28 studs | 4.5 s, cooks in hand | 2 | Thrown at 95, lobbed at 45. |
Flashbang | Flash | none | 45 studs | 1.8 s after the throw | 2 | Blinds anyone looking toward it and deafens everyone nearby. |
M18 | Smoke | none | 22 studs | 2 s after the throw | 2 | Smoke lasts 35 seconds. |
C4 | Charge | 300 | 22 studs | when you set it off | 3 | Up to 4 out at once. |
Claymore | Mine | 240 | 20 studs, 60° fan | arms after 2 s, trips at 8 studs | 2 | Up to 2 out at once. Behind it takes 10%. |
RPG7 | Rocket | 260 blast, 120 direct | 24 studs | arms after 18 studs | 1 + 3 | Speeds up from 45 to 110 m/s. |
M320 | 40mm | 190 blast, 90 direct | 16 studs | arms after 14 studs | 1 + 6 | 76 m/s on a high arc. Range ladder 50 to 300. |
Blast damage is the most it does at the centre. It falls off with distance and stops behind cover. See Explosives.
Recoil and sway #
Recoil is what makes guns feel different more than any other setting. XSF's recoil has three separate parts, and once you know which is which, tuning a gun takes minutes instead of hours.
- The gun's kick (
Pitch,Yaw,Roll,Back,Rise,Shake): how the gun model jumps in your hands each shot. It looks violent but springs back, so it doesn't move where you're aiming. - The screen kick (
Kick): a quick jolt of the camera that also springs back. - The climb (
Climb,ClimbYaw,Recovery,Pattern): how far your aim actually moves each shot. This is what players have to pull down against, and it's what decides how controllable a gun is.
All three get stronger as the gun heats up during a long burst, and all three are scaled by stance (crouch, prone, bipod) and attachments.
Every recoil setting
| Setting | Default | What it does |
|---|---|---|
Recoil.Pitch | { 2.6, 3.4 } | How far the gun model tips up each shot, in degrees. A random number between the two. |
Recoil.Yaw | { -1.2, 1.2 } | How far it twists left or right each shot. |
Recoil.YawBias | 0.25 | Pushes the sideways kick and climb toward one side. Positive drifts right, negative left. |
Recoil.Roll | { -2.5, 2.5 } | How much it rolls on its side each shot. |
Recoil.Back | 0.16 | How far it pushes back into your shoulder, in studs. |
Recoil.Rise | 0.03 | How far it lifts up, in studs. |
Recoil.Shake | 0.9 | A random shake on top, for buzz on fast firing guns. |
Recoil.RotSpring, PosSpring, ShakeSpring | { 6.5, 0.36 }, { 9, 0.45 }, { 15, 0.2 } | The springs that bring the gun back: { speed, damping }. Higher speed snaps back faster. Lower damping bounces more, higher damping settles without bouncing. |
Recoil.Kick | 1.2 | How hard the camera jolts each shot. |
Recoil.KickSpring | { 8, 0.5 } | The spring for the camera jolt. |
Recoil.Climb | { 0.45, 0.7 } | How far your aim climbs per shot, in degrees. The number that matters most for control. |
Recoil.ClimbYaw | { -0.22, 0.28 } | How far your aim drifts sideways per shot. |
Recoil.Recovery | 0.3 | How fast the aim settles back down after you stop firing. |
Recoil.HeatPerShot | 0.07 | How much each shot heats the gun. Each point of heat adds to every part of the recoil, so shot 10 of a burst kicks harder than shot 1. |
Recoil.HeatMax | 1.6 | The most heat it can build. At max, recoil is 2.6 times the first shot. |
Recoil.HeatDecay | 2.2 | How fast heat drains when you stop firing, per second. When it's fully drained the pattern starts again from shot one. |
Recoil.Aim | { Weapon = 0.42, Shake = 0.55, Kick = 1, Climb = 0.85 } | Multipliers while aiming down sights. By default aiming cuts the visible gun kick to 42% and the climb to 85%. |
Recoil.Pattern | generated | The climb pattern, shot by shot. See below. |
Patterns
Every gun climbs in the same pattern every time, so players can learn to pull against it, like in CS. You don't have to make one. If a gun has no Pattern, XSF generates one from the gun's model name: the first three shots go straight up, then a side to side drift grows in over the next few shots and weaves from there. Two guns with different names get different patterns, and the same gun always gets the same one.
To write your own, give a list of { up, sideways } per shot. up multiplies the gun's average climb (1 is normal), sideways is a share of the gun's widest ClimbYaw (1 is all the way right, -1 all the way left). The last entry repeats for longer bursts. Three quarters of the climb follows the pattern and a quarter stays random, so it never feels robotic.
Recoil = {
	Climb = { 0.5, 0.7 },
	ClimbYaw = { -0.3, 0.3 },
	-- up, then pull right, then snake left
	Pattern = {
		{ 1, 0 }, { 1.1, 0 }, { 1.1, 0.2 }, { 1, 0.5 }, { 0.9, 0.8 },
		{ 0.9, 0.4 }, { 0.8, -0.2 }, { 0.8, -0.7 }, { 0.8, -0.9 }, { 0.8, -0.4 },
	},
},
What lowers recoil
| Source | Effect |
|---|---|
| Crouching | All recoil x0.8 (Stances.Brace.Crouch) |
| Prone | x0.62 |
| Prone with a bipod | x0.42 |
| Sliding | x1.25, so it gets worse |
| Aiming | The Recoil.Aim multipliers |
| Vertical Grip | Up kick and climb x0.88 |
| Angled Grip | Sideways kick and climb x0.88 |
| Compensator | Sideways x0.8 |
| Muzzle Brake | Up x0.85, push back x0.9 |
| Suppressor | Up x0.9, push back x0.85 |
| Subsonic ammo | Up x0.9, push back x0.9 |
| Dashboard Recoil slider | Everything times the slider value |
They all multiply together. A crouched player with a Muzzle Brake and a Vertical Grip has 0.8 x 0.85 x 0.88, about 60% of the standing climb.
Tuning a gun in five minutes
- In a Studio playtest, hold the gun and press F4.
- Fire full auto at a wall from 50 studs and watch where the bullet holes land.
- Too hard to control? Lower
Climbfirst. Too easy? Raise it. This is 80% of the work. - Drifts too much sideways? Narrow
ClimbYawor moveYawBiastoward 0. - Gets out of hand too quickly in long bursts? Lower
HeatPerShotorHeatMax. - Looks too tame? Raise
Pitch,BackandKick. These change how it looks and feels without changing how hard it is to control. - Press PRINT TO OUTPUT and paste the result into the gun's Config.
Sway
Sway is how the gun moves when you turn, walk and breathe, separate from shooting. Players can scale it with the Motion settings, you set the per gun shape here.
| Setting | Default | What it does |
|---|---|---|
Sway.InertiaMax | 7 | The most the gun can lag behind when you turn fast, in degrees. |
Sway.InertiaGain | 0.018 | How much turning speed turns into lag. |
Sway.InertiaSpring | { 4.2, 0.42 } | How the lag settles. |
Sway.InertiaRoll | 0.9 | How much the gun rolls into turns. |
Sway.LeadMax, LeadGain, LeadPeek, LeadSpring | 6, 0.03, 1.6, { 2.2, 0.85 } | The muzzle leading ahead into a turn: how far, how quickly, how much it peeks out, and how it settles. |
Sway.MoveSpring | { 5, 0.5 } | How the gun reacts to starting and stopping. |
Sway.BreathAmount | 0.35 | Breathing sway while still. Snipers use 0.5. |
Sway.AimMultiplier | 0.35 | All sway is multiplied by this while aiming. |
Heavy guns (snipers, machine guns) ship with a higher InertiaMax and InertiaGain. If a light gun feels too floaty, lower Handling.Mass first, it affects everything at once.
Adding a gun #
Adding your own gun is mostly a model and a copied folder. XSF fits the hands, the attachments and the animations to it by itself.
What the model needs
Put the model in XSF.Assets.GunModels. Inside it, XSF looks for these by name:
| Name | Type | Required? | What it's for |
|---|---|---|---|
Handle | Part | Yes | Where the right hand holds the gun. Everything is measured from it. Its front face should point down the barrel. |
AimPart | Part | Yes | Where your eye lines up when aiming with iron sights. Put it right behind the rear sight, centred on the bore line. |
Muzzle | Attachment inside Handle | Yes | Where bullets, flash and smoke come out. |
Chamber | Attachment inside Handle | No | Where the ejection port is, if you want to place it exactly. |
Mag | Part (or model) | For XSF reloads | The magazine. XSF's own reload animation grabs this part, drops it and brings a new one in. Without it the gun uses its imported reload. |
Slide or Bolt | Motor6D inside Handle | No | A Motor6D named Slide (or Bolt) that connects the Handle to the moving part. XSF drives it back when the gun cycles, and SlideTravel in the Config sets how far. |
Nodes | Folder of parts | For attachments | One part per slot the gun takes attachments in: Sight, Barrel, UnderBarrel, Other. Place each where that attachment should sit (on the rail, at the muzzle, under the handguard, on the side rail). A gun without a node for a slot simply doesn't offer that slot. |
ACS gun models already have Handle, AimPart, Muzzle and Nodes, which is why they drop in so easily.
The steps
- Put the model in
XSF.Assets.GunModels. - Copy the weapon folder in
XSF.Weaponsthat's closest to your gun (an SMG for an SMG, a bolt action for a bolt action) and rename it. The folder name is what goes inLoadout. - If the model's name is different from the folder name, add
Model = "YourModelName"to the Config. - Change the Config: damage, fire rate, magazine, mass, recoil. Delete anything you don't need, like the copied
Inspect, if it doesn't suit the new shape. - Add the folder name to
Loadoutand press Play. The hands find the grip on their own. - Press F6 to run the self test on it. It catches a missing Handle, a missing Anims module and bad Config values.
Model attributes
Set these on the gun model itself (select it, then Attributes at the bottom of Properties) when the defaults don't suit it.
| Attribute | Type | What it does |
|---|---|---|
XSF_AttFit | boolean | true seats attachments from their real shape instead of snapping their centre to the node. Sights sit on top of the rail, grips hang under it, muzzle devices thread onto the end. This is what lets one ACOG fit every gun. Turn it on for your own guns unless your nodes are already placed exactly. |
XSF_AttScale | number | Scales every attachment on this gun. Use it when your gun is built bigger or smaller than XSF's guns. 1.2 makes attachments 20% bigger. |
XSF_SightRiser | number | Extra height under sights, in studs (0.015 by default), for guns with tall front sights that would block the view. |
XSF_Class | string | Picks a matching set of attachment models from XSF.Assets.AttModels.<Class> if you make one (for example a smaller pistol suppressor in AttModels.Pistol). |
XSF_GripWrap | boolean | true closes the shooting hand into a fixed fist. See Hands and grips. |
XSF_GripReach | number | How far XSF may slide the hand looking for the grip. See Hands and grips. |
Animations
Every weapon folder needs an Anims ModuleScript next to its Config. When you copy a folder you copy that too. With Animations = "XSF" (the default), magazine guns use XSF's own draw, reload, inspect and jam clearing, built from the gun's real Mag part, so you don't need to animate anything. Use the ACS importer if you have hand made ACS animations you'd rather keep.
Skins on your gun
Skins paint parts by name. Parts called Polymer, Wood or Leather count as furniture, Steel and Bolt as metal, Mag as the magazine, Blade as a knife blade, and BlackSteel, Slide, Stainless and Tan as the body. Anything else counts as body, except glass and neon parts, parts called Rubber and see through parts, which are left alone. See Skins.
Common problems
- The gun points the wrong way or sits sideways. The Handle's front face isn't pointing down the barrel. Rotate the Handle (not the whole model) so its LookVector runs along the barrel, then re-weld.
- Aiming looks off to the side. Move
AimPartso it's centred on the sights, or raise it if you're looking at the top of the gun. - Bullets come out of the wrong place. Move the
Muzzleattachment to the end of the barrel. - Attachments float or sink. Turn on
XSF_AttFit, or move the part inNodes. - The hand doesn't close on the grip. Set
XSF_GripWrap = true.
Importing ACS guns #
If you have an ACS gun with its animations, XSF can convert it into an XSF weapon folder for you, animations included. You need the optional XSF_Tools folder from the download in ServerStorage. Run it in Studio while the game is stopped, not during Play.
- Put the gun model in
XSF.Assets.GunModels. - Put its
ACS_Animationsmodule anywhere in ServerStorage. - Open the command bar (View > Command Bar) and paste this, changing the path and the name:
require(game.ServerStorage.XSF_Tools.ImportACS).weapon(game.ServerStorage.ACS_Animations, "YourGun")This creates XSF.Weapons.YourGun with the converted animations and a starting Config. Open the Config, set the real stats (damage, RPM, magazine, class) and add it to your loadout.
After importing
- With
Animations = "XSF", XSF's own reload is used for magazine guns if the model has aMagpart, and the imported clips are used for everything else. SetAnimations = "Imported"to always use the ACS clips. - ACS guns are often built at a different size. If attachments look too big or small, set
XSF_AttScaleon the model. - Delete the ACS scripts that came inside the model (anything that isn't a part, a weld or an attachment). XSF doesn't need them, and old ACS scripts can error.
- You can delete
XSF_Toolsagain when you're done. It never runs in a live game either way.
Attachments #
Guns take one attachment per slot. There are five attachment slots plus skins:
| Slot | Included |
|---|---|
| Sight | Reflex, EOTech, Aimpoint, Acog, TA33 Acog, PM II, Night Vision, Thermal |
| Barrel | Suppressor, Flash Hider, Compensator, Muzzle Brake |
| UnderBarrel | Vertical Grip, Angled Grip, Bipod |
| Other | Laser, Flashlight, AN PEQ (on pistols these mount under the barrel) |
| Ammo | FMJ, Hollow Point, Armor Piercing, Subsonic |
| Skin | 108 skins, see Skins |
What each one does
| Attachment | Slot | Effect |
|---|---|---|
| Reflex | Sight | Small open red dot. No zoom, keeps the gun's own aim speed. |
| EOTech | Sight | Holographic sight with a wide window. No zoom. |
| Aimpoint | Sight | Tube red dot. No zoom. |
| Acog | Sight | Aim FOV 22 (about 3x). Aiming takes 15% longer. |
| TA33 Acog | Sight | Aim FOV 26 (about 2.5x). Aiming takes 10% longer. |
| PM II | Sight | Aim FOV 12 (about 6x) with a full scope view. Aiming takes 25% longer. |
| Night Vision | Sight | Aim FOV 26. Image intensifier: dark rooms and night maps turn readable in green. Aiming takes 15% longer. |
| Thermal | Sight | Aim FOV 22. White hot thermal: people glow through smoke and shadow, the world goes grey. Aiming takes 20% longer. |
| Suppressor | Barrel | Quiet shot for everyone, no muzzle flash. 10% less climb, 15% less push back, 5% less damage and bullet speed. |
| Flash Hider | Barrel | Hides the muzzle flash. No other change. |
| Compensator | Barrel | 20% less sideways recoil. |
| Muzzle Brake | Barrel | 15% less climb and 10% less push back. |
| Vertical Grip | UnderBarrel | 12% less climb. The support hand holds the grip. |
| Angled Grip | UnderBarrel | 12% less sideways recoil and 8% faster aiming. The support hand holds the grip. |
| Bipod | UnderBarrel | While prone, recoil drops to the Stances.Brace.Bipod value (0.42) instead of 0.62. |
| Laser | Other | Visible laser beam and dot, seen by everyone. Toggle with K. |
| Flashlight | Other | Weapon light, seen by everyone. Toggle with L. |
| AN PEQ | Other | Laser and light in one. |
Ammo types are in Ammo types.
Effects stack across slots by multiplying. A Muzzle Brake and a Vertical Grip together give 0.85 x 0.88 climb, so about 25% less.
Who gets which attachment
Three things decide whether a player can pick an attachment on a gun:
- The gun has to take it. It needs a node for that slot.
- Your rules allow it.
Customization.Slots,AllowedandBlockedin GameConfig. - The player owns it. With
Customization.Ownershipon (the default), players only get attachments you give them, plus anything inCustomization.Starter, plus whatever the gun comes with in its Config. See Unlocks.
Setting them from a script
Server scripts can fit anything with XSF.SetAttachments, skipping all of the rules above. Good for classes, events and NPCs:
local XSF = require(game.ServerScriptService.XSF.Server)
XSF.SetAttachments(player, "HK416", {
	Sight = "Acog",
	Barrel = "Suppressor",
	UnderBarrel = "Angled Grip",
	Ammo = "Armor Piercing",
})
Slots you leave out of the table are emptied, so include everything you want the gun to keep.
Adding your own attachment
- Put the model in
XSF.Assets.AttModels, named exactly what it'll be called in game. It needs a part calledMain. - Sights also need
AimPos(where the eye goes) andSightMark(the reticle). Muzzle devices needBarrelPos(the new muzzle). Lights needFlashPoint, lasersLaserPoint. - Give it a line in the attachment list (the
Listtable at the top ofXSF.Shared.Attachments) with its slot and effects, the same way the built in ones are written. That module is protected, so only edit inside theListtable and keep a backup. The fields areSlot,AimFov,AimTime,Velocity,Damage,Recoil = { Vertical, Horizontal, Kick },Suppressed,NoFlash,Bipod,Laser,LightandGrip. - It shows up in the loadout screen for every gun with a matching node, and works in
SetAttachmentsand weapon Configs.
Ask in the Discord if you get stuck on step 3, it's the fiddly one.
Loadout screen #
Players press N (Y on controller, KIT on mobile) to open the loadout screen. It shows the gun they're holding, turning slowly, with every attachment that fits it. Hovering an option shows exactly what it changes, as green or red bars against the gun's base: recoil, aim time, damage, bullet speed and wall penetration.
- Apply fits the choice straight away, on the gun in their hands and on everyone else's screen.
- Default goes back to what the gun comes with in its Config.
- Presets: three per gun. Save the current setup into one and load it any time.
- Items the player doesn't own show as LOCKED with "Locked. This game decides how you unlock it.", so players can see what's out there to earn or buy.
- Skins have their own row, with rarity colours: grey Common, green Uncommon, blue Rare, purple Epic, gold Legendary.
- Knives show up here too, for skins. Grenades don't.
Choices and presets are saved with the player's settings, so they follow the player to every server. The server checks every change, so nothing can be fitted that the gun, your rules or the player's unlocks don't allow.
Customization = {
	Enabled = true,
	Slots = { Sight = true, Barrel = true, UnderBarrel = true, Other = true, Ammo = true, Skin = true },
	Allowed = { HK416 = { "Acog", "Suppressor", "Vertical Grip", "Woodland" } }, -- optional, per gun
	Blocked = { "PM II" },                 -- optional, nobody can pick these
	Ownership = { Attachments = true, Skins = true },
	Starter = { "FMJ", "Reflex" },        -- free for everyone
	SaveOwnership = false,
	Access = "Anywhere",
},
Workbenches
With Customization.Access = "Workbench", the screen only opens at a workbench while holding the gun. Copy ReplicatedStorage.XSF.Assets.Workbench into your map, as many as you like, anywhere you like. It's a good fit for milsim and survival games where changing attachments mid fight shouldn't be possible.
Turning it off
Customization.Enabled = false hides the screen and the server refuses all changes, so every gun keeps the attachments in its Config. You can still change attachments from server scripts.
Ammo types #
Ammo is picked per gun in the loadout screen, in the Ammo slot. It changes damage, wall penetration, armour and sound.
| Ammo | Damage | Walls | Armour | Other |
|---|---|---|---|---|
| FMJ | x1 | x1 | normal | The standard round. Free for everyone by default (Customization.Starter). |
| Hollow Point | x1.2 | x0.45 | armour counts 1.5 times as much | Best against unarmoured targets in the open. Bad through cover and vests. |
| Armor Piercing | x0.9 | x1.9 | ignores 60% of armour | For armoured enemies and shooting through walls. |
| Subsonic | x0.92 | x1 | normal | Bullets 28% slower (more drop), quieter and heard from much less far away, 10% less climb and push back. Best with a suppressor. |
The worked examples with armour are in How damage works.
Reloads and feeds #
Different guns reload differently in 2.0, the way the real ones do. You pick the style with Feed and ShellInsert in a Config.
Magazine guns (the default)
- Empty reload: the old magazine drops, a new one goes in, and the slide or bolt is released.
- Tactical reload (rounds still left): the old magazine goes back in the pouch instead of dropping, and with
Ammo.Chamber = truethe gun keeps one round in the chamber on top of the new magazine. - With
Animations = "XSF", the hand really grabs the gun'sMagpart. It works out the motion from where the magazine is on each gun. Handling.ReloadSpeedspeeds the animation up or slows it down.
Pump and shell by shell (ShellInsert = true)
The 870 and SPAS-12 load one shell at a time. With Modes = { "Pump" } the player pumps after every shot.
Bolt actions (Modes = { "Bolt" })
The right hand comes off the grip, lifts and pulls the bolt, then pushes it home after every shot. Handling.Bolt describes the bolt so the hand finds it:
Handling = {
	-- where the right hand works the bolt (handle space), the bolt's turn and pull
	Bolt = { Knob = Vector3.new(0.19, 0.27, 0.04), Axis = 0.33, Lift = 60, Travel = 0.32 },
	Mass = 6.5, AimTime = 0.5, AimFov = 45,
},| Field | What it is |
|---|---|
Knob | Where the bolt handle is, relative to the gun's Handle, in studs. |
Axis | How far above the bore the bolt turns around. |
Lift | How far the handle lifts before it pulls back, in degrees. |
Travel | How far the bolt pulls back, in studs. |
Stripper clips (Feed = "Stripper")
The Kar98k and Mosin open the bolt and push five rounds down from a clip.
Revolver (Feed = "Revolver")
The 686 swings its cylinder out, punches all six cases at once and drops a speedloader in. It's slow on purpose (ReloadSpeed = 0.75), so every shot counts. The model needs a part called Mag for the cylinder.
Break open (Feed = "Breech")
The M320's barrel swings out to the side, the old case comes out and a new round goes in.
Front loaded (Feed = "Muzzle")
The RPG-7 takes a new warhead in the front of the tube. The round shows on the launcher while it's loaded.
Reloading and the server
The server tracks every reload. A reload that finishes faster than it possibly could is rejected (the Rejected event fires with the reason fast reload), so modified clients can't skip reload times.
Jams, sound and effects #
Jams
Off by default. Turn them on with Malfunctions.Enabled = true.
- Every shot has a
Malfunctions.Chanceof jamming (0.003, about one in 300). Long bursts make it more likely as the gun heats up, and so do suppressors. - A jammed gun shows JAMMED and RELOAD TO CLEAR, and won't fire.
- Reloading clears it: the player racks the gun if there are rounds left, or swaps the magazine if not.
- Jams are a great fit for milsim, a terrible fit for anything competitive. Leave them off unless your players want them.
Sound
- Distance. Shots get quieter and duller with distance, and far away shots arrive late, the way sound really travels.
- Walls. Every wall between the shot and the listener muffles it more. A firefight in the next building sounds like it.
- Indoors and outdoors sound different, so a shot inside a room doesn't ring out like one in an open field.
- Suppressors and subsonic ammo are quieter for everyone and carry much less far.
- Bullets passing close crack and whiz, and push the suppression effect on the player they passed.
- Footsteps change with the floor material (
Audio.Footsteps). - Ambience (
Audio.Ambience): quiet wind and distant traffic outdoors, room tone indoors.
Getting shot
- Players flinch when hit and stagger from heavy hits, which knocks their aim off for a moment.
- Being shot at (rounds landing or passing close) builds suppression: a bit of blur and a tighter view. Players can tone it down with the Stress effects setting.
- Low health brings in a heartbeat. The HUD shows HEALTHY, HURT, WOUNDED, BADLY WOUNDED or CRITICAL instead of a number when players check their gear.
Impacts
Bullet holes and debris match the surface: splinters from wood, sparks and bright dents on metal, shards from glass, dust from concrete and dirt kicked up from the ground. Unanchored parts get pushed by bullets and blasts, so loose crates and barrels react.
Low effects
Players can turn on Low effects in settings. It cuts particles, drops brass and muzzle smoke and keeps fewer bullet holes. Performance.LowEffects sets what new players start with. See Performance.
Knives #
Knives are held in one hand, the way CS2 shows them. Each one has its own draw, idle, inspect and slashes.
- Left click (Fire) slashes. Slashes take turns: forehand, then backhand, then forehand again.
- I (Inspect) shows the knife off. The karambit spins on your finger, the butterfly knife flips open and shut. Attacking cuts the inspect short.
- From behind, a slash does four times the damage. It counts as from behind when the person you hit is facing away from you, within 60 degrees either side of straight away. That's a one hit kill with every knife.
- Knives only make a sound when they're swung, never when drawn or inspected.
- Knives can wear skins, picked in the loadout screen like on guns.
Knife settings
return {
	Class = "Melee",
	Kind = "Melee",
	Melee = { Range = 5.5, Cooldown = 0.65, HitDelay = 0.18 },
	Damage = { Head = 75, Torso = 45, Limb = 32 },
	Handling = { Mass = 0.4 },
	Ammo = { Magazine = 0, Reserve = 0, Chamber = false },
}| Setting | What it does |
|---|---|
Melee.Range | How far the slash reaches, in studs. 5 to 6.2 on the shipped knives. |
Melee.Cooldown | Seconds between slashes. Lower is faster. |
Melee.HitDelay | Seconds into the swing when the hit lands. Bigger feels heavier. |
Melee.Backstab | Damage multiplier from behind. Not written in the shipped Configs, so it's 4. Add Backstab = 2 for a weaker backstab, or Backstab = false to turn it off. |
Damage | Head, torso and limb damage, like guns. Knives have no falloff. |
All seven knives and their numbers are in Every weapon's stats. Knife damage can also be set per preset on the dashboard.
A knife only round
local XSF = require(game.ServerScriptService.XSF.Server)

local function knifeRound()
	for _, player in game.Players:GetPlayers() do
		XSF.SetLoadout(player, { "Karambit" })
	end
end
Grenades #
Hold fire to get a grenade ready and release to throw it. Hold aim as you release to lob it underhand instead, slower and shorter, for rolling it round a corner or over a low wall.
| Grenade | What it does | Fuse | Radius |
|---|---|---|---|
| M67 frag | Up to 180 damage, falling off with distance, blocked by cover. Pushes loose objects around. | 4.5 s, and it cooks: the fuse starts when you pull the pin, so holding it before throwing shortens the time the enemy has | 28 studs |
| Flashbang (M84) | Blinds anyone looking toward it and deafens everyone nearby, even through walls. No damage. | 1.8 s after it leaves your hand | 45 studs |
| M18 smoke | A thick cloud that blocks sight for 35 seconds. Thermal sights see through it. | 2 s after it leaves your hand | 22 studs |
Each grenade slot starts with two (one in hand, one in reserve). Grenades bounce off walls and roll on slopes.
Grenade settings
return {
	Class = "Grenade",
	Kind = "Grenade",
	Grenade = { Type = "Frag", Fuse = 4.5, Radius = 28, Damage = 180, ThrowSpeed = 95, LobSpeed = 45, Cook = true },
	Ammo = { Magazine = 1, Reserve = 1, Chamber = false },
	Handling = { Mass = 0.4 },
}| Setting | What it does |
|---|---|
Grenade.Type | "Frag", "Flash", "Smoke", "C4" or "Claymore". |
Grenade.Fuse | Seconds until it goes off. |
Grenade.Cook | true starts the fuse when the player gets it ready, not when it's thrown. |
Grenade.Radius | Blast, flash or smoke radius in studs. |
Grenade.Damage | Damage at the centre, for frags and charges. |
Grenade.Duration | How long smoke lasts. |
Grenade.ThrowSpeed, LobSpeed | Throw speeds for an overhand throw and an underhand lob. |
Grenade.Arc, LobArc, Lift, Gravity, Bounce, Friction, Density, Spin, RollDrag | How this one flies and lands. Leave them out to use Throwables in GameConfig. For example a bouncy flashbang: Bounce = 0.5, RollDrag = 0, or a heavy frag that stops where it lands: Bounce = 0.05, RollDrag = 4. |
Ammo.Reserve | How many extra the player carries. |
Throwing grenades from a script
For traps, airstrikes and scripted events:
local XSF = require(game.ServerScriptService.XSF.Server)

-- name, start position, velocity, fuse seconds, thrower (optional, gets the kill credit)
XSF.SpawnGrenade("M67", Vector3.new(0, 50, 0), Vector3.new(0, -10, 0), 3)

-- a flashbang dropped from the ceiling when a door opens
XSF.SpawnGrenade("Flashbang", ceiling.Position, Vector3.zero, 1.2)
Hotbar and backpack #
Players can carry any number of weapons. The hotbar along the bottom of the screen holds the ones on the number keys, and the backpack holds the rest.
- Number keys 1 to 5 (or up to
Backpack.HotbarSize, at most 9) switch to that slot. The mouse wheel and the controller bumpers walk through the hotbar in order. - B (Select on controller) opens the backpack. Click a weapon to take it out: it shows next to the hotbar with a B while you hold it.
- Drag a weapon onto a numbered slot to put it on the hotbar. Drag a hotbar weapon onto another slot to swap them, or back onto the list to take it off the hotbar. Hovering a weapon and pressing a number key also puts it on that slot.
- On phones and tablets the hotbar is tappable and can be hidden in the player's settings.
Backpack.Hotbar = "Fade"hides the hotbar until the player switches weapons or holds Check gear, for a cleaner screen.
When a game gives a player new weapons with XSF.SetLoadout or XSF.Give, weapons that are still carried keep their slots, and new weapons fill the free slots in order. A slot the player emptied on purpose stays empty.
Games using Providers.Inventory = "RobloxTools" keep Roblox's own backpack bar instead, and none of this applies. Each weapon becomes a Tool, so other systems that look for Tools in the backpack (like some shop kits) keep working.
Hands and grips #
With the realistic arms (Providers.Arms = "XSFRealistic"), every finger is posed against the real shape of each gun when it's drawn, so the hand closes around the grip and the index finger sits on the trigger. Knives are held in a closed fist. The support hand finds the handguard, or the grip if one is fitted.
- Sleeves take the colour of the player's shirt. Players with no shirt (or only a t-shirt) get bare arms in their own skin colour, with a smooth skin texture. Force one colour for everyone with
Arms.SleeveColor, or ignore clothing withArms.PlayerClothing = false(see Hidden options). - Gloves never change colour.
- ACS arms (
Providers.Arms = "ACSClassic") are the classic blocky arms. They don't pose fingers.
Fixing the grip on your own gun
Most guns need nothing. If the hand looks wrong on a gun you added, these fix it:
| Where | Setting | What it does |
|---|---|---|
Attribute on the gun model in Assets.GunModels | XSF_GripWrap (boolean) | true closes the shooting hand into a fixed fist. Use it when the fingers stay open, which happens when the grip has no gap behind the trigger guard. |
| Attribute on the gun model | XSF_GripReach (number) | How far, in studs, XSF may slide the hand along the gun looking for the best grip. Rifles use 0.4 and pistols 0.1. Set 0 to keep the hand exactly where the animation puts it. |
| Weapon Config | Handling.LeftHandShift | Moves the support hand along the gun, in studs. Positive Z moves it back toward you. |
| Weapon Config | Handling.LeftHand = false | One handed: the support hand stays off the gun. |
| Weapon Config | Handling.LeftHand = CFrame.new(...) | Places the support hand exactly, in the Handle's space. |
To move where the hand sits on the gun itself, move the gun model's parts (not the Handle) relative to the Handle. Moving them back, toward the player, puts the hand further forward on the gun.
How damage works #
Every shot is simulated as a real bullet, first on the shooter's screen and then again on the server, which decides what it hit. The server rewinds other players to where they were when the shot was fired (it keeps one second of history), so hits line up even with lag.
Step by step
- Body part. The part that was hit picks the zone.
Headis Head.UpperTorso,LowerTorso,Torso(R6) andHumanoidRootPartare Torso. Everything else, arms, hands, legs and feet, is Limb. - Base damage comes from the gun's
Damagetable for that zone. - Ammo and attachments. Times the ammo's damage (Hollow Point 1.2, Armor Piercing 0.9, Subsonic 0.92) and the suppressor's 0.95 if fitted.
- Falloff. Up to
FalloffStartstuds of bullet travel, damage is full. From there it drops in a straight line toMinMultiplieratFalloffEnd, and stays there. With the defaults (150, 600, 0.6), a hit at 375 studs does 80%. - Walls. A bullet that went through cover keeps a share of its damage based on how much penetration power it has left, never less than half. See Bullets and walls.
- Armour.
XSF_Armoron the character cuts Torso and Limb damage by that share.XSF_Helmetdoes the same for the Head. Armor Piercing ignores 60% of the armour, Hollow Point makes it count 1.5 times. Armour never goes above 100%. - Your modifier. If GameConfig has a
Damage.Modifyfunction, it runs now and can change the number (see below). - Downed. With
Downed.Enabled, a hit that would kill puts the player down instead. After that they can takeDownedHealthmore damage before dying, and bleed out afterBleedOutTimeseconds.
Who can't be hurt
- Teammates, while
Damage.FriendlyFireis off. That means two players on the same Team, where the attacker isn't on a Neutral team. Players with no team can always be hurt. - Anyone with a ForceField. Roblox's spawn ForceField blocks all XSF damage, so spawn protection works the normal way (SpawnLocation.Duration).
- Yourself, from bullets. Your own explosions can hurt you.
- The already dead.
Worked example
An HK416 does 60 to the torso. With Hollow Point that's 72. The target has XSF_Armor = 0.4, and hollow points make armour count 1.5 times, so it stops 60%: the hit does about 29. The same shot with Armor Piercing does 54, and the armour only counts 40% as much, stopping 16%: about 45.
Giving characters armour
-- give every player a vest and a helmet
game.Players.PlayerAdded:Connect(function(player)
	player.CharacterAdded:Connect(function(char)
		char:SetAttribute("XSF_Armor", 0.35)  -- vest: 35% less torso and limb damage
		char:SetAttribute("XSF_Helmet", 0.5)  -- helmet: 50% less head damage
	end)
end)
The attributes go on the character model. Change them any time, for armour pickups or armour that breaks after so many hits.
Changing damage with your own rule
For rules XSF doesn't have (double damage weekends, a boss that takes half damage, headshots only), add a Modify function to the Damage table in GameConfig. It gets the Humanoid being hit, the damage after armour, and a table with attacker, zone, weapon and from (where the damage came from). Return the new amount, or 0 to cancel the hit.
Damage = {
	FriendlyFire = false,
	Hitmarkers = false,
	Modify = function(humanoid, amount, info)
		-- the boss takes half damage
		if humanoid.Parent.Name == "Boss" then
			return amount * 0.5
		end
		-- knives can't hurt anyone wearing the riot shield attribute
		if humanoid.Parent:GetAttribute("RiotShield") and info.weapon == "Knife" then
			return 0
		end
		return amount
	end,
},
Modify only runs on the server. Keep it quick, it runs for every hit.
Kill credit
XSF sets the classic creator ObjectValue on the victim's Humanoid to the attacking player, the same tag most old Roblox leaderboards and kill feeds look for. So older kill scripts usually work as they are. For anything new, use XSF.Killed, which gives you the attacker and the weapon directly.
Bullets and walls #
Bullets in XSF are projectiles that fly at MuzzleVelocity, fall with gravity and can go through things. Here's exactly how.
Flight
- Speed is
Fire.MuzzleVelocityin meters per second, converted to studs withBallistics.StudsPerMeter(one stud is 28 cm). An HK416 bullet at 880 m/s moves about 3,140 studs per second. - Gravity is
Ballistics.Gravity(9.81 m/s²), separate from your map'sworkspace.Gravity. - Each shot gets a random spread of
Fire.Dispersiondegrees (plusPelletSpreadfor shotgun pellets). - Bullets live for
Ballistics.MaxLifeseconds (3) or until they fall below the map. - Over long range, slower bullets visibly drop and take time to arrive. Lead moving targets and use the zero on snipers.
Going through walls
Every bullet starts with a penetration power that comes from its class, times its ammo:
| Class | Power |
|---|---|
| Shotgun (per pellet) | 0.35 |
| Pistol | 0.45 |
| SMG | 0.55 |
| Rifle | 1.3 |
| DMR | 1.8 |
| Sniper | 2.4 |
| Anything else | 1 |
Armor Piercing multiplies it by 1.9, Hollow Point by 0.45. You can set any gun's power directly with Fire.Penetration.
When a bullet hits something, XSF measures how thick it is along the bullet's path (up to 6 studs) and multiplies that by the material's cost:
| Material | Cost per stud |
|---|---|
| ForceField | 0 |
| Glass | 0.15 |
| Fabric | 0.2 |
| Cardboard | 0.25 |
| Foil | 0.4 |
| Plastic, SmoothPlastic | 0.55 |
| Wood, WoodPlanks | 0.6 |
| Ice | 0.9 |
| Brick | 2.4 |
| CorrodedMetal | 2.6 |
| Concrete | 2.8 |
| Grass, Cobblestone | 3 |
| Metal, Slate | 3.2 |
| Granite, Marble | 3.5 |
| Sand, Ground, Rock, DiamondPlate | 4 |
| Anything else | 2 |
If the cost is less than the bullet's remaining power, it goes through, loses that much power and slows down. If not, it stops inside. Parts thicker than 6 studs always stop bullets.
Some quick results with the defaults: a rifle (1.3) goes through about 2 studs of wood but less than half a stud of concrete. A pistol (0.45) gets through 0.75 studs of wood and no real concrete. An AWM (2.4) goes through 4 studs of wood or 0.85 studs of concrete. Glass barely slows anything.
Making a wall bulletproof (or paper thin)
Set the XSF_PenetrationCost attribute (a number) on any part to override its material. 100 makes it bulletproof, 0 makes bullets ignore it entirely. Handy for a glass window that should stop bullets, or a thick prop that should be shoot through.
-- every part in the Bunker model stops bullets
for _, p in workspace.Bunker:GetDescendants() do
	if p:IsA("BasePart") then p:SetAttribute("XSF_PenetrationCost", 100) end
end
Damage after a wall
A bullet that went through something does its damage times its remaining power share, but never less than half. A rifle round that spent most of its power on a wooden wall does about 50 to 60% on the other side. Glass costs so little that it barely matters.
Ricochets
A bullet that hits a hard surface (anything costing 2.4 or more: brick, concrete, metal, rock) at a shallow angle, less than about 13 degrees from the surface, skips off once instead of stopping. It keeps 45% of its speed and 40% of its power. You'll hear the ricochet whine. Each bullet only ricochets once.
Loose parts
Unanchored parts under 1,500 mass get a push when a bullet hits them, so crates, cans and barrels react to being shot. Characters aren't pushed by bullets.
Explosives #
Four weapons blow things up. Add them to Loadout like any other weapon: "RPG7", "M320", "C4" and "Claymore".
| Weapon | How it works |
|---|---|
| RPG-7 | The rocket leaves the tube slowly (45 m/s), the motor lights after a moment and it speeds up to 110 m/s. There's a back blast behind the shooter, so don't stand behind one. Closer than 18 studs the warhead doesn't arm: it only hurts on a direct hit (120). Armed, it blasts for up to 260 in 24 studs. Reloading pushes a new warhead into the muzzle. One loaded plus three spare. |
| M320 | Fires a 40mm grenade on a real arc at 76 m/s. Change the range step with ] and [, the same keys as zeroing, from 50 to 300 studs. It arms after 14 studs, blasts for up to 190 in 16 studs, and a direct hit does 90. The barrel swings open to reload. One loaded plus six spare. |
| C4 | Throw it and it sticks flat to whatever it hits. Right click sets off every charge you have out, for up to 300 in 22 studs each. You can have four out at once. When you have none left in hand, the clacker stays out and left click works too. Three charges per spawn. |
| Claymore | Set it down facing where you look. It arms after 2 seconds and fires a 60 degree fan at the first enemy who walks within 8 studs in front of it, for up to 240. Standing behind one is mostly safe (10% damage). Two out at once. |
How blast damage works
- XSF checks the head and torso parts of everyone in the radius and uses whichever is most exposed.
- Damage falls off with distance on a curve: full at the centre, about two thirds at a quarter of the way out, a bit under 40% halfway out, and nothing at the edge.
- Cover blocks it. If something solid is between the blast and you, you take nothing, unless you're very close (inside a quarter of the radius), where you still take 35%.
- Directional blasts (the claymore) only do full damage inside their cone. Behind is
Backtimes the damage. - Loose parts in the blast get thrown around.
- Friendly fire rules apply. Your own explosions can always hurt you.
Explosive settings
Class = "Launcher",
Feed = "Muzzle",
Fire = { RPM = 30, Modes = { "Semi" }, MuzzleVelocity = 115, Zero = 150, TracerEvery = 0 },
Ammo = { Magazine = 1, Reserve = 3, Chamber = false },
-- Speed and MaxSpeed in m/s, Arm and Radius in studs. Closer than Arm it
-- does not go off, only the direct hit (Impact) hurts
Projectile = { Speed = 45, MaxSpeed = 110, Ignite = 0.12, Burn = 0.7, Drop = 0.12, Life = 5,
Arm = 18, Radius = 24, Damage = 260, Impact = 120, Blast = "HE", ShowRound = true },| Projectile field | What it does |
|---|---|
Speed | Launch speed in m/s. |
MaxSpeed, Ignite, Burn | For rockets: the motor lights after Ignite seconds and burns for Burn seconds, speeding up to MaxSpeed. |
Drop | How much gravity affects it, 1 is full gravity. The RPG uses 0.12, the M320 1. |
Life | Seconds before it self destructs in the air. |
Arm | Studs it must travel before it can explode. |
Radius, Damage | Blast radius and damage at the centre. |
Impact | Damage of a direct hit, armed or not. |
ShowRound | Shows the round sitting in the launcher while loaded. |
Model | The projectile model in XSF.Assets.Projectiles. |
C4 and claymore use Grenade settings: Radius, Damage, MaxPlaced (how many can be out at once), and for the claymore Cone, Back, Trigger (trip distance), TriggerCone and Arm (seconds).
Your own explosions
From any server script, for barrels, mines, airstrikes or a car blowing up:
local XSF = require(game.ServerScriptService.XSF.Server)

-- position, settings, attacker (optional, gets kill credit), weapon name (optional, for the kill feed)
XSF.Explode(barrel.Position, { Radius = 20, Damage = 200 }, attackerPlayer, "Barrel")

-- a shaped charge that only blasts forward
XSF.Explode(door.Position, { Radius = 15, Damage = 250, Cone = 70, Back = 0.1 })
XSF.Exploded fires for every explosion, with (kind, position, attacker, weaponName). kind is "Frag", "HE" (launchers, C4 and your own calls), "Claymore", "Flash" or "Smoke".
Pickups #
Guns can be dropped and picked up. A dropped gun keeps its attachments, skin and ammo, so picking up someone's gun gives you exactly what they had.
- Drop: X drops the gun in your hands in front of you (
Keybinds.Drop, see Hidden options). - Pick up: walk within 8 studs and a Pick up prompt appears. Press F (Y on controller).
- Already carrying that gun? Picking up another one just takes its ammo into your spare rounds.
- On death the gun in your hands drops where you fell (
Pickups.DropOnDeath). - Clean up: dropped guns disappear after 90 seconds (
Pickups.Lifetime). - Carry limit: with
Pickups.MaxWeaponsset, a full player swaps the gun in their hands for the one on the floor. - Downed players can't pick things up.
All of this can be changed with the Pickups table, see Hidden options.
Spawning guns and ammo from a script
local XSF = require(game.ServerScriptService.XSF.Server)

-- a gun with its own ammo and an ACOG on it
XSF.SpawnPickup("AK47", spot.CFrame, { mag = 30, reserve = 60, atts = { Sight = "Acog" } })

-- an ammo box: each gun gets up to 3 magazines, and the box can be used 4 times
XSF.SpawnPickup("Ammo", crate.CFrame, { Mags = 3, Uses = 4 })

-- a box that never runs out (a resupply point)
XSF.SpawnPickup("Ammo", base.CFrame, { Mags = 2, Infinite = true })| Option | For | What it does |
|---|---|---|
mag | guns | Rounds in the magazine. Defaults to a full magazine. |
reserve | guns | Spare rounds. Defaults to the gun's spawn reserve. |
atts | guns | Attachments and skin, like { Sight = "Acog", Skin = "Woodland" }. Defaults to the gun's own attachments from its Config. If you pass a table, it replaces them. |
Mags | ammo | Magazines given to each gun per use. Default 2. |
Uses | ammo | How many times the box can be used. Default 1. |
Infinite | ammo | true never runs out. |
The position can be a CFrame or a Vector3. SpawnPickup returns the pickup model if you want to move or delete it later.
An ammo box tops up every gun the player carries (not knives or grenades) by up to Mags magazines, but never past what the gun spawns with. A use only counts if it actually gave someone ammo, so a full player walking past doesn't waste a box.
Events
XSF.PickedUp:Connect(function(player, weaponName, model)
	print(player.Name, "picked up", weaponName) -- weaponName is "Ammo" for ammo boxes
end)

XSF.Dropped:Connect(function(player, weaponName, model)
	-- player is nil for pickups spawned by a script
end)
Zeroing and special optics #
Zeroing
Long guns can be zeroed. Bullets drop, so a sight can only be exactly right at one distance. Zeroing picks that distance. Press ] to raise the zero and [ to lower it (ZeroUp and ZeroDown in Keybinds). The HUD shows ZERO and the current range. Set it to the target's distance and the bullet lands where the reticle is.
| Gun | Zero steps (studs) |
|---|---|
| AWM, SVD | 100, 200, 300, 400, 600, 800, 1000 |
| M82 | 100, 200, 300, 400, 600, 800, 1000, 1500 |
| R700, Kar98k, Mosin | 100, 200, 300, 400, 600, 800 |
| FAL, M14 | 100, 200, 300, 400, 500, 600 |
| M320 (range ladder) | 50, 100, 150, 200, 250, 300 |
Add zero steps to any gun with Fire.ZeroSteps and set where it starts with Fire.Zero. Guns without steps are zeroed at Fire.Zero (100 studs) and can't be changed.
Fire = { RPM = 700, Modes = { "Semi" }, MuzzleVelocity = 850, Zero = 200, ZeroSteps = { 100, 200, 300, 400, 600 } },Night vision and thermal
Two sights change what you see through them:
- Night Vision: an image intensifier. Dark rooms and night maps turn bright green and readable.
- Thermal: white hot. People and NPCs glow bright through smoke and shadow while the world goes grey.
They aren't given out by default. Give them to players like any other unlock (XSF.GrantAttachment(player, "Thermal")), or put them in Customization.Starter to make them free for everyone. Thermal through smoke is strong, so many games keep it rare or expensive.
Vault and mantle #
Run at a low wall and jump to vault over it. Jump at a ledge you can reach and you climb up onto it. The left hand plants on the edge and the camera dips, so it feels physical. On a thin wall you land on the middle of the top, not the far edge. There's nothing to set up: it works on any part in your map.
- Obstacles up to
Vault.VaultHeight(3.6 studs) are vaulted over, and you land on the far side. - Taller ones, up to
Vault.MaxHeight(7 studs), are climbed onto. - XSF looks for something to vault within
Vault.Reach(3.2 studs) in front of you. - Downed players can't vault.
None of these are in GameConfig by default. Add a Vault table to change them, see Hidden options.
-- parkour game: climb higher
Vault = { MaxHeight = 10 },

-- stop players getting onto roofs
Vault = { MaxHeight = 4.5 },

-- no vaulting at all
Vault = { Enabled = false },
To stop players climbing one specific thing (an invisible wall, the edge of the map), make it taller than MaxHeight. A tall transparent part with CanCollide on does it.
Skins #
XSF ships with 108 skins that work on every gun and knife, including guns you add yourself. Players put them on in the loadout screen, in the Skin row.
Rarities
| Rarity | Colour | How many | Examples |
|---|---|---|---|
| Common | grey | 18 | Matte Black, Olive Drab, Flat Dark Earth, Woodland, Desert Storm, Arctic, Worn Steel |
| Uncommon | green | 28 | Two Tone Tan, Gunmetal, Tiger Stripe, Digital Woodland, Flecktarn, Rust |
| Rare | blue | 25 | Crimson, Cobalt, Copper, Carbon Fiber, Python, Topographic |
| Epic | purple | 25 | Chrome, Neon Cyan, Plasma, Damascus, Circuit Board, Magma |
| Legendary | gold | 12 | Gold Plated, Black Gold, Hologram, Galaxy, Aurora, Dragon Scale |
XSF.Skins on the server is the full list, keyed by name, with each skin's Rarity and Info. Use it to build a shop or a crate preview:
local XSF = require(game.ServerScriptService.XSF.Server)
for name, skin in pairs(XSF.Skins) do
	print(name, skin.Rarity, skin.Info)
end
How skins paint a gun
A skin colours each part of the gun by its role: body, furniture (stocks and grips), metal, magazine and blade. Solid skins set colours and materials. Camo and pattern skins (Woodland, Galaxy, Damascus and so on) add a texture on top, scaled to the size of the gun. Attachments keep their own look. To make your own guns take skins nicely, name the parts the way Adding a gun describes.
Who gets which skin
With Customization.Ownership.Skins on (the default), players only have the skins you give them. Turn it off to give everyone every skin. Skins are given and checked the same way as attachments, see Unlocks.
Crates
XSF.RollSkin picks a random skin by rarity weights. Leave the weights out and it uses 55 Common, 25 Uncommon, 12 Rare, 6 Epic, 2 Legendary. Only rarities you list can come up.
local XSF = require(game.ServerScriptService.XSF.Server)

local function openCrate(player)
	local skin = XSF.RollSkin({ Common = 60, Uncommon = 25, Rare = 10, Epic = 4, Legendary = 1 })
	XSF.GrantSkin(player, skin)
	return skin -- show it in your crate opening UI
end

-- a premium crate that never gives Commons
local function premiumCrate(player)
	local skin = XSF.RollSkin({ Rare = 70, Epic = 25, Legendary = 5 })
	XSF.GrantSkin(player, skin)
	return skin
end
Putting a skin on for the player
-- after a purchase, equip it straight away on the gun they're carrying
XSF.GrantSkin(player, "Galaxy")
XSF.EquipSkin(player, "AK47", "Galaxy")
EquipSkin returns false if the player doesn't own the skin or isn't carrying that weapon. Pass nil as the skin to take it off.
Unlocks #
By default players only get the attachments and skins your game gives them, so you can sell them, put them in crates or tie them to levels. A gun's own default attachments (from its Config) and anything in Customization.Starter are always free.
Turning it on and off
Customization = {
	-- players only get what you give them (the default)
	Ownership = { Attachments = true, Skins = true },

	-- everyone gets every attachment, skins still have to be earned
	-- Ownership = { Attachments = false, Skins = true },

	-- everything free for everyone
	-- Ownership = false,

	Starter = { "FMJ", "Reflex", "Woodland" }, -- free for everyone, on every gun
	-- Starter = { "FMJ", "AK47:Acog" },       -- "Gun:Item" frees one item on one gun
},
Giving and taking
| Function | What it does |
|---|---|
XSF.GrantAttachment(player, name, weapon?) | Unlocks an attachment. Leave weapon out to unlock it on every gun, or name one gun ("AK47"). |
XSF.RevokeAttachment(player, name, weapon?) | Takes it away again. A gun using it goes back to its default straight away. |
XSF.OwnsAttachment(player, name, weapon?) | true if the player has it (including through Starter or as a gun default). |
XSF.GrantSkin, XSF.RevokeSkin, XSF.OwnsSkin | The same three, for skins. |
XSF.EquipSkin(player, weapon, skin) | Puts an owned skin on a gun the player is carrying. |
XSF.RollSkin(weights?) | Picks a random skin by rarity, for crates. See Skins. |
XSF.GetOwned(player) | Everything a player owns as one table: { Attachments = { ... }, Skins = { ... } }, each a list of names (or "Gun:Name" for per gun unlocks). |
XSF.SetOwned(player, data) | Replaces everything they own with that table. Use it to load what you saved. |
XSF.OwnershipChanged | Fires when a player gets or loses an item. |
A misspelled name prints [XSF] there is no attachment called "X" (or skin) and does nothing. Granting "*" unlocks every item of that kind.
Saving unlocks
Two choices:
- Let XSF do it. Set
Customization.SaveOwnership = true. XSF saves to its own DataStore (named byCustomization.SaveKey,"XSF_Ownership"by default) when unlocks change and loads it when the player joins. ChangeSaveKeyto start everyone fresh. - Do it yourself. Leave it off and save
XSF.GetOwned(player)in your own DataStore with the rest of your player data, thenXSF.SetOwnedwhen they join. Do this if you already have a data system (ProfileService, ProfileStore, DataStore2), so everything saves and rolls back together.
local DataStoreService = game:GetService("DataStoreService")
local XSF = require(game.ServerScriptService.XSF.Server)
local store = DataStoreService:GetDataStore("PlayerUnlocks")

game.Players.PlayerAdded:Connect(function(player)
	local ok, data = pcall(store.GetAsync, store, "u_" .. player.UserId)
	if ok and data then
		XSF.SetOwned(player, data)
	end
end)

game.Players.PlayerRemoving:Connect(function(player)
	pcall(store.SetAsync, store, "u_" .. player.UserId, XSF.GetOwned(player))
end)
Ideas
- Leveling: grant attachments at certain levels. There's a full example in Recipes.
- Gamepass: check
MarketplaceService:UserOwnsGamePassAsyncon join and grant a set of skins. - Developer products: grant a crate roll in
ProcessReceipt. - Kill streaks: grant the Thermal sight for the rest of the round after 5 kills, and revoke it on death.
Unlocks are stored on the player as the XSF_Owned attribute (JSON), so LocalScripts can read what a player owns for your own shop UI. Never trust it for purchases, always grant from the server.
Server scripts #
Your own server Scripts talk to XSF through one module. Require it at the top of any Script in ServerScriptService. Everything here is checked and replicated for you: a weapon you give shows up for the player, and damage you deal counts for downing, armour and kill credit exactly like a bullet.
local XSF = require(game.ServerScriptService.XSF.Server)
print("Running XSF " .. XSF.Version)
Only require it from the server. A LocalScript can't see ServerScriptService. LocalScripts use the client API.
Values
| Name | What it is |
|---|---|
XSF.Version | The version string, like "2.1.0". |
XSF.Config | Your GameConfig as XSF sees it, with defaults and website values filled in. Read it, don't change it at runtime. |
XSF.Attachments | Every attachment and its effects, keyed by name: XSF.Attachments["Acog"].AimFov is 22. |
XSF.Skins | Every skin, keyed by name, with Rarity and Info. |
Weapons
XSF.SetLoadout(player, names)
Replaces everything the player is carrying with this list, in slot order, each with its spawn ammo and the player's saved attachments. Call it after the character has spawned.
| Argument | What to pass |
|---|---|
player | The Player. |
names | A list of weapon folder names, like { "MP5", "USP" }. Unknown names are skipped with a message in Output. An empty list {} takes everything away. |
game.Players.PlayerAdded:Connect(function(player)
	player.CharacterAdded:Connect(function()
		task.wait() -- let XSF set up the character first
		if player.Team and player.Team.Name == "Snipers" then
			XSF.SetLoadout(player, { "R700", "USP", "M18" })
		else
			XSF.SetLoadout(player, { "HK416", "USP", "M67" })
		end
	end)
end)
The task.wait() matters. XSF hands out the normal loadout when the character spawns, and without the wait your loadout can arrive first and get replaced. If you always give weapons yourself, add GiveLoadout = false to GameConfig and you can skip the wait.
XSF.Give(player, name)
Adds one weapon after the player's last slot, with full ammo. Giving a weapon they already carry gives them a second copy, so check first if that matters.
-- a pad that gives each player one shotgun per life
local given = {}
script.Parent.Touched:Connect(function(hit)
	local player = game.Players:GetPlayerFromCharacter(hit.Parent)
	if player and given[player] ~= player.Character then
		given[player] = player.Character
		XSF.Give(player, "M870")
	end
end)
For a pickup that players can see and press, XSF.SpawnPickup is usually nicer, see Pickups.
XSF.Remove(player, name)
Takes one weapon away (the first copy if they have two). If it was in their hands, their hands are left empty.
XSF.AddAmmo(player, name, amount)
Adds spare ammo, not to the magazine.
| Argument | What to pass |
|---|---|
player | The Player. |
name | Weapon name, or nil for the gun in their hands. |
amount | Rounds to add. |
-- an ammo crate: 60 rounds for whatever they are holding
XSF.AddAmmo(player, nil, 60)
XSF.GetEquipped(player)
Returns the name of the weapon the player is holding, or nil if their hands are empty (including when they holstered).
XSF.GetInventory(player), XSF.GetAmmo(player, weapon), XSF.GetAttachments(player, weapon)
Read what a player carries, as the server sees it. GetInventory returns weapon names in slot order. GetAmmo returns two numbers, the magazine and the spare rounds, or nil if they don't carry that weapon. GetAttachments returns a copy of that gun's kit (slot to name), or nil.
-- a shop that refills whatever runs low
for _, name in ipairs(XSF.GetInventory(player)) do
	local mag, reserve = XSF.GetAmmo(player, name)
	if reserve and reserve < 30 then XSF.AddAmmo(player, name, 60) end
end
XSF.SetAttachments(player, weapon, attachments)
Changes a gun's attachments, ammo and skin. Everyone sees the change, and the gun in their hands updates straight away. This skips the loadout screen rules and unlocks, so you can fit things players can't pick themselves.
| Argument | What to pass |
|---|---|
player | The Player. |
weapon | Weapon name, or its slot number. |
attachments | A table of slot to name. Slots you leave out are emptied, and names that don't exist or are in the wrong slot are ignored. |
Returns: true if the player carries that weapon, false if not.
XSF.SetAttachments(player, "HK416", {
	Sight = "Acog",
	Barrel = "Suppressor",
	UnderBarrel = "Angled Grip",
	Ammo = "Armor Piercing",
	Skin = "Woodland",
})
XSF.SetCustomizeCheck(fn)
Lets your game refuse a loadout change, for example once a round has started or outside a safe zone. fn(player, weapon, kit) runs on the server every time a player applies a change in the loadout screen (or with SetKit from the client API), after XSF's own checks (the attachment fits, it's unlocked, Customization.Required). Return false to refuse it, with a second value as the reason the player sees. Return anything else (or nothing) to allow it.
| Argument | What it is |
|---|---|
player | The Player. |
weapon | The gun's name. |
kit | The whole new setup as slot to name, like { Sight = "Acog", Ammo = "FMJ" }. Empty when the player took everything off. It's a copy, so changing it does nothing. |
There is one check at a time; calling it again replaces the old one, and XSF.SetCustomizeCheck(nil) removes it. If your function errors, the change is refused, the player sees "Not allowed right now." and the error is printed as a warning. Don't yield in it for long; the player waits for the answer. It doesn't stop XSF.SetAttachments from your own scripts.
local XSF = require(game.ServerScriptService.XSF.Server)

-- no loadout changes once the round is live, and no thermals in this mode
local roundLive = workspace:GetAttribute("RoundLive")
workspace:GetAttributeChangedSignal("RoundLive"):Connect(function()
	roundLive = workspace:GetAttribute("RoundLive")
end)

XSF.SetCustomizeCheck(function(player, weapon, kit)
	if roundLive then
		return false, "You can change attachments between rounds."
	end
	if kit.Sight == "Thermal" then
		return false, "Thermal sights are off in this mode."
	end
end)
XSF.MountWeapon(model, name, attachments)
Puts a gun in the hands of any character model, for NPCs or display. For NPCs, setting the XSF_Weapon attribute is usually easier (see NPCs with guns).
Damage and downed
XSF.Damage(humanoid, amount, attacker, zone, options)
Hurts a character the same way a bullet would. Armour, downing, hit markers, kill credit, Damage.Modify and the Damaged and Killed events all work.
| Argument | What to pass |
|---|---|
humanoid | The Humanoid to hurt. |
amount | Damage before armour. |
attacker | Optional Player who gets the credit. Friendly fire rules use it. |
zone | Optional "Head", "Torso" or "Limb". Decides which armour applies. Defaults to Torso. |
options | Optional table. from is a Vector3 the hit came from, so the victim's red hit marker points at it (an aircraft, a turret, a mortar). weapon is a name passed on to Damaged, Killed, PlayerDowned and Damage.Modify, for kill feeds. |
Returns: the damage actually dealt after armour, or 0 if it was blocked (teammate, ForceField, already dead).
-- a killstreak gunship: the hit comes from the sky and shows in the kill feed
XSF.Damage(hum, 120, owner, "Torso", { from = gunship.Position, weapon = "AC-130" })-- a lava floor
script.Parent.Touched:Connect(function(hit)
local hum = hit.Parent:FindFirstChildOfClass("Humanoid")
if hum then XSF.Damage(hum, 15) end
end)XSF.IsDowned(humanoid)
Returns true if someone is down and waiting for a revive.
XSF.Revive(humanoid, by)
Gets a downed character back up at Downed.ReviveHealth. by is the optional Player who revived them, passed on to the Revived event.
Grenades, explosions and pickups
XSF.SpawnGrenade(name, position, velocity, fuse, thrower)
| Argument | What to pass |
|---|---|
name | "M67" (frag), "M18" (smoke) or "Flashbang". |
position | Where it starts, a Vector3. |
velocity | Its starting speed and direction, a Vector3. Vector3.zero just drops it. |
fuse | Seconds until it goes off. |
thrower | Optional Player who gets credit for kills. |
XSF.Explode(position, settings, attacker, weapon)
An explosion anywhere. settings takes Radius (default 20), Damage (default 150), and optionally Cone (degrees) and Back (damage share behind the cone) for directional blasts. attacker and weapon are optional, for kill credit and kill feeds. See Explosives.
XSF.SpawnPickup(name, where, options)
Spawns a gun or an ammo box (name = "Ammo") at a CFrame or Vector3. Returns the pickup model. See Pickups for the options.
Unlocks and skins
GrantAttachment, RevokeAttachment, OwnsAttachment, GrantSkin, RevokeSkin, OwnsSkin, EquipSkin, RollSkin, GetOwned and SetOwned are all covered in Unlocks and Skins.
Events
Connect with XSF.EventName:Connect(function(...) end). They all fire on the server.
| Event | Arguments | When it fires |
|---|---|---|
Fired | player, weaponName, origin, direction | Every shot the server accepts. |
Damaged | humanoid, attacker, amount, zone, weaponName | Every time XSF damages a character. attacker is a Player or nil, zone is Head, Torso or Limb, amount is after armour. |
Killed | humanoid, attacker, weaponName | When a character dies to XSF damage, including bleeding out after being downed by someone. |
PlayerDowned | humanoid, info | When someone goes down. info has attacker, zone, weapon and from. |
Revived | humanoid, byPlayer | When a downed character is revived. byPlayer is nil for scripted revives without one. |
BledOut | humanoid | When a downed character runs out of time or gives up. |
Exploded | kind, position, attacker, weaponName | Every explosion, flash and smoke. kind is Frag, HE, Claymore, Flash or Smoke. |
PickedUp | player, weaponName, model | Someone picked up a gun, or took ammo (weaponName is "Ammo"). |
Dropped | player, weaponName, model | A gun was dropped. player is nil for scripted spawns. |
OwnershipChanged | player | A player got or lost an attachment or skin. Call GetOwned to see what they have now. |
Equipped | player, weaponName, slot | A player took a weapon out. |
Holstered | player | A player put their weapon away (empty hands). |
Reloaded | player, weaponName, mag, reserve | A reload finished on the server. Shell loaders (shotguns, the Mosin) fire once per shell. |
Rejected | player, reason | The server threw away a shot or action that didn't add up. Reasons include "not equipped", "downed", "origin", "bad dir", "bad args" and "fast reload". Useful for spotting exploiters. Set Debug.LogRejects = true to also print them. |
local XSF = require(game.ServerScriptService.XSF.Server)

-- a simple kill feed and leaderstats
XSF.Killed:Connect(function(victim, attacker, weapon)
	if attacker and attacker:FindFirstChild("leaderstats") then
		attacker.leaderstats.Kills.Value += 1
	end
	print(("%s killed %s with %s"):format(
		attacker and attacker.Name or "the world", victim.Parent.Name, tostring(weapon)))
end)

-- headshot bonus
XSF.Damaged:Connect(function(victim, attacker, amount, zone)
	if attacker and zone == "Head" then
		print(attacker.Name .. " hit a headshot for " .. math.floor(amount))
	end
end)

-- flag players whose shots keep getting rejected
local rejects = {}
XSF.Rejected:Connect(function(player, reason)
	rejects[player] = (rejects[player] or 0) + 1
	if rejects[player] == 50 then
		warn(player.Name .. " has had 50 rejected shots, last reason: " .. reason)
	end
end)
A few rejects for a laggy player are normal. Hundreds in a minute is not.
Client scripts #
For your own LocalScripts: a custom HUD, kill feed, shop, main menu or cutscene. Require it from any LocalScript. Everything here only affects the local player.
local XSF = require(game.ReplicatedStorage:WaitForChild("XSF").Client.API)Functions
| Function | What it does |
|---|---|
GetWeapon() | The gun in hand as a table: name, slot, mag (rounds in the magazine), reserve (spare rounds) and mode (Auto, Semi and so on). nil when nothing is held. |
Equip(slot) | Switch to a slot number. |
Unequip() | Put the weapon away (empty hands). Since 2.1 the gun also leaves the character for other players and the server, the same as the Holster key. |
IsHolstered() | true while the player has put their weapon away on purpose. |
GetInventory() | A list of the weapon names being carried, in slot order. |
IsAiming() | true while aiming down sights. |
GetStance() | "Stand", "Crouch" or "Prone". |
IsDown(action) | true while an XSF action is held, by its Keybinds name: IsDown("Sprint"), IsDown("Aim"), IsDown("Fire"). It follows the player's own binds and works the same on keyboard, controller and touch, so you never check keys yourself. |
GetMovementState() | How the player is moving right now, as a table. See Movement state and speed below. |
OnMovement(fn) | Runs fn(dt, state) every frame, right after XSF has moved the player. Returns a function that stops it. |
AddSpeedModifier(fn) | Changes the walk speed XSF sets each frame. fn(speed, state) returns the new speed. Returns a function that removes it. |
SetMenuOpen(open, name) | For your own menus. true frees the cursor, stops XSF reading input (no shooting through the menu) and fires MenuChanged. false with the same name closes it. name is optional and keeps several menus apart; opening the same one twice is safe. See Menus and the mouse. |
IsMenuOpen(name) | true if any menu is open, XSF's own included. Pass a name to ask about one: "Settings", "Loadout", "Backpack" or yours. |
IsCursorFree() | true while the cursor is free: a menu is open, a Modal button is showing, or the FreeCursor key is held. |
SetInputEnabled(on) | false stops XSF reading keys, so a menu can use them. true gives them back. Calls stack, so two menus that both turn input off need two calls to turn it back on. It doesn't free the cursor; for menus use SetMenuOpen. |
SetHUDVisible(on) | false hides XSF's HUD (killstreak cameras, cutscenes, photo modes) until you call it with true. It wins over the player's HUD setting. |
GetSoundGroups() | XSF's sound groups as { World, Own, Body }, to duck or route them yourself. To put them under your master group from the start, use Audio.ParentGroup. |
GetKit(weapon) | The attachments the player runs on a gun (slot to name), the same ones the loadout screen shows. Works for guns they aren't carrying too. |
SetKit(weapon, attachments) | Sets the whole kit like the loadout screen's Apply: the server checks it, and it's saved with the player's settings. Slots you leave out are emptied. Yields. Returns true, or false and the reason (an attachment that doesn't fit or isn't unlocked). Nothing is sent if any part fails. |
GetAttachmentOptions(weapon) | What fits this gun for this player, as two tables of slot to names: available, and locked (fits but not unlocked yet). |
GetAttachmentStats(attachments) | The combined stat changes of a kit (recoil, aim time, range and so on), the numbers the loadout screen's bars use. |
GetAttachmentInfo(name) | One attachment's data: its slot, stats and description. |
SetCameraEnabled(on) | false hands the camera back to Roblox for cutscenes or spectating and puts the gun away. true takes it back. |
Shake(amount) | Camera shake, from 0 to 1. |
Flash(amount) | The flashbang effect, 0 to 1. |
Suppress(amount) | The effect of bullets passing close, 0 to 1. |
GetSetting(key) / SetSetting(key, value) | Read or change one of the player's settings. Changes save like normal. The keys are listed in Player settings. |
GetAllSettings() | Every setting the player has, as one table of key to value. It's a copy, so change settings with SetSetting. Saved kits are in it too, under keys that start with Kit_. |
IsReady() | true once XSF has passed its license check and finished starting on this client. Until then the other functions may do nothing (there's no weapon, no HUD). |
OnReady(fn) | Runs fn() once XSF is ready. If it already is, fn runs straight away (in a new thread). Use it for anything that has to happen after XSF starts, like opening your main menu with SetMenuOpen or calling SetHUDVisible. |
SetGunshotHandler(fn) | Hands gunshot sounds to your own sound system. fn(info) runs before every shot XSF would play on this client, the player's own and everyone else's. Return true and XSF plays nothing for that shot; return anything else and XSF plays it as normal (so you can add to it, or only take over some guns). Muzzle flashes, tracers and bullet whizz aren't affected. One handler at a time; nil removes it. If it errors, XSF warns and plays the shot itself. See the fields below. |
EncodeAttachments(kit) / DecodeAttachments(text) | Turn a kit (slot to name) into the short text XSF saves it as, "Sight=Acog;Barrel=Suppressor", and back. Handy for storing kits in your own DataStore or sending them through a RemoteEvent. DecodeAttachments of nil or "" gives an empty table. |
The info table SetGunshotHandler passes:
| Field | What it is |
|---|---|
weapon | The gun's name, like "HK416". |
class | The Class from its Config: Rifle, SMG, Pistol, Sniper, Shotgun or Launcher. |
position | Where the shot came from (a Vector3). |
own | true for the local player's own shots. |
suppressed | true when a suppressor is fitted. |
subsonic | true for subsonic ammo (quieter, carries less far). |
distance | Studs from the camera to the shot. |
indoor | How enclosed the listener is, 0 (open air) to 1 (a small room). XSF uses it for its own reverb. |
Signals
| Signal | Arguments | When it fires |
|---|---|---|
Fired | weaponName, origin, direction | Every shot the local player fires. |
WeaponChanged | what | Something about the held weapon changed. what is one of equip, ammo, reload, mode, check, empty, fire, inventory, inspect, zero or jam. |
Hurt | damage, fromPosition, zone | The local player took damage. |
HitConfirmed | zone, killed, damage | One of the local player's shots landed on someone. |
Suppressed | amount, position | Bullets passed close to the local player. |
StanceChanged | new, old | The player stood, crouched or went prone. |
SettingChanged | key, value | A setting changed. key is "*" when all settings were loaded at once. |
InputBegan / InputEnded | action | An XSF action was pressed or let go, by its Keybinds name ("Reload", "QuickLethal", your own added actions too). Follows the player's binds on every device. Doesn't fire while a menu has input blocked. |
MenuChanged | name, open | A menu opened or closed: XSF's "Settings", "Loadout" and "Backpack", or yours from SetMenuOpen. |
Equipped | weaponName, slot | The local player took a weapon out (after the switch, as the draw starts). |
Holstered | (none) | The local player put their weapon away (Holster key, the number key of the held gun, or Unequip()). |
ReloadStarted | weaponName, slot | A reload began. |
Reloaded | weaponName, slot, mag, reserve | A reload finished, with the new counts. Shell loaders (shotguns, the Mosin) fire it once per shell. A reload cut short (switching weapons, sprinting without Movement.SprintReload) doesn't fire it. |
ArmsBuilt | armsModel, weaponName | New first person arms were built: on every weapon switch, and for empty hands (weaponName is nil then). Use it to recolour or add to the arms, like a team colour or a watch. The model is rebuilt on the next switch, so set it up again each time. |
OtherFired | shooter, weaponName, origin, direction | Another player fired, as this client sees it (one call per shot, rockets and grenade launchers included). shooter is a Player. Good for a minimap ping or your own hit markers on teammates. |
local XSF = require(game.ReplicatedStorage:WaitForChild("XSF").Client.API)

-- a tiny ammo counter of your own (set Providers.HUD = "None" to hide XSF's)
local label = script.Parent.AmmoLabel
XSF.WeaponChanged:Connect(function()
	local w = XSF.GetWeapon()
	label.Text = w and (w.mag .. " / " .. w.reserve) or ""
end)

-- a hit sound and a kill sound
XSF.HitConfirmed:Connect(function(zone, killed)
	if killed then
		script.KillSound:Play()
	elseif zone == "Head" then
		script.HeadshotSound:Play()
	end
end)

-- your own gunshot sounds for one gun; every other gun keeps XSF's
XSF.SetGunshotHandler(function(info)
	if info.weapon ~= "Barrett" then return false end
	local s = script.BarrettShot:Clone()
	s.Volume = if info.own then 1 else math.clamp(1 - info.distance / 1500, 0.1, 1)
	local part = Instance.new("Part")
	part.Anchored, part.CanCollide, part.Transparency = true, false, 1
	part.Position = info.position
	part.Parent = workspace
	s.Parent = part
	s:Play()
	game:GetService("Debris"):AddItem(part, 4)
	return true
end)

-- a photo mode that hides the first person arms, even after a weapon switch
local photoMode = false
local currentArms
XSF.ArmsBuilt:Connect(function(arms)
	currentArms = arms
	if photoMode then
		for _, p in ipairs(arms:GetDescendants()) do
			if p:IsA("BasePart") then p.LocalTransparencyModifier = 1 end
		end
	end
end)

-- a shop: free the mouse and stop shooting while it is open
local function openShop()
	XSF.SetMenuOpen(true, "Shop")
	shopGui.Enabled = true
end
local function closeShop()
	shopGui.Enabled = false
	XSF.SetMenuOpen(false, "Shop")
end
Menus and the mouse
In first person XSF locks the mouse to the middle of the screen every frame. It lets go of it in these cases, and while it's free the mouse buttons never fire or aim:
- XSF's own screens (settings, loadout, backpack).
- Your menus opened with
XSF.SetMenuOpen(true, name). Input is blocked too, so keys don't move or reload behind the menu. This is the one to use. - Any visible GuiButton with
Modal = true. That's Roblox's own way to free the mouse in first person, so menus built for normal Roblox games work as they are. - While the player holds the FreeCursor key (Left Alt by default), for quick clicks on your UI without opening a menu.
If your game takes the character away without killing it (a main menu that calls Character:Destroy() or parents it to nil, a "leave match" button), XSF puts the gun away and hides its hotbar and scope overlay until the player spawns again, so nothing of XSF's is left floating on your menu.
Two more rules stop stray shots. If your script frees the cursor itself (setting MouseBehavior every frame), a click that lands on your visible UI still doesn't shoot. And the click that closes a menu, on its close button or the dark area around it, is never counted as a shot.
local XSF = require(game.ReplicatedStorage:WaitForChild("XSF").Client.API)

-- a deploy screen between lives
XSF.SetMenuOpen(true, "Deploy")
deployButton.Activated:Connect(function()
	deployGui.Enabled = false
	XSF.SetMenuOpen(false, "Deploy")
end)

-- hide your own HUD while XSF's settings menu is up
XSF.MenuChanged:Connect(function(name, open)
	if name == "Settings" then myHud.Enabled = not open end
end)

-- a killstreak camera: no XSF HUD while it runs
XSF.SetHUDVisible(false)
task.wait(30)
XSF.SetHUDVisible(true)
Movement state and speed
GetMovementState() returns this table, and OnMovement and AddSpeedModifier pass it to your function as state.
| Field | What it is |
|---|---|
stance | "Stand", "Crouch" or "Prone". |
sprinting | true while actually sprinting (moving forward on the ground at sprint speed), including a sprint reload. |
sprintReload | true while running through a reload with Movement.SprintReload on. |
sprintHeld | true while the player wants to sprint (key held, or sprint toggled on), even if they can't right now. |
sliding | true during a slide. |
exhausted | true once stamina ran out. Sprint stays locked until the bar is back above 30%. |
stamina | 0 to 1. |
lean | -1 (full left) to 1 (full right), 0 upright. |
aiming | true while aiming down sights. |
reloading | true during a reload. |
grounded | true when standing on something. |
speed | The walk speed XSF last set. |
Don't set Humanoid.WalkSpeed yourself, XSF sets it again every frame. A speed modifier is the way to change it: it runs after sprint, aim, stance and dragging are worked out, so you get the final number and return your own. Several modifiers run in the order they were added.
local XSF = require(game.ReplicatedStorage:WaitForChild("XSF").Client.API)

-- a tactical sprint: hold sprint for two seconds and you get a short burst of speed
local heldFor = 0
XSF.OnMovement(function(dt, state)
	heldFor = if state.sprinting then heldFor + dt else 0
end)
XSF.AddSpeedModifier(function(speed, state)
	if state.sprinting and heldFor > 2 and heldFor < 4 then
		return speed * 1.25
	end
	return speed
end)

-- a mud zone: half speed while the player stands in it
local inMud = false
local stopMud = XSF.AddSpeedModifier(function(speed)
	return if inMud then speed * 0.5 else speed
end)
-- call stopMud() to remove it again

-- your own stamina bar
XSF.OnMovement(function(dt, state)
	bar.Size = UDim2.fromScale(state.stamina, 1)
	bar.BackgroundColor3 = if state.exhausted then Color3.fromRGB(200, 60, 60) else Color3.new(1, 1, 1)
end)
Things the client API can't do
It can't give weapons, ammo, damage or unlocks, on purpose. Anything that changes the game has to happen on the server, or exploiters could do it too. For a shop, the LocalScript asks the server with a RemoteEvent, and the server checks the player can afford it and calls the server API. There's a full example in Recipes.
NPCs with guns #
Any model in Workspace with a Humanoid can be shot, takes the same damage by body part as players, ragdolls when it dies and fires the same events. You don't need to register it. XSF finds it when it appears, including NPCs you clone in later.
To give an NPC a gun and pose it, set attributes on its model from a server script. XSF puts the gun in its hands and poses the body on every client.
| Attribute | Type | What it does |
|---|---|---|
XSF_Weapon | string | Weapon name, like "HK416". Change it to swap guns, clear it to take the gun away. |
XSF_Attachments | string | Optional. Slot=Name pairs split by semicolons, like "Sight=Acog;Barrel=Suppressor". Set it before XSF_Weapon. |
XSF_Stance | string | "Stand", "Crouch" or "Prone". On R15, crouch also lowers the hip height. |
XSF_Pitch | number | Where it aims up or down, in radians. 0 is level. |
XSF_Aim | number | 0 holds the gun at the ready, 1 raises it to the shoulder. |
XSF_Lean | number | -1 leans left, 1 leans right. |
XSF_Sprint | boolean | Carries the gun low, like it's running. |
XSF_Sliding | boolean | Slide pose. |
XSF_Armor / XSF_Helmet | number | Armour, 0 to 1. See How damage works. |
local npc = workspace.Guard
npc:SetAttribute("XSF_Attachments", "Sight=Aimpoint;Other=Flashlight")
npc:SetAttribute("XSF_Weapon", "MP5")
npc:SetAttribute("XSF_Aim", 1)
npc:SetAttribute("XSF_Armor", 0.3)
Making NPCs shoot
NPC shooting logic is yours to write. XSF handles the gun, the pose, damage and death. The simplest way to make an NPC hurt players is a line of sight check and XSF.Damage:
local XSF = require(game.ServerScriptService.XSF.Server)
local npc = script.Parent
local head = npc:WaitForChild("Head")
local params = RaycastParams.new()
params.FilterDescendantsInstances = { npc }

local function closestPlayer()
	local best, bestDist = nil, 120
	for _, p in game.Players:GetPlayers() do
		local root = p.Character and p.Character:FindFirstChild("HumanoidRootPart")
		local hum = p.Character and p.Character:FindFirstChildOfClass("Humanoid")
		if root and hum and hum.Health > 0 then
			local d = (root.Position - head.Position).Magnitude
			if d < bestDist then best, bestDist = p, d end
		end
	end
	return best
end

while npc.Parent and npc.Humanoid.Health > 0 do
	local target = closestPlayer()
	if target then
		local root = target.Character.HumanoidRootPart
		local dir = root.Position - head.Position
		local hit = workspace:Raycast(head.Position, dir, params)
		if hit and hit.Instance:IsDescendantOf(target.Character) then
			npc:SetAttribute("XSF_Aim", 1)
			npc:SetAttribute("XSF_Pitch", math.asin(dir.Unit.Y))
			npc.HumanoidRootPart.CFrame = CFrame.lookAt(npc.HumanoidRootPart.Position,
				Vector3.new(root.Position.X, npc.HumanoidRootPart.Position.Y, root.Position.Z))
			if math.random() < 0.35 then -- it misses a lot
				XSF.Damage(target.Character.Humanoid, 18, nil, "Torso")
			end
		else
			npc:SetAttribute("XSF_Aim", 0)
		end
	end
	task.wait(0.25)
end
This doesn't fire visible bullets. For a full NPC that also plays shots and tracers, keep this logic and trigger your own sound and effect, or ask in the Discord for the current approach.
Downed NPCs
Set Downed.NPCs = true in GameConfig if NPCs should go down and be revivable instead of dying straight away. Your scripts can revive them with XSF.Revive, so an NPC squadmate that picks the player up (or that the player can pick up) is a few lines.
Test dummies
The test map's dummies are normal models with Humanoids. Copy one anywhere to get a target that takes damage and ragdolls.
Attributes #
XSF reads and sets a handful of attributes. The ones you can set are how you control things without code in XSF's modules. The ones XSF sets are safe to read from your own scripts.
You set these
| Attribute | On | Type | What it does |
|---|---|---|---|
XSF_Armor | character model | number 0 to 1 | Cuts torso and limb damage by that share. |
XSF_Helmet | character model | number 0 to 1 | Cuts head damage by that share. |
XSF_Weapon, XSF_Attachments, XSF_Stance, XSF_Pitch, XSF_Aim, XSF_Lean, XSF_Sprint, XSF_Sliding | NPC model | see NPCs | Gun and pose for NPCs. |
XSF_PenetrationCost | any part | number | Overrides the material's wall cost. 100 is bulletproof, 0 is ignored by bullets. See Bullets and walls. |
XSF_AttFit, XSF_AttScale, XSF_SightRiser, XSF_Class | gun model | see Adding a gun | How attachments sit on your gun. |
XSF_GripWrap, XSF_GripReach | gun model | boolean, number | Shooting hand grip. See Hands and grips. |
XSF_SelfTest | Workspace | string | Limits the F6 self test to a list like "RPG7, M320". Studio only. |
XSF_VaultSlowMo | Workspace | number | Slows vault animations down (0.25 is quarter speed) so you can check how they look. Studio testing only, remove it after. |
XSF sets these (read only)
| Attribute | On | What it means |
|---|---|---|
XSF_Downed | Humanoid | true while the character is downed. |
XSF_Stance | player character | The player's current stance ("Stand", "Crouch" or "Prone"), so your scripts can react to it. |
XSF_Owned | Player | Their unlocks as JSON. See Unlocks. |
XSF_Skin | gun model | The skin currently on that gun. |
XSF_Weapon, XSF_Mag, XSF_Reserve, XSF_Attachments | pickup model | What a dropped gun is and how much ammo it has. |
Don't set the read only ones yourself. Setting XSF_Downed by hand won't down anyone, it'll just confuse the HUD.
Swapping parts out #
The Providers section of GameConfig picks which version of a system runs.
| Provider | Options |
|---|---|
Inventory | "XSF": XSF's own hotbar and backpack. "RobloxTools": each weapon is a normal Tool in the Roblox backpack, for games that already use Tools (some shop kits, admin commands that give tools, and so on). |
Arms | "XSFRealistic": gloved arms whose fingers close around each gun. "ACSClassic": the original ACS block arms. |
HUD | "XSFMinimal": small readouts that only show when they matter. "None": no XSF HUD, so you can build your own with the client API. |
Advanced: any of these can also point at your own ModuleScript instead of a name. It has to offer the same functions as the built in one, so this is only worth it for big custom projects. Ask in the Discord before you start, and we'll tell you what it needs.
Building your own HUD
Set Providers.HUD = "None", then build a ScreenGui and fill it from the client API: WeaponChanged and GetWeapon() for ammo, Hurt and the Humanoid's Health for health, StanceChanged for stance, HitConfirmed for hitmarkers.
Recipes #
Copy and paste starting points for things people build on XSF all the time. Each one is complete and works on its own in a fresh place with XSF installed. Change the names and numbers to fit your game.
Server code goes in a Script in ServerScriptService. Client code goes in a LocalScript in StarterPlayerScripts unless it says otherwise. Where a recipe needs a RemoteEvent, the server script creates it, so you don't have to.
Main menu with a Play button
Players spawn with no guns, see a menu, and get their loadout when they press Play. First add GiveLoadout = false to GameConfig.
local ReplicatedStorage = game:GetService("ReplicatedStorage")
local XSF = require(game.ServerScriptService.XSF.Server)

local play = Instance.new("RemoteEvent")
play.Name = "PlayPressed"
play.Parent = ReplicatedStorage

local inMatch = {}

play.OnServerEvent:Connect(function(player)
	if inMatch[player] then return end -- ignore spam clicks
	inMatch[player] = true
	XSF.SetLoadout(player, { "M4A1", "G17", "KaBar", "M67" })
end)

-- give guns again after a respawn, as long as they already pressed Play
game.Players.PlayerAdded:Connect(function(player)
	player.CharacterAdded:Connect(function()
		if inMatch[player] then
			task.wait()
			XSF.SetLoadout(player, { "M4A1", "G17", "KaBar", "M67" })
		end
	end)
end)

game.Players.PlayerRemoving:Connect(function(player)
	inMatch[player] = nil
end)local ReplicatedStorage = game:GetService("ReplicatedStorage")
local XSF = require(ReplicatedStorage:WaitForChild("XSF").Client.API)
local gui = script.Parent
-- free the mouse and keys while the menu is open
XSF.SetInputEnabled(false)
gui.Play.Activated:Connect(function()
gui.Enabled = false
XSF.SetInputEnabled(true)
ReplicatedStorage:WaitForChild("PlayPressed"):FireServer()
end)Set the ScreenGui's ResetOnSpawn to false, or the menu will pop up again every time the player dies.
Class picker
The same idea with a choice. The server owns the list of classes, so a modified client can only pick a class that exists.
local ReplicatedStorage = game:GetService("ReplicatedStorage")
local XSF = require(game.ServerScriptService.XSF.Server)

local CLASSES = {
	Assault  = { guns = { "HK416", "G17", "M67" },  atts = { HK416 = { Sight = "EOTech", UnderBarrel = "Vertical Grip" } } },
	Sniper   = { guns = { "R700", "USP", "M18" },   atts = { R700 = { Sight = "PM II", UnderBarrel = "Bipod" } } },
	Breacher = { guns = { "M870", "Deagle", "C4" }, atts = {} },
	Support  = { guns = { "M249", "M1911", "M67" }, atts = {} },
}

local pick = Instance.new("RemoteEvent")
pick.Name = "PickClass"
pick.Parent = ReplicatedStorage

local chosen = {}

local function equip(player)
	local class = CLASSES[chosen[player]]
	if not class then return end
	XSF.SetLoadout(player, class.guns)
	for gun, atts in pairs(class.atts) do
		XSF.SetAttachments(player, gun, atts)
	end
end

pick.OnServerEvent:Connect(function(player, name)
	if type(name) ~= "string" or not CLASSES[name] then return end
	chosen[player] = name
	equip(player)
end)

game.Players.PlayerAdded:Connect(function(player)
	player.CharacterAdded:Connect(function()
		task.wait()
		equip(player)
	end)
end)

game.Players.PlayerRemoving:Connect(function(player)
	chosen[player] = nil
end)
From your menu's buttons, call ReplicatedStorage.PickClass:FireServer("Sniper"). With GiveLoadout = false, players have nothing until they pick.
Leveling that unlocks attachments
Kills give XP, levels unlock attachments. Keep Customization.Ownership on (the default) and set Customization.SaveOwnership = true so unlocks are remembered between visits. XP itself is saved here with a simple DataStore.
local DataStoreService = game:GetService("DataStoreService")
local Players = game:GetService("Players")
local XSF = require(game.ServerScriptService.XSF.Server)

local store = DataStoreService:GetDataStore("XP_v1")
local XP_PER_KILL = 100
local XP_PER_LEVEL = 500

-- what each level unlocks (on every gun)
local REWARDS = {
	[2] = { "Reflex" },
	[3] = { "Compensator", "Angled Grip" },
	[5] = { "Acog", "Suppressor" },
	[8] = { "Hollow Point", "Armor Piercing" },
	[10] = { "PM II", "Thermal" },
}

local function levelOf(xp)
	return math.floor(xp / XP_PER_LEVEL) + 1
end

local function grantUpTo(player, level)
	for lvl = 1, level do
		for _, name in ipairs(REWARDS[lvl] or {}) do
			XSF.GrantAttachment(player, name)
		end
	end
end

Players.PlayerAdded:Connect(function(player)
	local stats = Instance.new("Folder")
	stats.Name = "leaderstats"
	local level = Instance.new("IntValue")
	level.Name = "Level"
	level.Parent = stats
	local xp = Instance.new("IntValue")
	xp.Name = "XP"
	xp.Parent = stats
	stats.Parent = player

	local ok, saved = pcall(store.GetAsync, store, "u_" .. player.UserId)
	xp.Value = (ok and saved) or 0
	level.Value = levelOf(xp.Value)
	grantUpTo(player, level.Value) -- also re-grants anything missed
end)

XSF.Killed:Connect(function(victim, attacker)
	if not attacker or not attacker:FindFirstChild("leaderstats") then return end
	if Players:GetPlayerFromCharacter(victim.Parent) == attacker then return end
	local stats = attacker.leaderstats
	stats.XP.Value += XP_PER_KILL
	local newLevel = levelOf(stats.XP.Value)
	if newLevel > stats.Level.Value then
		stats.Level.Value = newLevel
		grantUpTo(attacker, newLevel)
	end
end)

Players.PlayerRemoving:Connect(function(player)
	local stats = player:FindFirstChild("leaderstats")
	if stats then
		pcall(store.SetAsync, store, "u_" .. player.UserId, stats.XP.Value)
	end
end)
For a per gun progression (unlock the ACOG on the AK by getting kills with the AK), pass the weapon name from Killed to GrantAttachment(attacker, "Acog", weapon).
A skin shop with coins
The client asks, the server checks the price and the balance, then grants. Prices live on the server so nobody can buy for free.
local ReplicatedStorage = game:GetService("ReplicatedStorage")
local Players = game:GetService("Players")
local XSF = require(game.ServerScriptService.XSF.Server)

local PRICE_BY_RARITY = { Common = 100, Uncommon = 250, Rare = 600, Epic = 1500, Legendary = 4000 }

local buy = Instance.new("RemoteFunction")
buy.Name = "BuySkin"
buy.Parent = ReplicatedStorage

Players.PlayerAdded:Connect(function(player)
	local stats = Instance.new("Folder")
	stats.Name = "leaderstats"
	local coins = Instance.new("IntValue")
	coins.Name = "Coins"
	coins.Value = 500
	coins.Parent = stats
	stats.Parent = player
end)

-- 25 coins per kill
XSF.Killed:Connect(function(victim, attacker)
	if attacker and attacker:FindFirstChild("leaderstats") then
		attacker.leaderstats.Coins.Value += 25
	end
end)

buy.OnServerInvoke = function(player, skinName)
	local skin = type(skinName) == "string" and XSF.Skins[skinName]
	if not skin then return false, "No such skin" end
	if XSF.OwnsSkin(player, skinName) then return false, "You already own it" end
	local price = PRICE_BY_RARITY[skin.Rarity] or 100
	local coins = player.leaderstats.Coins
	if coins.Value < price then return false, "Not enough coins" end
	coins.Value -= price
	XSF.GrantSkin(player, skinName)
	return true, "Bought " .. skinName
endlocal ReplicatedStorage = game:GetService("ReplicatedStorage")
local ok, message = ReplicatedStorage:WaitForChild("BuySkin"):InvokeServer("Carbon Fiber")
print(message)Save the coins the same way as the XP in the leveling recipe, and turn on Customization.SaveOwnership so bought skins stay bought.
Gamepass skins
local MarketplaceService = game:GetService("MarketplaceService")
local Players = game:GetService("Players")
local XSF = require(game.ServerScriptService.XSF.Server)

local GOLD_PACK = 000000000 -- your gamepass id
local GOLD_SKINS = { "Gold Plated", "Black Gold", "Rose Gold", "Brushed Gold" }

local function grantPack(player)
	for _, skin in ipairs(GOLD_SKINS) do
		XSF.GrantSkin(player, skin)
	end
end

Players.PlayerAdded:Connect(function(player)
	local ok, owns = pcall(MarketplaceService.UserOwnsGamePassAsync, MarketplaceService, player.UserId, GOLD_PACK)
	if ok and owns then grantPack(player) end
end)

-- bought it in game, no rejoin needed
MarketplaceService.PromptGamePassPurchaseFinished:Connect(function(player, passId, bought)
	if bought and passId == GOLD_PACK then grantPack(player) end
end)
Gamepass grants don't need saving, they're re-granted every time the player joins.
Battle royale loot
Put invisible, anchored, non colliding parts named Loot around your map (inside a folder called LootSpots). This fills them with random guns and ammo boxes. In GameConfig, add GiveLoadout = false and Pickups = { MaxWeapons = 3, Lifetime = 600 }.
local XSF = require(game.ServerScriptService.XSF.Server)

local LOOT = {
	{ name = "G17", weight = 30 }, { name = "MP5", weight = 20 }, { name = "UMP45", weight = 15 },
	{ name = "M870", weight = 12 }, { name = "AK47", weight = 10 }, { name = "HK416", weight = 8 },
	{ name = "SCAR", weight = 4 }, { name = "R700", weight = 3 }, { name = "AWM", weight = 1 },
}
local SIGHTS = { "Reflex", "EOTech", "Aimpoint", "Acog" }

local total = 0
for _, item in ipairs(LOOT) do total += item.weight end

local function roll()
	local r = math.random() * total
	for _, item in ipairs(LOOT) do
		r -= item.weight
		if r <= 0 then return item.name end
	end
	return LOOT[1].name
end

local function fill()
	for _, spot in ipairs(workspace.LootSpots:GetChildren()) do
		if math.random() < 0.25 then
			XSF.SpawnPickup("Ammo", spot.CFrame, { Mags = 2, Uses = 2 })
		else
			local atts = {}
			if math.random() < 0.3 then atts.Sight = SIGHTS[math.random(#SIGHTS)] end
			-- leave mag and reserve out: the gun comes with its normal spawn ammo
			XSF.SpawnPickup(roll(), spot.CFrame + Vector3.new(0, 1, 0), { atts = atts })
		end
	end
end

fill() -- call fill() again at the start of every round
Rounds with a timer
A team deathmatch loop: intermission, a timed round, a winner, repeat. Assumes two Teams called Red and Blue and turns downed off for quick fights (Downed = { Enabled = false }).
local Players = game:GetService("Players")
local Teams = game:GetService("Teams")
local XSF = require(game.ServerScriptService.XSF.Server)

local ROUND_TIME = 300
local INTERMISSION = 15
local score = { Red = 0, Blue = 0 }
local running = false

local status = Instance.new("StringValue")
status.Name = "RoundStatus"
status.Parent = game.ReplicatedStorage -- show this in your own UI

XSF.Killed:Connect(function(victim, attacker)
	if not running or not attacker or not attacker.Team then return end
	local victimPlayer = Players:GetPlayerFromCharacter(victim.Parent)
	if victimPlayer and victimPlayer.Team ~= attacker.Team then
		score[attacker.Team.Name] = (score[attacker.Team.Name] or 0) + 1
	end
end)

while true do
	for t = INTERMISSION, 1, -1 do
		status.Value = "Next round in " .. t
		task.wait(1)
	end

	score.Red, score.Blue = 0, 0
	running = true
	for _, p in ipairs(Players:GetPlayers()) do
		p:LoadCharacter() -- everyone respawns with a fresh loadout
	end

	for t = ROUND_TIME, 1, -1 do
		status.Value = ("Red %d  |  %d:%02d  |  %d Blue"):format(score.Red, t // 60, t % 60, score.Blue)
		task.wait(1)
	end
	running = false

	local winner = score.Red > score.Blue and "Red" or score.Blue > score.Red and "Blue" or "Nobody"
	status.Value = winner .. " wins!"
	task.wait(5)
end
Gun game
Every kill moves you to the next gun. First to finish the list wins.
local Players = game:GetService("Players")
local XSF = require(game.ServerScriptService.XSF.Server)

local LADDER = { "AK47", "HK416", "SCAR", "P90", "MP5", "M870", "AWM", "Deagle", "G17", "KaBar" }
local stage = {}

local function arm(player)
	XSF.SetLoadout(player, { LADDER[stage[player] or 1] })
end

Players.PlayerAdded:Connect(function(player)
	stage[player] = 1
	player.CharacterAdded:Connect(function()
		task.wait()
		arm(player)
	end)
end)

Players.PlayerRemoving:Connect(function(player)
	stage[player] = nil
end)

XSF.Killed:Connect(function(victim, attacker)
	if not attacker or not stage[attacker] then return end
	if Players:GetPlayerFromCharacter(victim.Parent) == attacker then return end
	stage[attacker] += 1
	if stage[attacker] > #LADDER then
		print(attacker.Name .. " wins gun game!")
		for p in pairs(stage) do stage[p] = 1 end
		for _, p in ipairs(Players:GetPlayers()) do p:LoadCharacter() end
	else
		arm(attacker)
	end
end)
Add GiveLoadout = false, Downed = { Enabled = false } and Pickups = { Enabled = false } to GameConfig so nobody skips the ladder by grabbing a dropped gun.
A kill feed on everyone's screen
local ReplicatedStorage = game:GetService("ReplicatedStorage")
local Players = game:GetService("Players")
local XSF = require(game.ServerScriptService.XSF.Server)

local feed = Instance.new("RemoteEvent")
feed.Name = "KillFeed"
feed.Parent = ReplicatedStorage

local lastZone = {}
XSF.Damaged:Connect(function(victim, attacker, amount, zone)
	lastZone[victim] = zone
end)

XSF.Killed:Connect(function(victim, attacker, weapon)
	local victimPlayer = Players:GetPlayerFromCharacter(victim.Parent)
	feed:FireAllClients(
		attacker and attacker.Name or "",
		victimPlayer and victimPlayer.Name or victim.Parent.Name,
		weapon or "",
		lastZone[victim] == "Head"
	)
	lastZone[victim] = nil
end)local ReplicatedStorage = game:GetService("ReplicatedStorage")
local feed = script.Parent.Feed
ReplicatedStorage:WaitForChild("KillFeed").OnClientEvent:Connect(function(killer, victim, weapon, headshot)
local line = Instance.new("TextLabel")
line.Size = UDim2.new(1, 0, 0, 22)
line.BackgroundTransparency = 1
line.TextColor3 = Color3.new(1, 1, 1)
line.TextXAlignment = Enum.TextXAlignment.Right
line.Font = Enum.Font.GothamBold
line.TextSize = 16
line.Text = (killer ~= "" and killer .. " [" .. weapon .. "] " or "") .. victim .. (headshot and " (headshot)" or "")
line.Parent = feed
task.delay(6, function() line:Destroy() end)
end)Armour pickups
local part = script.Parent
local used = false

part.Touched:Connect(function(hit)
	if used then return end
	local char = hit.Parent
	local player = game.Players:GetPlayerFromCharacter(char)
	if not player then return end
	used = true
	char:SetAttribute("XSF_Armor", 0.4)
	char:SetAttribute("XSF_Helmet", 0.5)
	part.Transparency = 1
	task.wait(30) -- respawns after 30 seconds
	part.Transparency = 0
	used = false
end)
Armour lasts until the character dies, because the attributes are on the character. For armour that breaks, lower XSF_Armor a bit in XSF.Damaged every time the player is hit.
Kill streak rewards
local Players = game:GetService("Players")
local XSF = require(game.ServerScriptService.XSF.Server)

local streak = {}

XSF.Killed:Connect(function(victim, attacker)
	local victimPlayer = Players:GetPlayerFromCharacter(victim.Parent)
	if victimPlayer then
		streak[victimPlayer] = 0
	end
	if not attacker or attacker == victimPlayer then return end
	streak[attacker] = (streak[attacker] or 0) + 1
	if streak[attacker] == 3 then
		XSF.AddAmmo(attacker, nil, 60)
	elseif streak[attacker] == 5 then
		XSF.Give(attacker, "M320")
	elseif streak[attacker] == 10 then
		-- airstrike on the attacker's last victim
		local pos = victim.Parent:GetPivot().Position
		for i = 1, 5 do
			task.delay(i * 0.4, function()
				XSF.Explode(pos + Vector3.new(math.random(-20, 20), 0, math.random(-20, 20)),
					{ Radius = 18, Damage = 180 }, attacker, "Airstrike")
			end)
		end
	end
end)
Headshots only
A hardcore mode where only headshots hurt. This goes in GameConfig, not a script:
Damage = {
	FriendlyFire = false,
	Hitmarkers = false,
	Modify = function(humanoid, amount, info)
		-- explosions and script damage still hurt, so grenades and lava work as normal
		local explosive = { M67 = true, C4 = true, Claymore = true, RPG7 = true, M320 = true }
		if info.weapon and not explosive[info.weapon] and info.zone ~= "Head" then
			return 0 -- body and limb hits from guns and knives do nothing
		end
		return amount
	end,
},
Spawn protection
XSF already respects Roblox's ForceField. Set Duration on your SpawnLocations (3 to 5 seconds is common) and players can't be hurt by XSF until it wears off. That's the whole recipe.
Building maps for XSF #
XSF is realistic enough that the map decides how fights play. Bullets go through some walls and not others, players can vault and climb, and leaning lets them peek corners. A few numbers to build around:
Scale
- One stud is 28 cm (
Ballistics.StudsPerMeter). A standard Roblox character is about 5 studs tall, so a 7 to 8 stud doorway and 10 to 12 stud ceilings feel right. - Default walk speed is 12 studs per second and sprint is 21. A 300 stud long street takes about 15 seconds to sprint, which is longer than most players expect. Size your map for the speeds you picked.
Cover that works the way players expect
Players will learn what stops bullets. Make it consistent:
- Hard cover (Concrete, Brick, Rock, Metal) at 1 stud or thicker stops everything up to a rifle. Use it for walls players are meant to hide behind.
- Soft cover (Wood, Plastic, Fabric) stops vision, not bullets. Rifles go through 2 studs of wood. Use it for fences, crates and interior walls, so shooting through them is a real tactic.
- Glass barely slows a bullet.
- A part that looks like concrete but uses SmoothPlastic is shoot through. Match materials to looks, or set
XSF_PenetrationCostwhere they don't match. - Thicker than 6 studs always stops bullets, whatever the material.
The full table is in Bullets and walls.
Heights
| Height | What happens | Good for |
|---|---|---|
| Up to 3.6 studs | Vaulted over | Low walls, sandbags, car bonnets, windows you jump through |
| 3.6 to 7 studs | Climbed onto | Ledges, shipping containers, low roofs |
| Over 7 studs | Can't be climbed | Anything players must not get over, like map edges |
| Under 2.6 studs of headroom | Can't stand up from a crouch | Crawl spaces, vents (need prone, under 3.2 from prone) |
These follow Vault.VaultHeight, Vault.MaxHeight and the stance headroom checks. Change the Vault values and these change with them.
Corners and leaning
Leaning moves the head 1.1 studs sideways (Stances.LeanOffset). A doorway with walls thinner than that lets players peek without exposing their body, which is good. Pillars thinner than about 2 studs let players lean around both sides.
Sight lines
Match your longest sight lines to the guns you give out. Rifle damage starts falling at 150 studs by default and reaches its lowest at 600. Snipers keep full damage out to 500 to 1000 studs. A map with 800 stud sight lines and only SMGs is just frustrating. The range of every gun is in Every weapon's stats.
Lighting
If you plan to give out Night Vision or Thermal, make some areas really dark. Night vision is only worth picking when the map has places you can't see without it. Thermal shines in smoke and shadow.
Props
- Anchor anything that doesn't need to move. Loose parts get pushed by every bullet and blast, which costs performance in a big fight.
- A few loose barrels or crates near where fights happen look great when they get blown around.
- Keep invisible walls tall (over 7 studs) so players can't climb them.
Placing XSF things
- Workbenches (with
Customization.Access = "Workbench") belong at spawns and safe spots, not in the middle of fights. - Ammo boxes (
XSF.SpawnPickup("Ammo", ...)) on routes between fights, so players are tempted to move. - Loot spots for a battle royale: more and better loot in riskier places.
Balancing guns #
XSF's guns ship balanced against each other for a realistic game with 100 health. If you change health, add armour or only use a few guns, you'll want to adjust. Here's how to think about it.
Time to kill
The number that matters most is how long it takes to kill someone. Work it out like this:
- Shots to kill = 100 health divided by damage per shot, rounded up.
- Time to kill = (shots to kill minus 1) times 60 divided by RPM.
An HK416 does 60 to the body: 2 shots. At 800 RPM that's one gap of 0.075 seconds. An MP5 does 34: 3 shots, two gaps at 800 RPM, 0.15 seconds. A G17 does 28: 4 shots, three gaps at 480 RPM, 0.375 seconds. That ignores misses, travel time and falloff, but it's the right starting point.
With downed on, add Downed.DownedHealth (40) to finish someone, so the HK416 needs one more shot to actually kill.
Roles, not just numbers
Two guns with the same time to kill still feel different because of everything else. Give each gun a reason to pick it:
| To make a gun... | Change |
|---|---|
| better up close | Lower Handling.AimTime and Mass, raise RPM, shorten falloff (FalloffStart 40 to 60) |
| better far away | Raise MuzzleVelocity and falloff distances, lower Dispersion, add zero steps |
| easier to use | Lower Recoil.Climb and HeatPerShot |
| harder but stronger | Raise damage and climb together |
| better against armour | Raise Fire.Penetration, or hand out Armor Piercing ammo |
| a commitment | Small magazine, slow reload (Handling.ReloadSpeed below 1), small reserve |
Headshots
Most rifles do about 2.5 times body damage to the head, so any headshot is a kill at 100 health. If you raise health to 150 or add helmets, headshots stop being one shot for most guns. Decide if you want that.
Armour changes everything
XSF_Armor = 0.4 makes every body shot do 60%. An HK416 goes from 2 shots to 3, an MP5 from 3 to 5. Armour piercing ammo cuts that armour to 0.16. If you add armour, test the weak guns first. Pistols and SMGs suffer the most.
Shotguns
Shotgun damage is per pellet, 8 pellets per shot. The 870's 28 per pellet is 224 if every pellet hits, which is a kill even through armour up close. To make shotguns weaker at range without touching close range, shorten FalloffEnd or widen PelletSpread.
Use the dashboard for balance passes
The dashboard's per gun stats (damage, RPM, magazine, reserve, bullet speed, aim time, recoil) cover most balance changes, and they reach every new server without republishing. Make a copy of your preset first, change the copy, and switch a test game to it before switching your live game.
Test it, don't guess
- Shoot the dummies in the test map at 25, 50, 100 and 150 studs and count hits to kill.
- Play a round with someone else using the gun you're worried about.
- Watch which guns people actually pick. A loadout where everyone runs the same gun is the clearest sign something's off.
Testing your game #
Weapon self test (F6)
In a Studio playtest, press F6. XSF equips every weapon in your game one by one, fires it, aims, reloads and inspects, then prints a pass or fail line for each in Output, and a summary at the end like XSF self test: 59 weapons, 59 passed, 0 with problems. It takes under a minute and catches broken weapon folders, missing models, missing Anims modules and bad Config values. Your character can't die during the run, and it respawns you when it's done.
To test only some weapons, set the Workspace attribute XSF_SelfTest to a list like "RPG7, M320" before you press Play. It only runs in Studio, never in a live game.
Run it every time you add or change a weapon. It's the fastest way to find the gun you broke.
Test map
The download comes with an optional XSF_TestMap (see Install). Put it in Workspace and you get:
- A house to clear, for close quarters, leaning and grenades.
- A range with dummies and steel plates at 25, 50, 75, 100 and 150 studs, for checking damage, drop and zeroing.
- A vault course with walls from knee to head height.
- Penetration walls in different materials, so you can see what each gun gets through.
- A yard for explosives.
You spawn in front of the house. Delete it before you publish, or move it somewhere players can't reach.
Testing with several players
One player can't test team rules, revives, friendly fire, hit registration or pickups. In Studio, open the Test tab, set the number of players (2 or 3 is enough) and press Start. You get a server window and a window per player. Put the players on different teams to test damage, the same team to test revives.
Testing lag
Studio can add fake lag: File > Studio Settings > Network > Incoming Replication Lag. Try 150 to 250 ms: hits should still land where you aim, because of lag compensation.
Studio only tools
| Key | What it does |
|---|---|
| F3 | Performance readout. |
| F4 | Live recoil and handling tuner for the gun in your hands. See Recoil and sway. |
| F6 | Weapon self test. |
None of these work in a live game, so you can leave them alone.
Performance #
XSF is built to run on phones as well as PCs, but a busy firefight with 20 players is a lot of bullets, sounds and particles. These are the levers.
For players
- Low effects (settings, EFFECTS tab) cuts particles, drops brass and muzzle smoke and keeps fewer bullet holes. Set the default for new players with
Performance.LowEffects. Turn it on by default for phone first games. - Lens and grain off saves a little on the Bodycam style.
- Stress effects lower means less blur when hurt or suppressed.
For you
- Fewer weapons in the place file means less to download when players join. Delete weapons you'll never use (folder and model).
- Tracers.
Fire.TracerEveryof 3 is fine. Every round being a tracer (1) on twenty machine guns is not. - Pickups. Lower
Pickups.Lifetimein big servers so the floor doesn't fill with guns. - Unanchored parts. Bullets and blasts push loose parts. Hundreds of loose parts in a firefight is expensive for physics, so anchor what doesn't need to move.
- Use F3 in Studio, or
Debug.Overlay = truefor a live test, to see what a busy moment costs.
What XSF already does
- Shots are rate limited on the server, so a modified client can't flood it.
- The same warning is only printed once per session, so a problem in a loop won't flood Output.
Updates #
New versions go to testers first. If you used XSF while it was in beta (your account existed before 2.0), you get each new version a few days before everyone else, so you can try it and report bugs. Your account page tells you if you're one of them, and testers get the Beta Tester role in the Discord.
When a server starts, XSF checks whether a newer version is out. If there is one, it prints a line in Output, and in Studio a small note appears on screen with the version you have and the newest one. Players in a live game never see it. Download the new version from your account, and read the patch notes for what changed.
Updating from 2.0 to 2.1
2.1 doesn't change anything you set up, so this is quick.
- Note your changes. Copy anything you changed in
GameConfigand in weapon Configs, or keep the old place open in another window. - Delete the old XSF:
ReplicatedStorage.XSF,ServerScriptService.XSFandStarterPlayer.StarterPlayerScripts.XSF_Boot. Move your own weapons and gun models somewhere safe first if they're insideXSF.WeaponsorXSF.Assets.GunModels. - Install 2.1 the same way as the first time (see Install).
- Put your changes back into the new GameConfig, line by line. The new file has more written in (see New in 2.1), so don't paste the old file over it. Your old GameConfig would still work, it just wouldn't list the new options.
- Check two new defaults. The number key of the gun in your hands now puts it away (
Holster.Reselect), and Left Alt frees the cursor (Keybinds.FreeCursor). SetHolster.Reselect = falseorFreeCursor = {}if your game uses those keys for something else.Yis the Holster key. - Run the self test (F6) and play a round.
Updating to 2.0
- Save your changes first. Copy anything you changed out of your old
GameConfigand weapon Configs, or keep the old place open in another window. If you made your own weapons, note their folder and model names. - Delete the old XSF:
ReplicatedStorage.XSF,ServerScriptService.XSFandStarterPlayer.StarterPlayerScripts.XSF_Boot. - Install 2.0 the same way as the first time (see Install).
- Put your changes back. Only copy the lines you changed, into the new files. Don't paste your whole old GameConfig over the new one: 2.0 has new options (Skin slot, Ownership, Starter) that the old file doesn't have.
- Your own weapons: copy their folders back into
XSF.Weaponsand their models intoXSF.Assets.GunModels. Turn onXSF_AttFiton their models to get the new attachment fitting. - Decide on unlocks. 2.0 ships with
Customization.Ownershipon, so players only get attachments you give them. If your 1.3 game let everyone use every attachment, setOwnership = { Attachments = false, Skins = true }to keep that. - Run the self test (F6) and play a round.
Fixes inside a version
Small fixes sometimes go into the current download without a new version number. If something in the patch notes says it was fixed in your version and you still see it, download again from your account.
Old versions
2.0.0, 1.3.0 and earlier can no longer be downloaded. Games already running an old version keep working, but they won't get fixes and don't read newer dashboard settings. Docs for old versions are still up: pick the version in the box at the top of the sidebar.
Error messages #
When XSF hits a problem in Studio, it prints an orange line in Output starting with [XSF]. For problems it knows, the line says exactly what's wrong and how to fix it. Every message also links the XSF Discord in case you're still stuck. None of this is shown to players in a live game.
| Message starts with | What it means | Fix |
|---|---|---|
The gun model "X" is not in XSF.Assets.GunModels | A weapon's Model points at a model that is not there. | Put the model in XSF.Assets.GunModels, or fix Model in that gun's Config to the exact name. |
There is no weapon called "X" in XSF.Weapons | A name in Loadout, SetLoadout or Give does not match a weapon folder. | Match the folder name exactly, capitals included. |
There is a typo in GameConfig on line N | GameConfig cannot be read, so XSF cannot start. | Look at that line and the one above for a missing comma, bracket or quote. Every line inside a table ends with a comma. |
There is a typo in the Config for X on line N | Same, in one weapon's Config. | Fix that line. Only that gun is affected. |
HTTP requests are off | The license check and settings saving cannot reach the XSF site. | Game Settings, Security, turn on Allow HTTP Requests. |
Studio can't reach DataStores | HTTP is off, so settings tried to save to DataStores, which Studio blocks by default. | Turn on HTTP requests, or Enable Studio Access to API Services. |
Part of XSF's networking is missing | The server half of XSF is not running. | Make sure the XSF folder with Main in it is in ServerScriptService. |
"X" is not a Roblox key name | A key in Keybinds is misspelled. That action has no key until it is fixed. | Use the names under Keys and key names. |
Providers.Arms in GameConfig names arms that don't exist | The arms setting is misspelled. | Use "XSFRealistic" or "ACSClassic". |
A gun model has no part called Handle | A model in GunModels is missing its Handle. | Add a part named Handle where the right hand holds the gun. |
A weapon folder is missing its Anims module | A weapon was added without animations. | Copy Anims from a similar gun, or use the ACS importer. |
XSF is waiting for X, which is missing | Something was moved or renamed. | Put XSF back where the download puts it, with the original names. |
Something went wrong in X | An error XSF does not recognise. | Post the Output in the XSF Discord or open a ticket there. |
GameConfig asks for the website preset "X", but your account has no preset with that name | Preset in GameConfig names a preset you do not have. | Make a preset with that exact name on the dashboard, or fix Preset. Until then the game uses Default. |
could not apply the website settings | A value from the dashboard could not be used. | The game runs on its Studio settings. Post the full line in the XSF Discord. |
More messages
| Message | What it means | Fix |
|---|---|---|
[XSF] there is no attachment called "X" / there is no skin called "X" | A script granted or revoked something that doesn't exist. | Check the spelling and capitals against the attachment list or XSF.Skins. |
[XSF] rejected Name: reason | Only with Debug.LogRejects on. The server threw away a shot. | Nothing to fix for a few. Lots from one player can mean exploits. See Rejected. |
[XSF] This copy is XSF 2.0.0. The latest is ... | A newer version is out. | Download it from your account when you're ready. See Updates. |
[XSF] self test: the server side is missing | F6 was pressed but the server half isn't running. | Make sure ServerScriptService.XSF is in place. |
[XSF] finger grip failed / hand animations failed | The hands couldn't be fitted to a gun model. | Usually an unusual custom model. The gun still works. Try XSF_GripWrap, or post the model in the Discord. |
License messages
| Message | What it means | Fix |
|---|---|---|
| Checking the XSF license... | Normal, shows for a moment when a server starts. | Nothing. |
| This copy of XSF has no license key yet. Paste the license key from your XSF account. | The file doesn't have your key in it. Downloads from your account always do, so this usually means the copy came from somewhere else. | Download XSF again from your account, or paste the key from your account page into the box. The place remembers it after that. |
| This license is not valid. | The key doesn't match an account. It can also mean the game was revoked on the dashboard. | Check the Games tab on the dashboard and press Restore if you revoked it, or download a fresh copy. |
| Could not reach the XSF license server. | The XSF site didn't answer, or HTTP is off. | Turn on Allow HTTP Requests. If it's on, it's a hiccup on our side, try again in a minute. |
| HTTP requests are off. | Allow HTTP Requests is off in Game Settings. | Game Settings > Security > Allow HTTP Requests, then save and press Play. |
The same message is only printed once per session, so a problem in a loop won't flood Output.
Troubleshooting #
The problems people actually run into, most common first. Not listed here? Ask in the XSF Discord or open a ticket on the support page.
Output says Infinite yield possible on ReplicatedStorage:WaitForChild("XSF")
The XSF folder isn't directly inside ReplicatedStorage, so XSF_Boot waits for it forever and no gun ever shows up. It usually ended up one level too deep (ReplicatedStorage.ReplicatedStorage.XSF) or is still inside XSF_Release in Workspace. Drag the XSF folder itself into ReplicatedStorage, and check the other two pieces the same way (see step 5 of Install).
Nothing happens when I press Play
Check the three pieces are in the right places (see Install) and read Output for lines starting with [XSF]. If there's nothing from XSF at all, XSF_Boot probably isn't in StarterPlayerScripts.
It says HTTP requests are off
Game Settings > Security > turn on Allow HTTP Requests, save, then press Play again. In a published game, the setting has to be on for that game (it's saved with the game, not with Studio).
I spawn without guns
- The names in
Loadoutmust match the folder names inXSF.Weaponsexactly, capitals included. Output names the one it couldn't find. - Did you add
GiveLoadout = false? Then XSF waits for your script to give guns. - Is the loadout set on the dashboard to an empty list? Check the Weapons tab of the preset this game uses.
My SetLoadout gets replaced by the normal loadout
Your script ran before XSF handed out the default loadout. Add task.wait() before SetLoadout in CharacterAdded, or add GiveLoadout = false to GameConfig.
Another gun system is fighting XSF
Remove the other system's scripts. Two frameworks can't both control the camera and the mouse. Search the Explorer for leftovers (ACS_Engine, ACS_Framework, FE Gun Kit scripts in StarterPlayerScripts and StarterCharacterScripts).
The gun drifts away from the centre of the screen
That's FreeAim, the Bodycam style gun movement. Aiming down sights centres it. Turn it off or tune it in Gun movement.
My walk speed changes don't work
XSF sets WalkSpeed every frame. Change Movement.WalkSpeed and the other speeds in GameConfig (or on the dashboard) instead of the Humanoid.
Players can't open the loadout screen
- Check
Customization.Enabled. - With
Access = "Workbench", they have to be at a workbench. - They need to be holding a gun or a knife. The screen says "Take out the gun or knife you want to work on first." otherwise. Grenades don't count.
Every attachment shows as LOCKED
That's the unlock system, on by default in 2.0. Give players attachments with XSF.GrantAttachment, list free ones in Customization.Starter, or turn it off with Customization.Ownership = { Attachments = false, Skins = false }. See Unlocks.
A gun keeps jamming
Malfunctions.Enabled is on. Lower Malfunctions.Chance or turn it off. Long full auto bursts and suppressors raise the odds.
My dashboard changes don't show up in my game
- The game must run XSF 1.3 or newer. The Games tab warns about older games.
- Servers read the dashboard when they start. In Studio, stop and press Play again. In a live game, new servers get it.
- Check which preset the game uses on the Games tab, and that you edited that preset (the Editing preset picker).
- If the setting has a STUDIO tag, the game changed it in Studio and keeps its own value. Set it back to the shipped value in Studio to let the website decide.
Teammates can hurt each other (or enemies can't)
Damage.FriendlyFireis the switch.- XSF uses Roblox Teams. Players with no team, or on a team with
Neutralbehaviour, can always be hurt. Make sure your team script actually setsplayer.Team.
Players can't hurt each other at all right after spawning
That's the spawn ForceField. XSF respects it. Lower Duration on your SpawnLocations if it's too long.
Bullets go through a wall they shouldn't
The wall is thin, or its material is cheap to shoot through (glass, wood, plastic). Make it thicker, change its material, or set XSF_PenetrationCost = 100 on it. See Bullets and walls.
The hand covers part of my gun
Use Handling.LeftHandShift for the support hand and the grip attributes for the shooting hand. See Hands and grips.
A skinned gun shows a second copy of itself
That was a bug in the very first 2.0.0 download. Download XSF again from your account and replace Client (or reinstall).
Settings don't save while testing
Make sure Allow HTTP Requests is on. Without it settings fall back to DataStores, which also need Enable Studio Access to API Services in Studio. Also check SettingsSave in GameConfig isn't "Off".
Unlocks are gone after rejoining
Unlocks aren't saved unless you save them. Set Customization.SaveOwnership = true, or save XSF.GetOwned yourself. Studio also needs Enable Studio Access to API Services for DataStores to work.
Questions people ask #
Is XSF free?
Yes. Use it in as many of your own Roblox games as you like, free of charge, including games that make money. Your license is tied to your account, and every game that runs it shows up on your dashboard.
Can I use it in a game I sell or monetize?
Yes, gamepasses, developer products and paid access are all fine. What you can't do is share, sell, reupload or give away XSF itself (including on the Creator Store or the Toolbox), or share your license key. See the terms.
Can I edit the code?
GameConfig, the weapon Configs and the two API modules are readable and editable. The rest is protected. Everything people usually want to change is reachable through those, the attributes and the Damage.Modify hook. If you need something that isn't, ask in the Discord, it might become an option.
Can I use ACS and XSF together?
No. Two gun systems both try to control the camera. Remove the other kit when you install XSF. You can bring ACS guns over with the importer.
Does it work with R6?
Yes, R6 and R15 both work. On R15, other players see more detail (crouch lowers the hips, for example).
Does it work on mobile and console?
Yes, with full touch and controller controls. See Mobile and console.
Can I add my own guns?
Yes. A model with a Handle, an AimPart and a Muzzle, plus a copied weapon folder. See Adding a gun.
Can I make a third person game with it?
No, XSF is built around first person. Other players see your full body and gun in third person, but your own camera is always first person.
Can I have vehicles, or a gun on a vehicle?
XSF doesn't have vehicles. You can use your own vehicle system next to it: turn XSF's input off with SetInputEnabled(false) while driving, and back on when the player gets out. Damage to and from your vehicles can go through XSF.Damage and XSF.Explode.
How do I make a zombie game?
Zombies are NPCs with a Humanoid, and XSF damages them automatically. Write the zombie movement yourself (Humanoid:MoveTo toward the closest player), and use XSF.Damage when a zombie reaches someone. XSF.Killed tells you who killed which zombie, for points.
Will an update break my game?
Updates are never pushed into your game automatically. Your game keeps the version you installed until you install a new one yourself, and the patch notes say what changed before you do.
Where's the source of the gunshot sounds?
Roblox's free audio library and sounds made for XSF, all usable in any game.
Support #
It's the fastest way to get help. Ask setup questions, report bugs and hear about updates first.
- Support tickets: open one from the support page while signed in, or DM the XSF bot on Discord. Same team, same tickets, and you can see your past ones and reopen them.
- Email: XSF@beirutsites.com.
Bug reports help a lot. Include what you did, what happened, what you expected, your XSF version, and the Output log if you can. When XSF hits a problem in Studio it prints what went wrong in Output, and how to fix it when the cause is a known one, so that log usually answers the question on its own.